Want to learn how to insert multiple rows in a single cell in Excel?
In this Blog, we will cover two different ways to quickly insert multiple lines in a single cell and the advantage of each.
Add multiple rows using Alt + Enter
Let’s look at an example. The spreadsheet below has columns with multiple headings, but we want to create one heading for each column.

In this example, we will move the $ Value heading in cell F4 into cell F3 but on a line underneath the word Ordered.

To do this, go to the Formula bar and type the text $ Value after the word Ordered.

Press Enter.
Due to the width of the column, we can’t see the entire heading.

Return to the Formula bar and place your insertion point where you want the information to drop to a new row. In this example, we will do this by putting our insertion bar before the dollar sign ($) because we want $ Value on a new line.

Press Alt + Enter.
Extra tip: If you’re using a Mac, use Control + Option + Return instead.

Press Enter.

You should now have your headings on two lines in the same cell.
Another way to enter multiple lines using Alt + Enter
For this example, we want to put $ Value under the word Invoiced in cell G3.

Click into your Formula bar.
Make sure your insertion bar is at the end of the word Invoiced.

Press Alt + Enter.

Type $ Value.

Press your Enter key.

You should now have the words Invoiced and $ Value on two lines in one cell.
How to view all your rows in the formula bar
In the Formula bar it now looks like we only have the word Invoiced.

Extend your Formula bar down using the arrow on the far-right of the bar.

You should now see that you have Invoiced and $ Value on two rows in the Formula bar.

Extra tip: You can continue pressing Alt + Enter to enter more information on different rows in the same cell.

Insert more than one line into one cell using Word Wrap
Using Alt + Enter is one option but let’s look at another option in Excel.
In the example below we will move the heading Number from cell A4 into a new line below PO in cell A3.

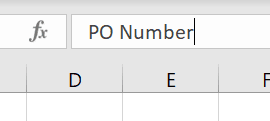
To do this, click into the Formula bar and then type Number after the text PO.

Press Enter.
Again, we have the problem of the column not being wide enough.

You can make the column wider by putting your mouse at the end of Column A until you have your Column Resize Mouse Pointer and then double click.

But a lot of the time, there are small numbers in the column, and it doesn’t suit to have a big wide column with empty space.

But when we make the column smaller, we lose our heading again.
To get around this, click the Wrap Text button, located on the Home tab.

Your text should now be displayed in the cell. However, sometimes you still need to make a small adjustment to the column width so that the text wraps correctly.

In this case, you will still need to make your column a little bit wider.

Now that we have the headings from row 4 moved into row 3, we can now delete row 4.
Select row 4.

Do a right click over the row number in the grey bar, and then select Delete.

The row will be deleted, leaving you with your headings now nicely displayed in row 3.
Adjust your Alignment
Headings containing multiple lines will cause the row to increase in height.
Adjust the alignment by using the Alignment buttons on the Home tab.

For this example, we will use a middle alignment. This will center your headings vertically, giving the heading row a nicely balanced look.

Wrap Text and Merge and Centre
Another great option to use in conjunction with Wrap Text is Merge & Center.
For example, if you wanted to enter a note out to the side of the table of data, you may find using these features together super helpful.
For example, if we were to enter ‘Kay is to call with new P/O number’ into cell L6 and press Enter, as soon as we use Wrap Text on the cell it makes row 6’s height quite deep which can look a bit odd

Instead, try the following.
Highlight several cells around the note.

From the Home tab, select Merge & Centre.

Now select Wrap Text.

Your information should now be centered inside the merged cells and your row height will remain unchanged.

Was this Blog helpful? Let us know in the Comments below.
If you enjoyed this post check out the related posts below.

