Creating custom tables in Microsoft Word is an excellent way to present your data in a clear and visually appealing way. Sometimes, you may create a table in Word that you really like and want to reuse but find yourself repeatedly applying all the formatting to achieve the desired appearance each time you create a table. This is where saving the Word table formatting comes in handy.
If you wish to learn about how to create a custom Table in Word before trying out these methods, check out our post Word table Formatting first. You can then return to this post to save the custom table you create.
In this blog, we will explore two distinct techniques for saving table formatting in Word: Saving a Quick Table and Preserving a Table Design. Both options have their own advantages and disadvantages. We will guide you through both methods and explain the key differences between the two, allowing you to decide which method is better for you. Regardless of your chosen method, both will save you time while working in Word and help you create professional and polished documents.
In this post, we will cover:
1. Option #1: Saving and applying Quick Tables In Word
2. Option #2 Creating and Applying Word Table Styles
3. The difference between Quick Tables and Table Styles
Option #1: Saving and applying Quick Tables in Word
To save a Table in Microsoft Word, follow these steps:
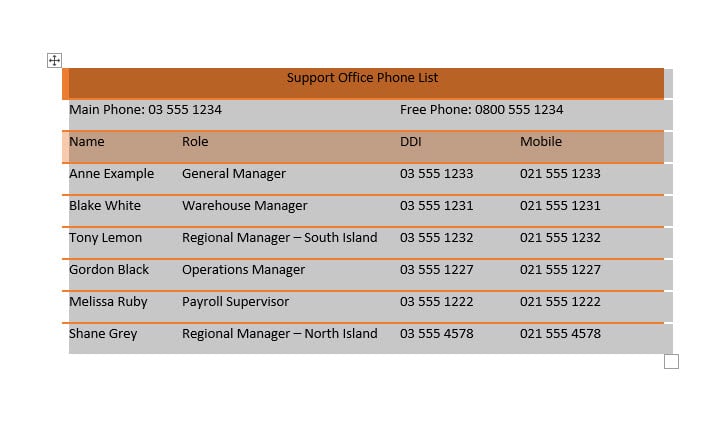
1. Select the Table you want to save. Hint: a quick way to select an entire table is to click into the table and then click the cross icon at the top left of the table.
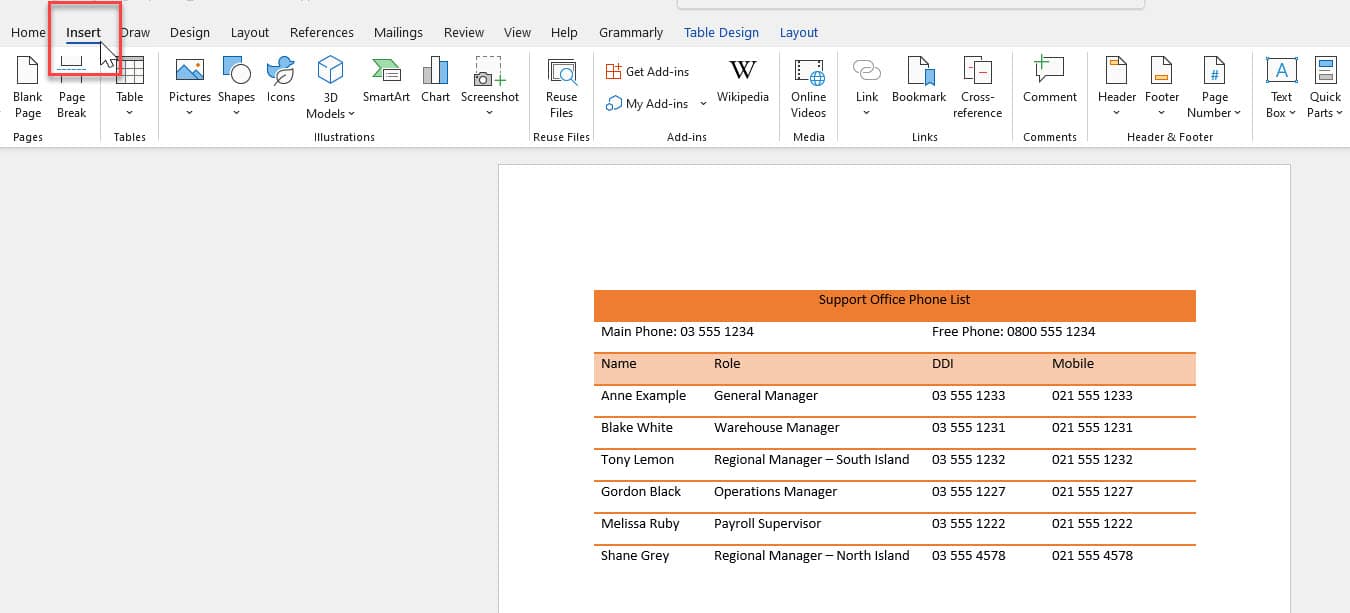
2. Navigate to the Insert tab in the Word ribbon.
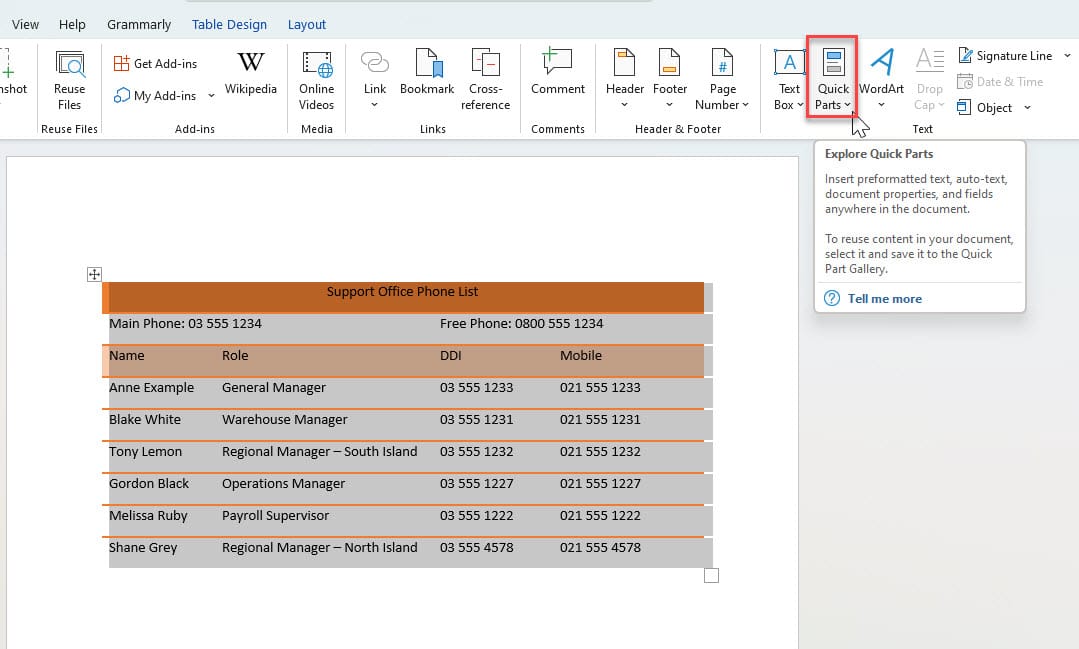
3. Click on Quick Parts.
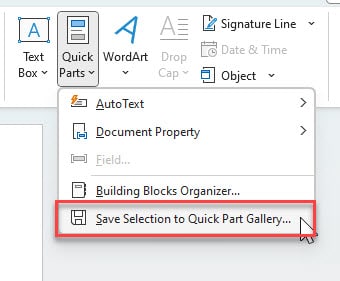
4. In the drop-down menu, locate and select Save Selection to Quick Part Gallery. You can also use the keyboard shortcut ALT + F3 after selecting your table.
5. A Create New Building Block dialog box will appear.
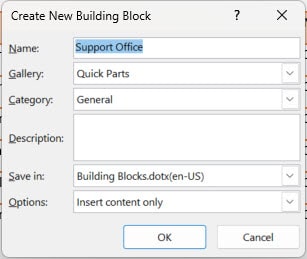
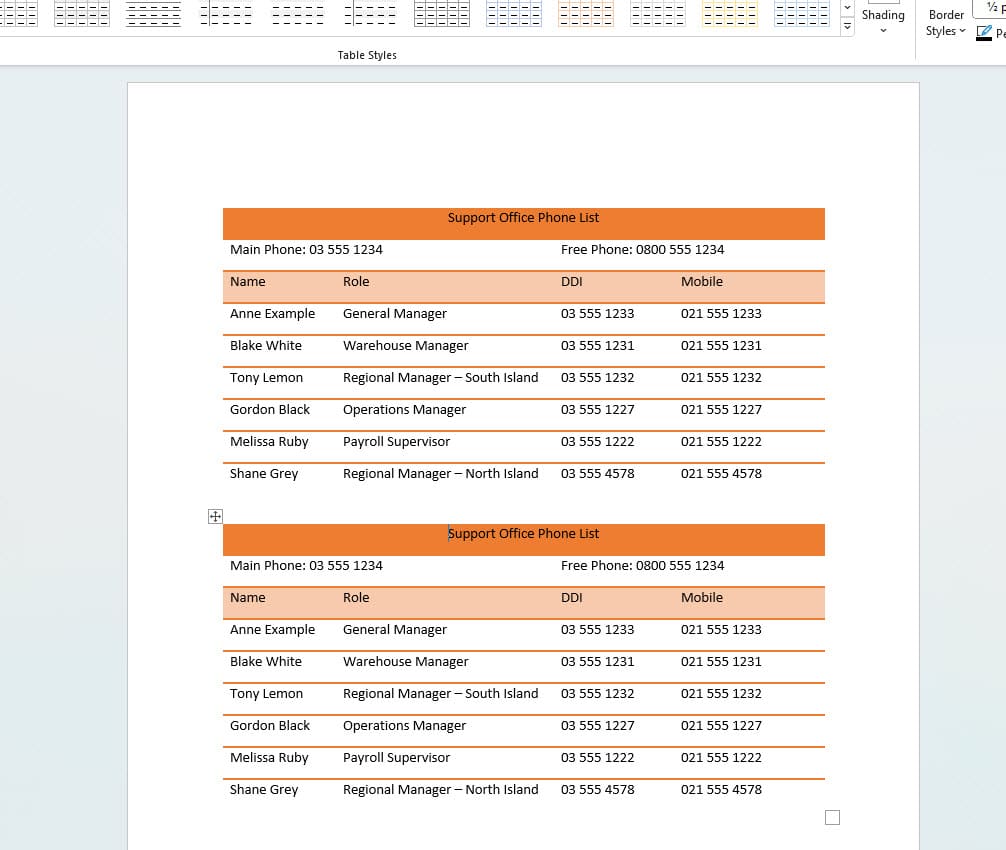
6. Provide a distinctive name for your table. In this example, we named it Support Office Phone List.
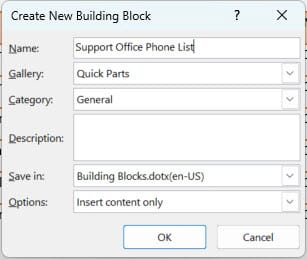
Note: The tables are listed alphabetically, so it's worth considering this when saving your table. If you name your table starting with the letter "A," it will appear at the top of the list for easier access.
7. Choose a gallery for it. Since we're saving a table, select Tables from the list of object types.
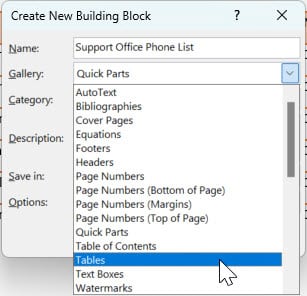
8. Select a category to help organise your table within the building blocks organiser. If necessary, create a new category, like your company's name. In our example, we left it as General.
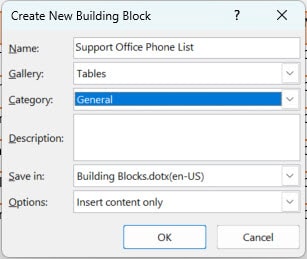
9. You can add a description for your table if desired.
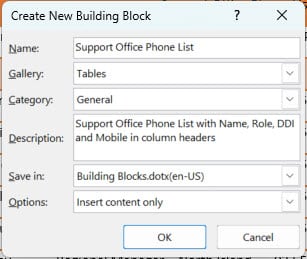
10. Under the Save In option, decide whether you want this saved table to be available in all documents or just those based on a specific template. Choose Normal for a specific template and Building Blocks for all documents. In our example, we chose Building Blocks.
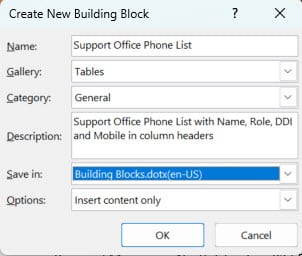
Note: The template you intend to use must be open before saving the table for it to appear in the Save In list.
11. The Options field lets you choose how the table will be inserted into the document. You can select either Insert content only, which inserts the table where the cursor is or Insert content in its own paragraph or page. In our example, we chose Insert content only.
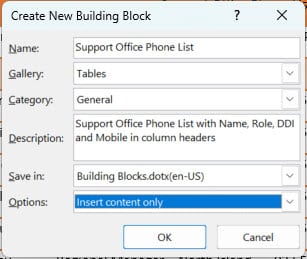
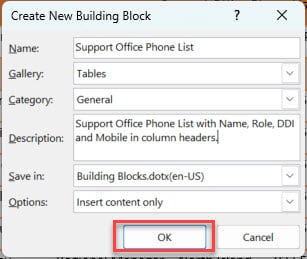
12. Click OK to save the table.
To insert saved table
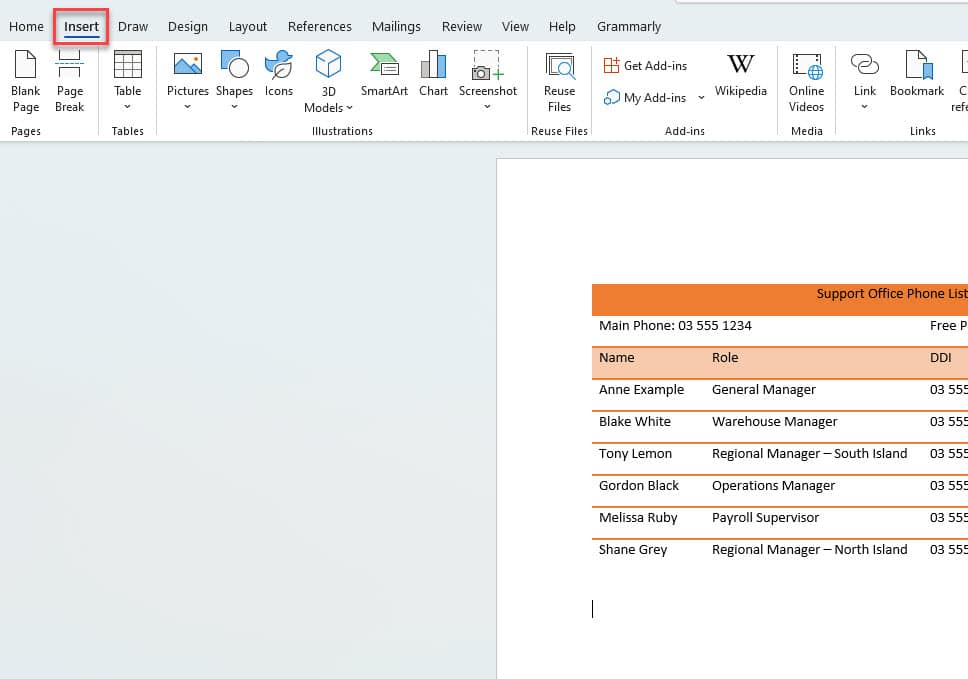
1. Navigate to the Insert tab.
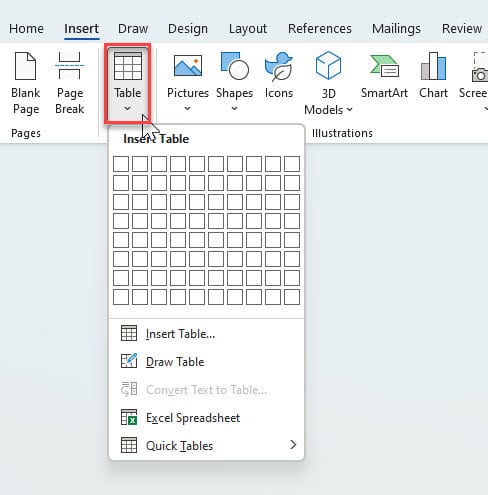
2. Select Table.
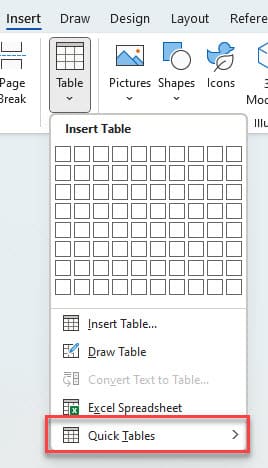
3. Click on Quick Tables.
4. The list of tables will be displayed in alphabetical order.
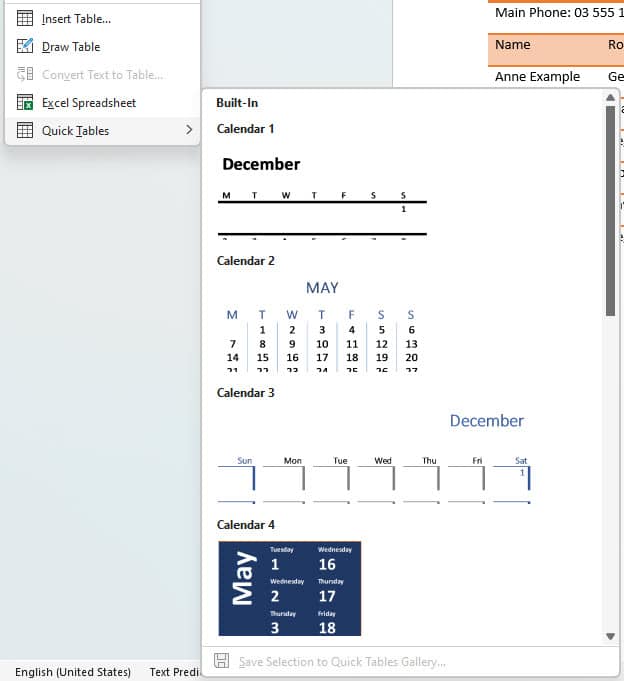
5. Choose your saved table from the list to insert it.
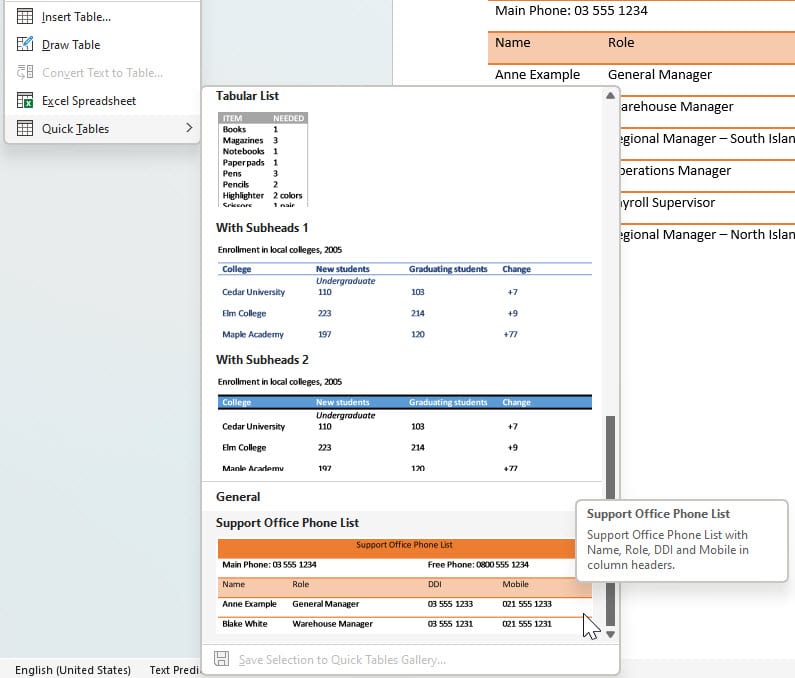
6. The Table will now be inserted.
Option #2: Creating and Applying Word Table Styles
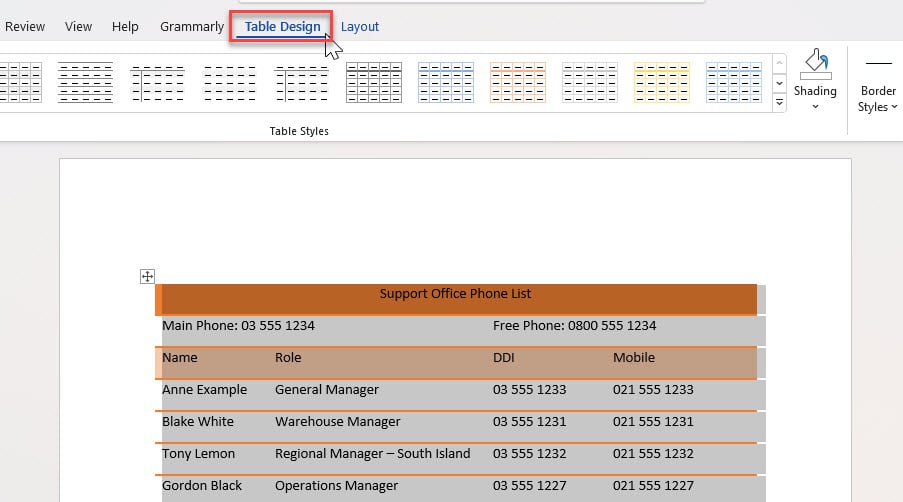
1. First select an existing table so that you can see the Table Design tab. Click the Table Design tab.
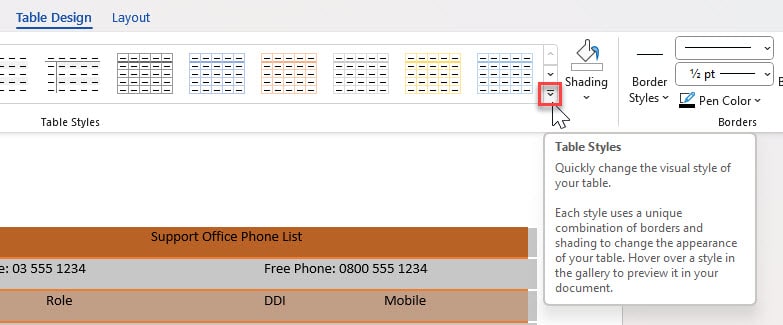
2. Under the Table Styles tab, select More.
3. Select New Table Style.
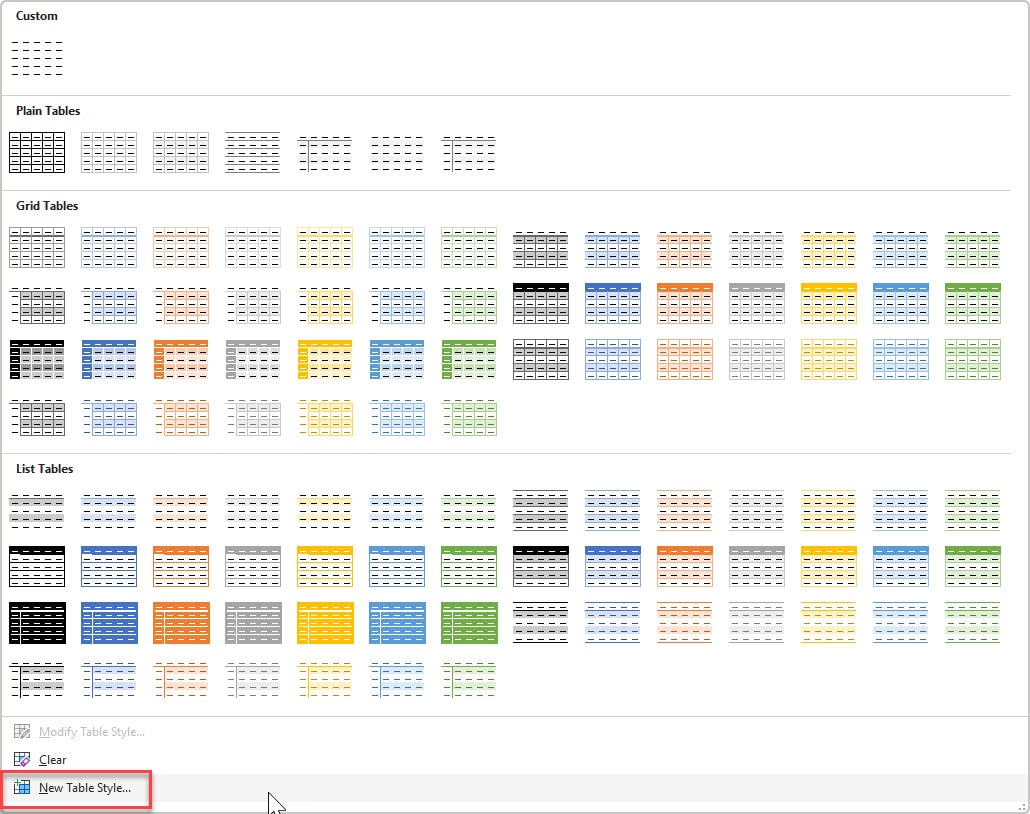
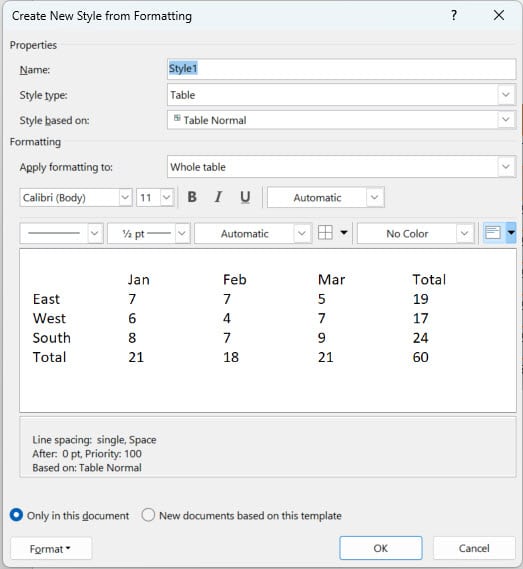
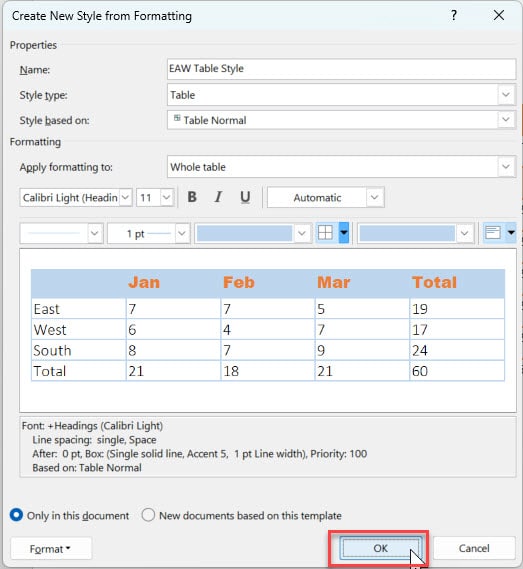
4. A Create New Style from Formatting dialog box will appear.
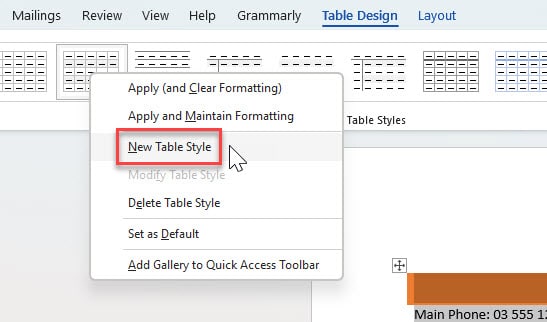
Note: You can right-click on a table style in the Table Styles tab and select New Table Style.
5. Name your Table.
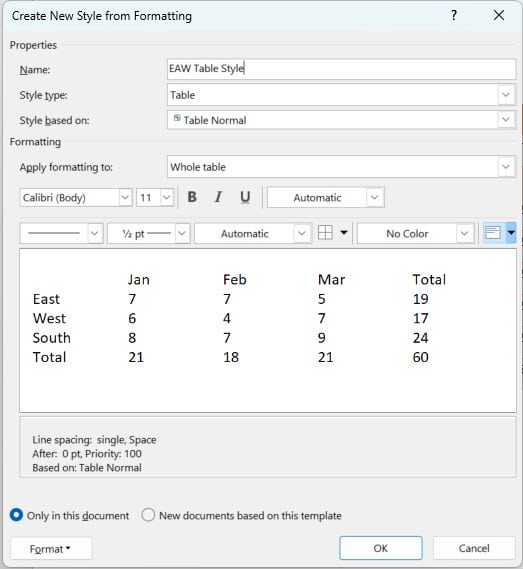
6. Leave style type as Table.
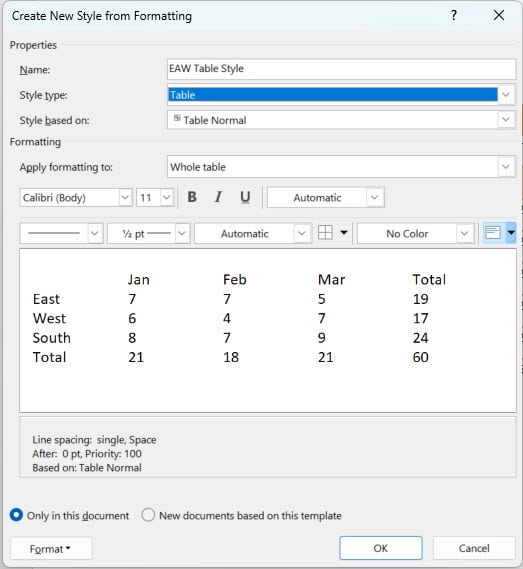
7. You can leave Style based on a normal table or you can change it if you want to base it on another table style. In our example, we left it as Table Normal.
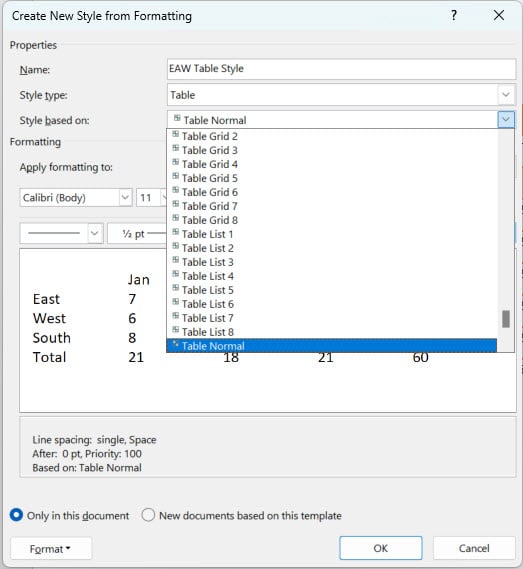
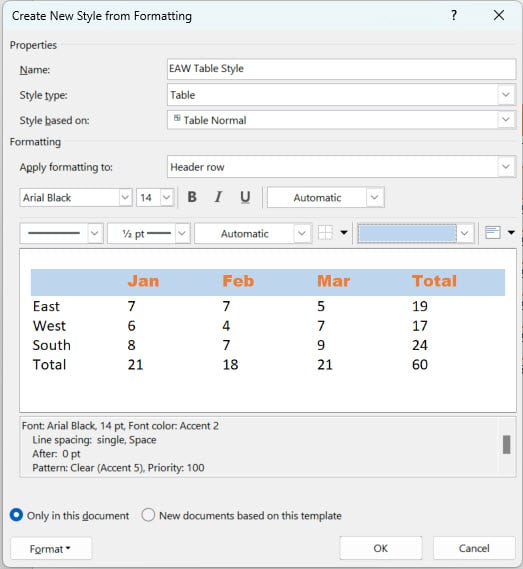
8. In the Apply formatting option, choose where you want to apply the formatting. In our example, we started off with the Header row.
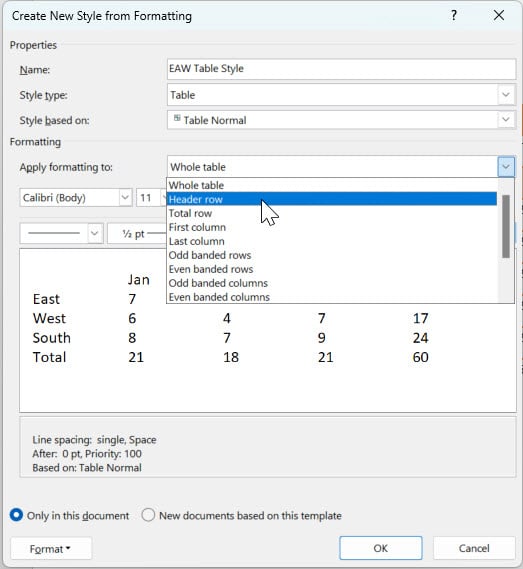
9. You can format the text in the text box option. You can also specify font size, style (bold, italic, underlined), and font colour. In our example, we changed the font to be Arial Black, the font size to be 14 and the colour to be Orange.
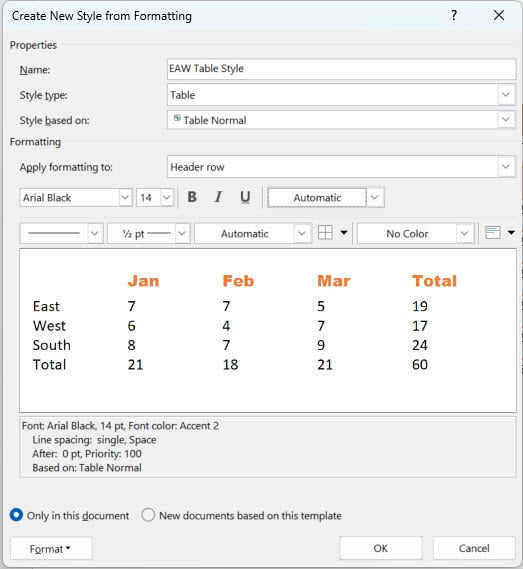
10. The next row of options allows you to format the cells. You can choose the border type, width, colour and location. You can also set cell fill colors and text alignment within the cells. In our example, we started off with the header row selected in the Apply formatting to box and changed the row colour to light blue.
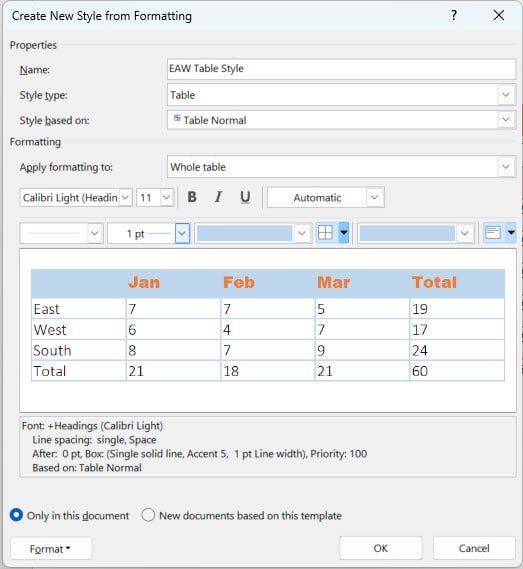
We then changed the option in the Apply formatting to box to Whole Table and added borders around the whole Table and made the colour blue to match the header row.
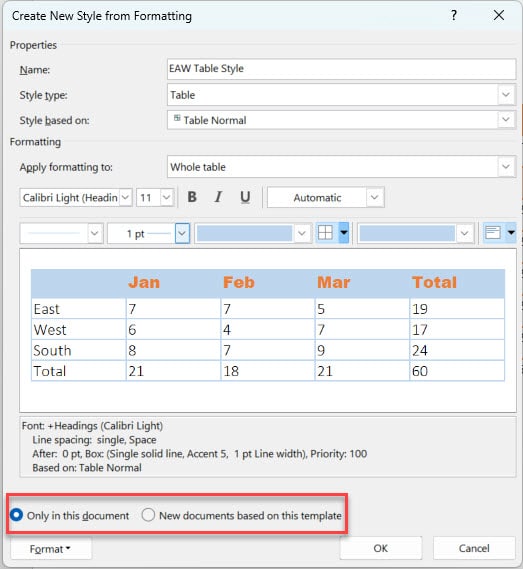
11. Select one of the two options at the bottom of the dialog box. Selecting Only in this document will mean the table style will only be available in the current document. The option New document based on this template will mean the table style will be available for all new documents based on the template style. We selected Only in this document.
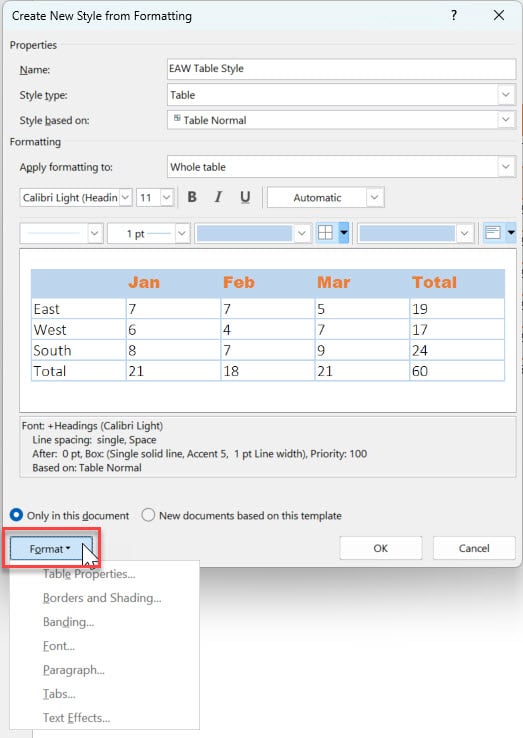
12. Further format your table style by clicking the Format button, where you can adjust borders and shading, apply banding, customise fonts, and more.
13. Select OK to create Table Style.
To apply the new style
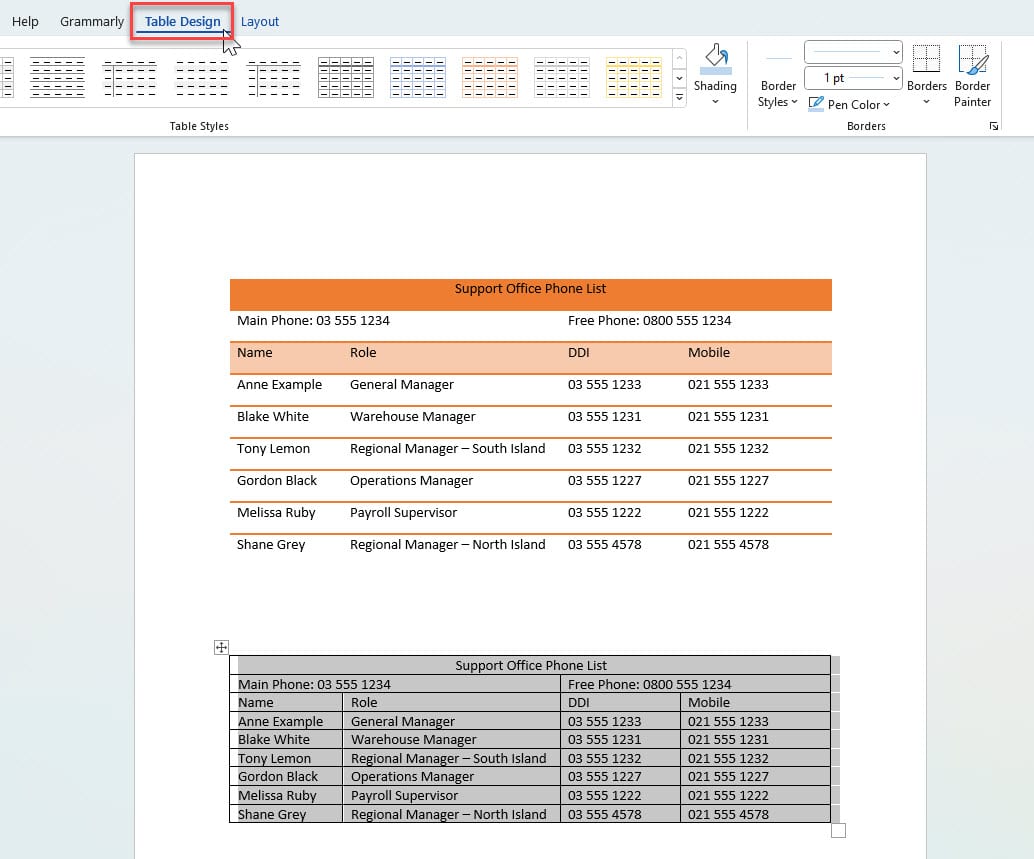
1. Select the Table you wish to format. For this example, we added a plain Table to our document.
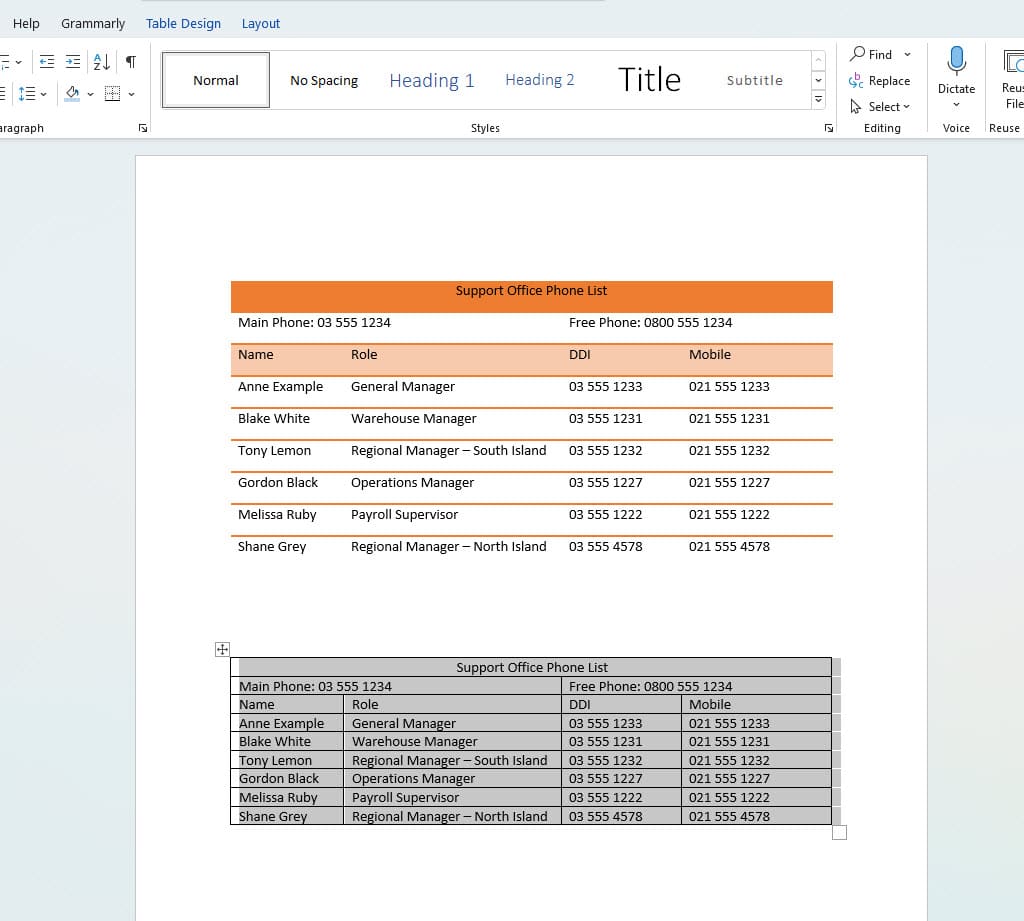
2. Navigate to the Table Design tab.
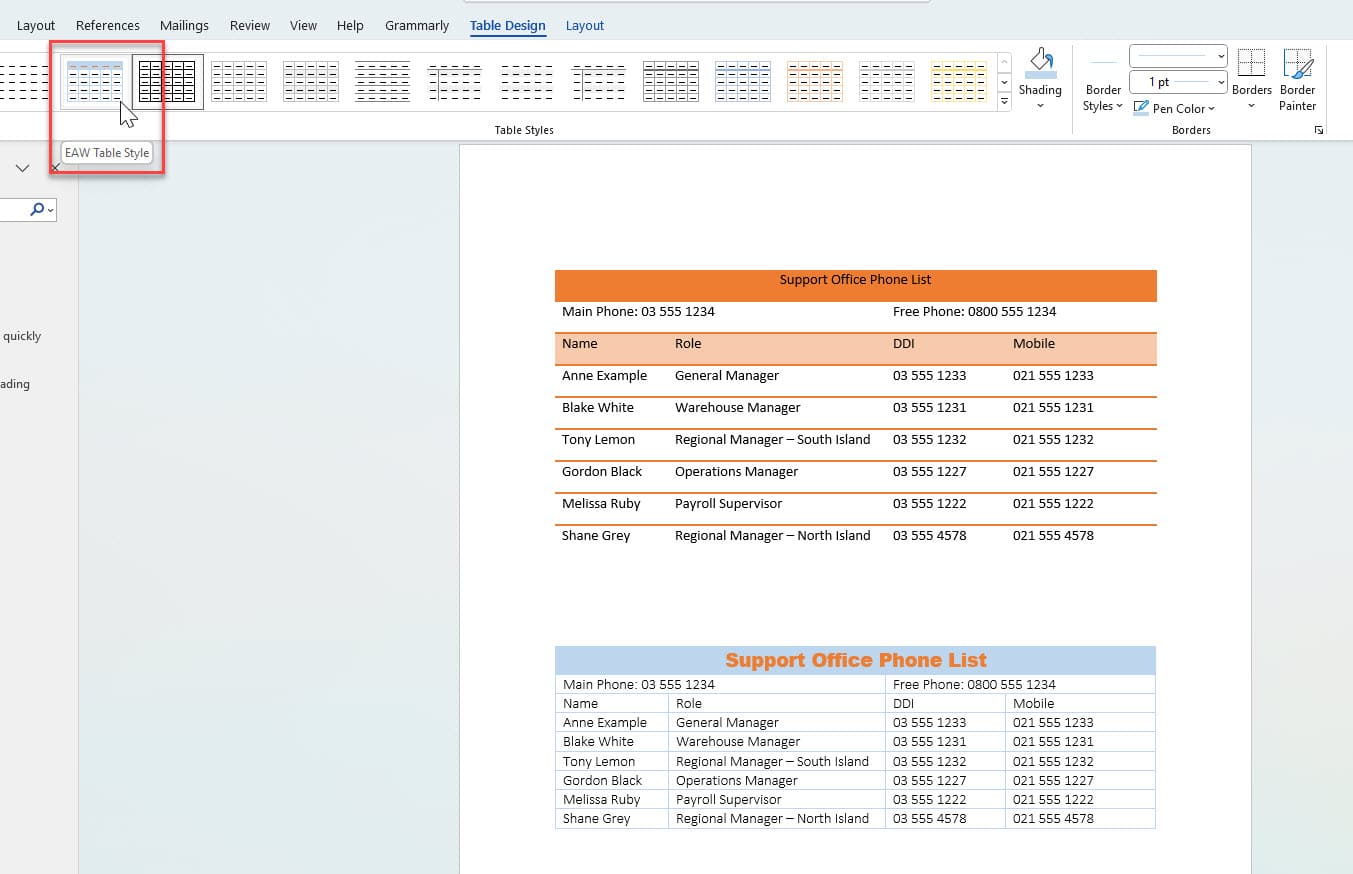
3. Choose your custom style from the Table Styles area.
The difference between Quick Tables and Table Styles
Quick Tables and Table Styles have distinct characteristics and purposes in document formatting. Here are the key differences between them:
Quick Tables:
- Content and Formatting: Quick Tables allow you to save both the table's content, including text, and its formatting.
- Specific Formatting: The formatting saved in a Quick Table is only available for that particular table. It doesn't affect other tables.
- Customized Rows and Columns: When using Quick Tables, you must carefully apply formatting to new rows and columns individually. Quick Tables do not automatically repeat formatting.
- Complex Looks: Quick Tables are suitable for preserving complex and unique table designs.
Table Styles:
- Formatting Only: Table Styles save formatting settings but not the content within the table. They are used to define a consistent look for tables.
- Apply to Any Table: You can apply Table Styles to any new or existing table in your document, ensuring a uniform appearance.
- Formatting Areas: Table Styles allow you to format different areas of the table, like headers, data cells, and borders, as specified in the "Apply Formatting to" list.
- Consistency: Any new rows or columns added to a table with a Table Style will automatically adhere to the formatting pattern established in the style, maintaining consistency across tables.
Conclusion
To sum up, utilising custom tables in Microsoft Word is an efficient way to display data with a polished and visually appealing look. However, the process of reformatting these tables can be quite time-consuming. Luckily, we have explored two practical methods for retaining table formatting in Word: Saving a Quick Table and a Table Design. Hopefully these approaches help you save time while working in Word.
Was this post helpful? Let us know in the Comments below.

