Tables in Word are super effective when it comes to organising and presenting data. Table formatting in Word is more than just aesthetics, it's also about clear communication. In this blog post, we will explore how to format your Tables in Word equipping you with the skills to craft impressive Tables.
In this post, we will cover:
- The importance of effective Word Table Formatting
- Formatting Tables in Word to have white space around the outside of the text (adjusting margins)
- Accessing the Table Design tab in Word
- Applying Shading and Border Styles using Table Styles in Word
- Word Table Style Options
- Remove the Table Style or Clear All Formats
- Applying shading and border options to Word Tables
The importance of effective Word Table Formatting
Word Tables are a great way to present complex data in a clear and visually appealing way which enables your audience to better understand the information you are presenting. Whether you are creating a financial report, a research paper, or a marketing presentation, Tables are an important tool to help you present your message accurately and effectively.
When we see a financial report with rows of numbers and percentages, it can be difficult to understand. It might be accurate, but it can also be overwhelming and confusing. However, if we present the same information in a well-organized Table with clear headings, alternating row colours, and appropriate borders, the data becomes much easier to comprehend.
Formatting Tables in Word to have white space around the outside of the text (adjusting margins)
Adding white space around the outside of your text in your Word Table cells can enhance readability and make it look more professional.
To do this:
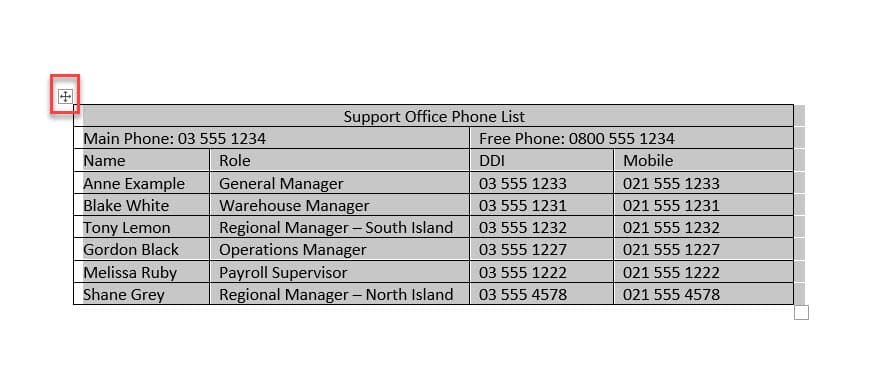
1. Select Table. You can do this by clicking the crossed arrow on the top left of the Table, which will highlight the entire Table.
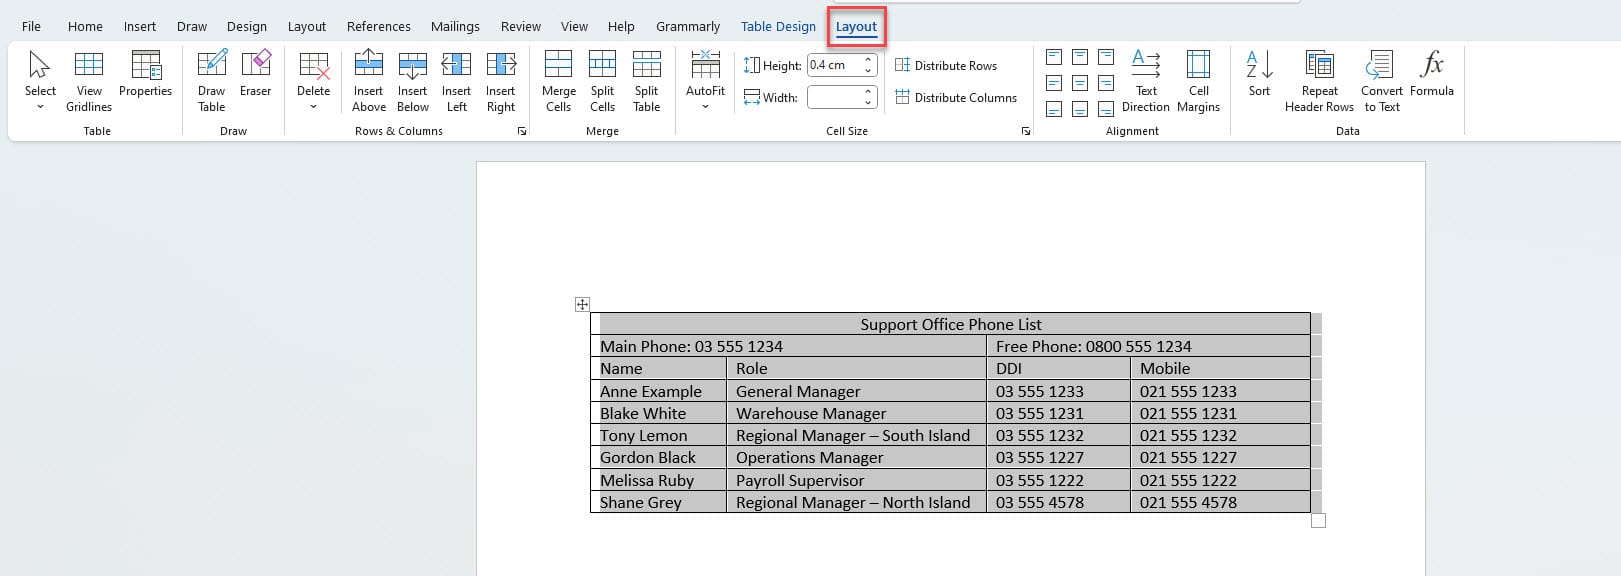
2. Navigate to the Layout tab.
Note: This tab is only accessible if you have selected your Table first.
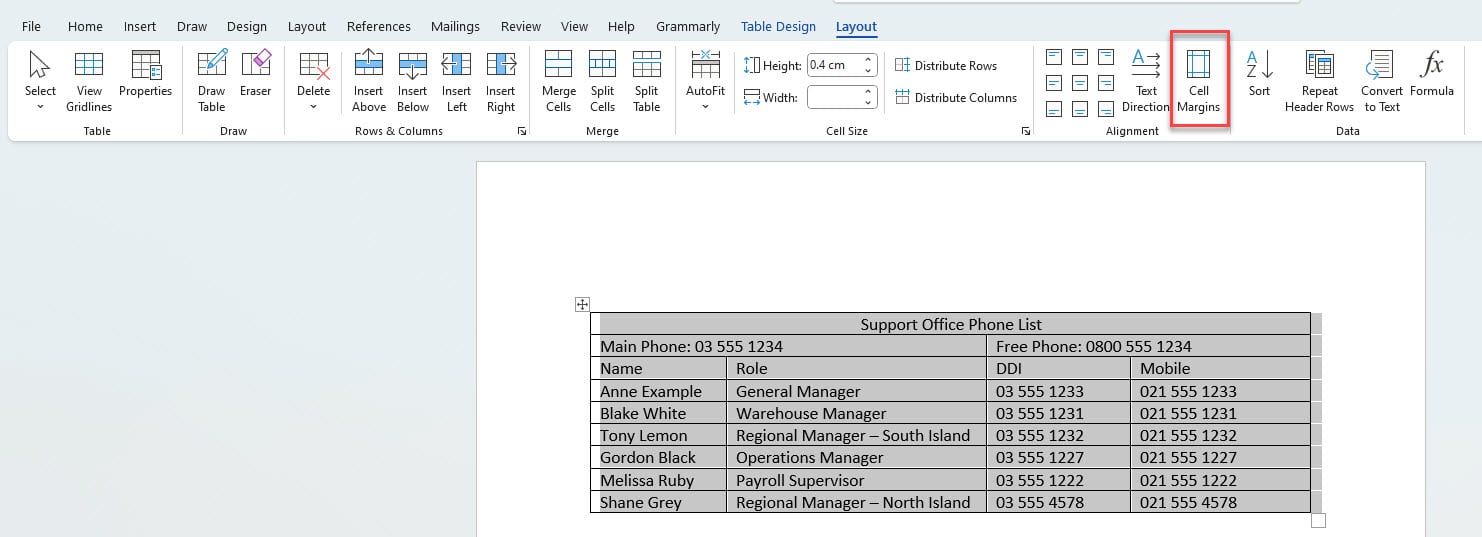
3. From the Alignment group, select Cell Margins.
As soon as you select Cell Margins a Table Options dialog box will appear. This dialog box is where you can make precise adjustments to your table's margins.
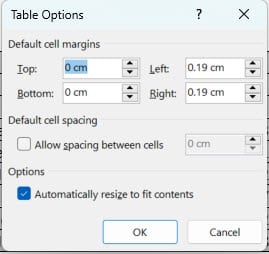
4. In the Table Options dialog box, you'll see options to set the margins for the top, bottom, left, and right sides of your table cells. To add white space around the outside of the text, ensure that these margin values are consistent and set to a desirable width. In our example, we set this to 0.2cm.
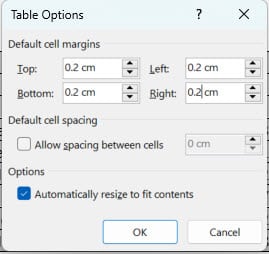
Quick tip: Moving between these margin input boxes is as simple as pressing the "Tab" key on your keyboard.
5. Click OK to apply the changes.
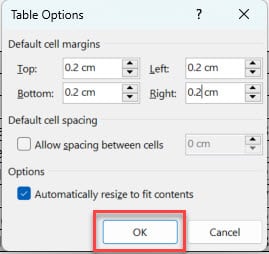
Now, there will be a generous amount of white space around your Table text.
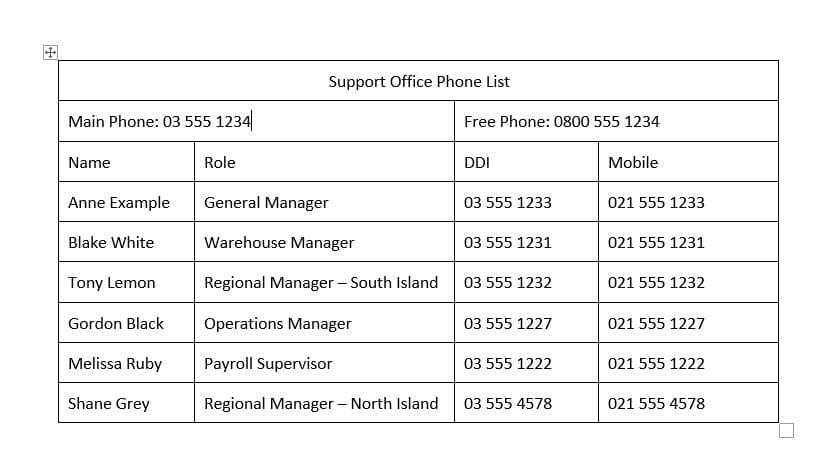
Accessing the Table Design tab in Word
Applying shading and border styles to your Word Table allows you to emphasize certain elements, provide structure and enhance the look of your Tables.
Start by opening the Table Design tab.
To do this:
1. Place the insertion point (cursor) anywhere within the Table.
2. Once the insertion point is inside the table, you'll notice a new tab called "Table Design" in the Word toolbar. Click on this tab to access a variety of formatting options. This is where you can create a look for your Table using shading and border options.

Applying Shading and Border Styles using Table Styles in Word
Within the Table Design tab, you will find a selection of pre-defined table styles to choose from. These styles have been designed to make your Table formatting process quick and easy.
1. Hover your mouse over each of the styles to preview how it would look if you added it to your table. You can then select which option you like to apply.

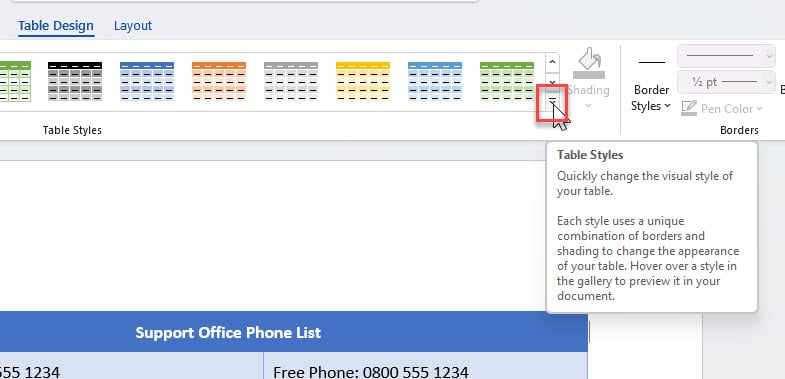
2. To view the whole Gallery, select the Table Styles button.
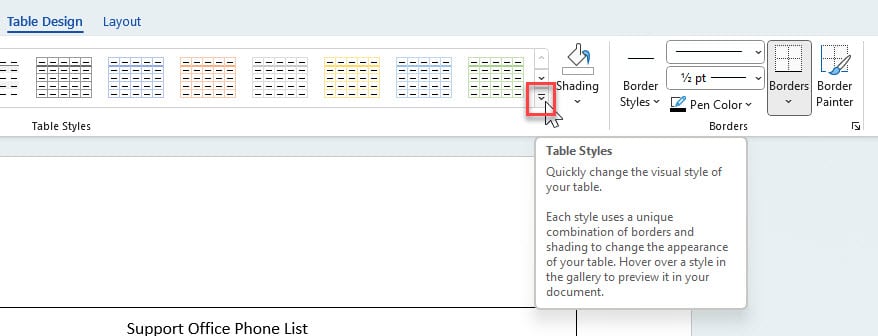
3. Scroll to look at options and select the one you would like to apply.
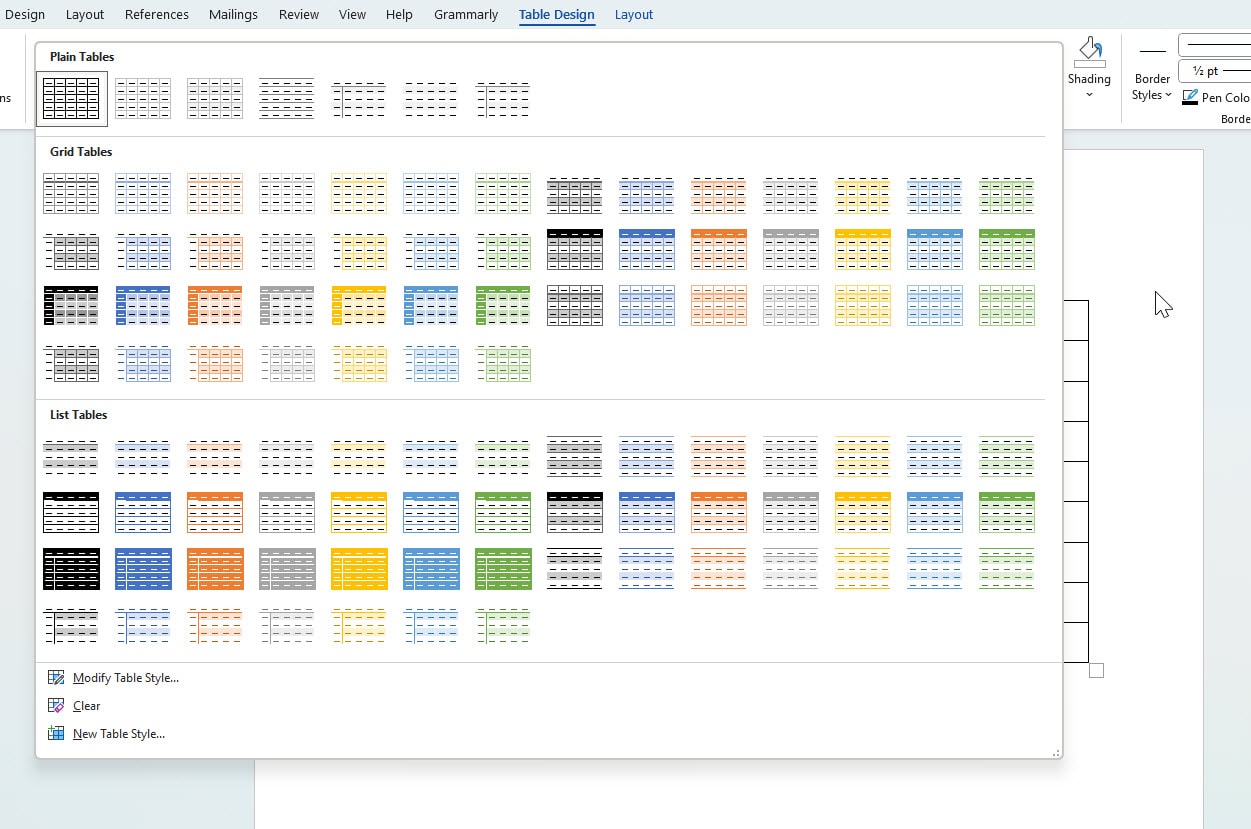
Note: It can be challenging to preview the styles while in the Gallery as the Gallery is over your Table. Instead, you can use the spinners button.
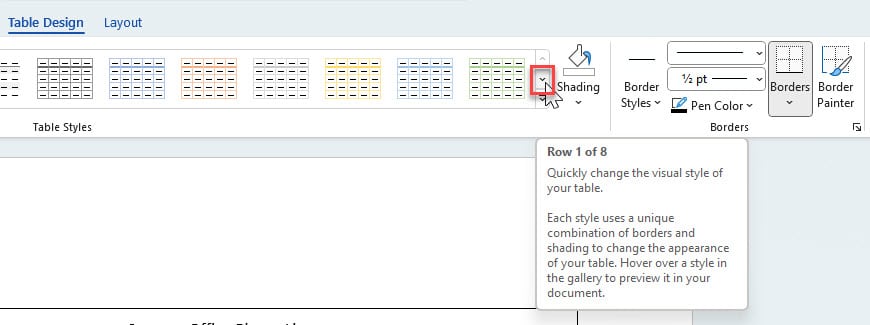
You can then navigate to the option you like and select it to apply.
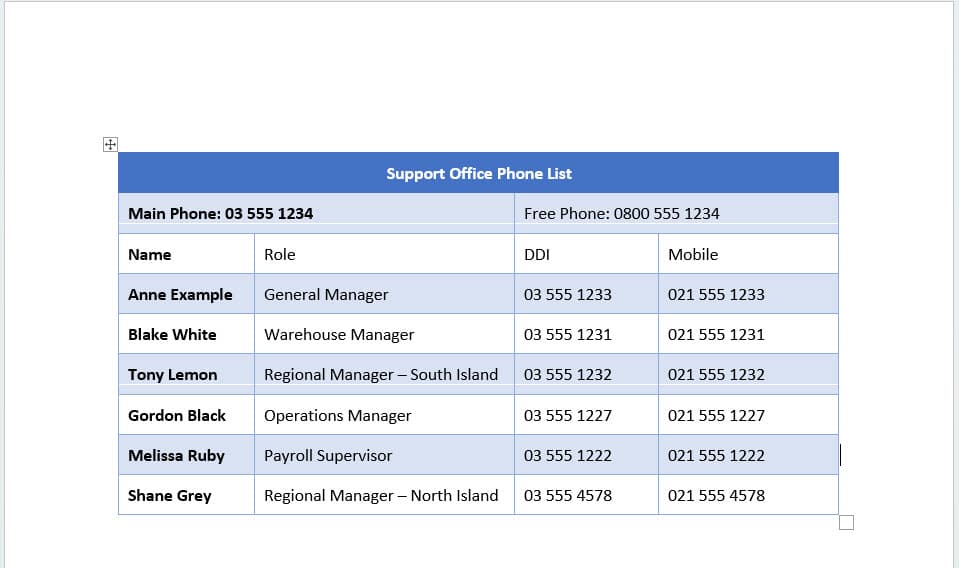
When choosing a style, a number of presets will be applied. In the example below, we selected Grid Style 4 – Accent 1, the border, shading, font and paragraph formats as well as some of our layout formats such as cell margin settings have been changed.
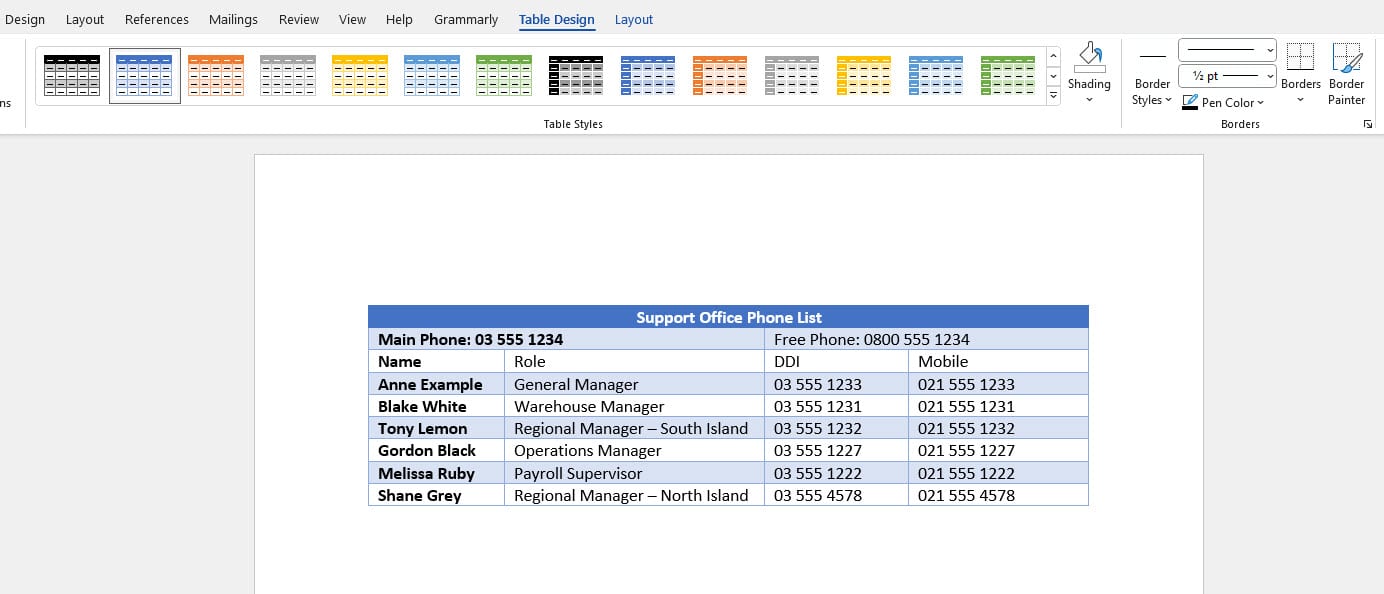
This means any formats that we had before applying this style may be replaced such as the margin settings that we applied before.
Note: If you have already added any formats to your Table and you wish to keep them, follow this step.
Simply right-click on the style option you want and choose 'Apply and Maintain Formatting' from the drop-down list.
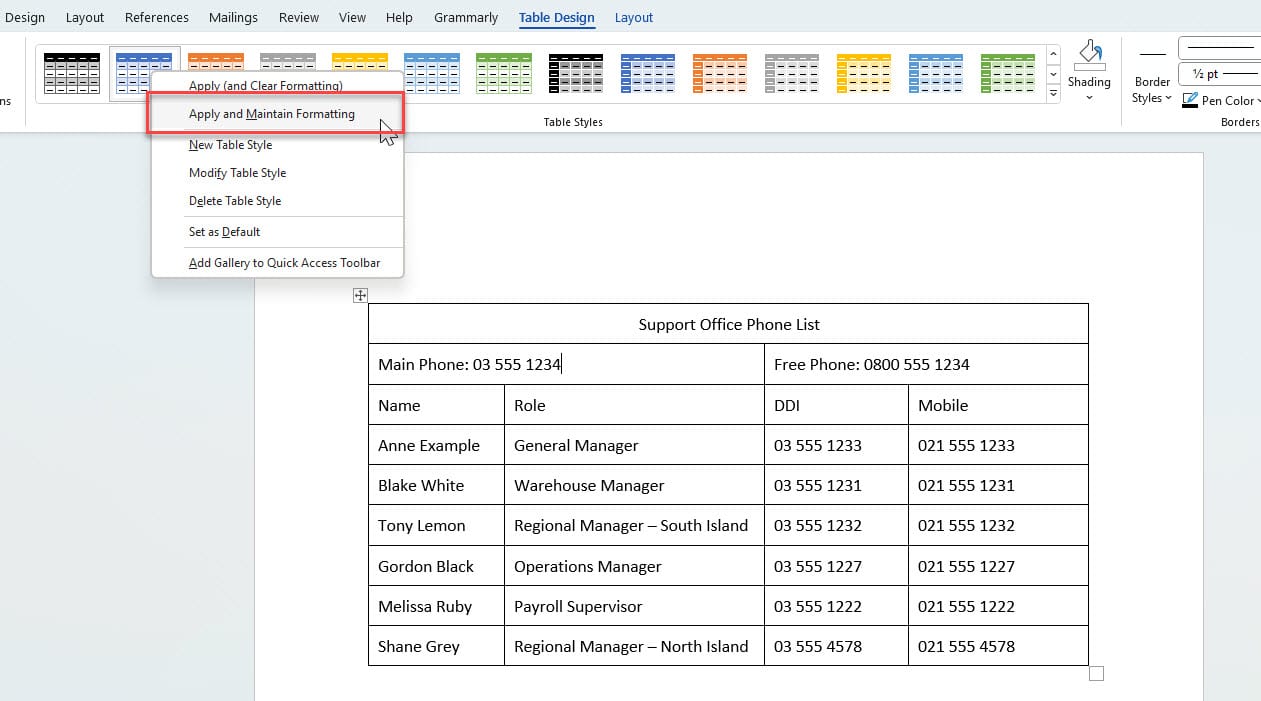
Your original formats should still remain with the new style applied.
If you haven't applied any formats yet, you can simply apply the style and adjust any necessary formats afterwards.
Word Table Style Options
Word Table Style formats are preset. However, Word allows you to customise the selected style by checking and unchecking the options you want to add or remove in the Table Styles Options area.
In our example above, the preset Table Style setting has applied bold to the first column of the Table.

To remove this, in the Table Style Options, uncheck the option First Column.
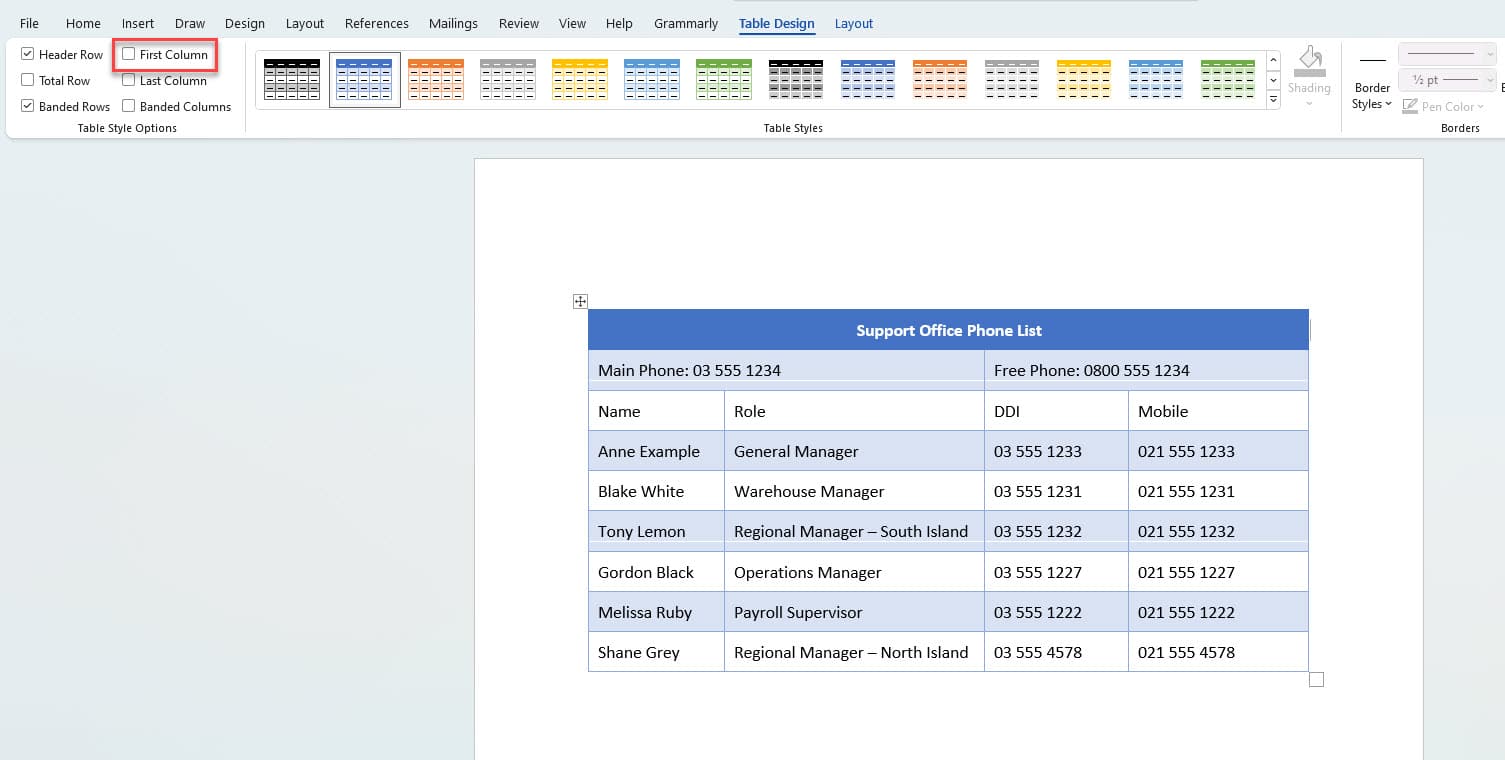
Your first column of the Table should no longer be bold.
Remove the Table Style or Clear All Formats
If you change your mind or want to start fresh, Word provides options to remove Table Styles or clear all formatting from the table. This can be useful if you want to revert to the default Table appearance.
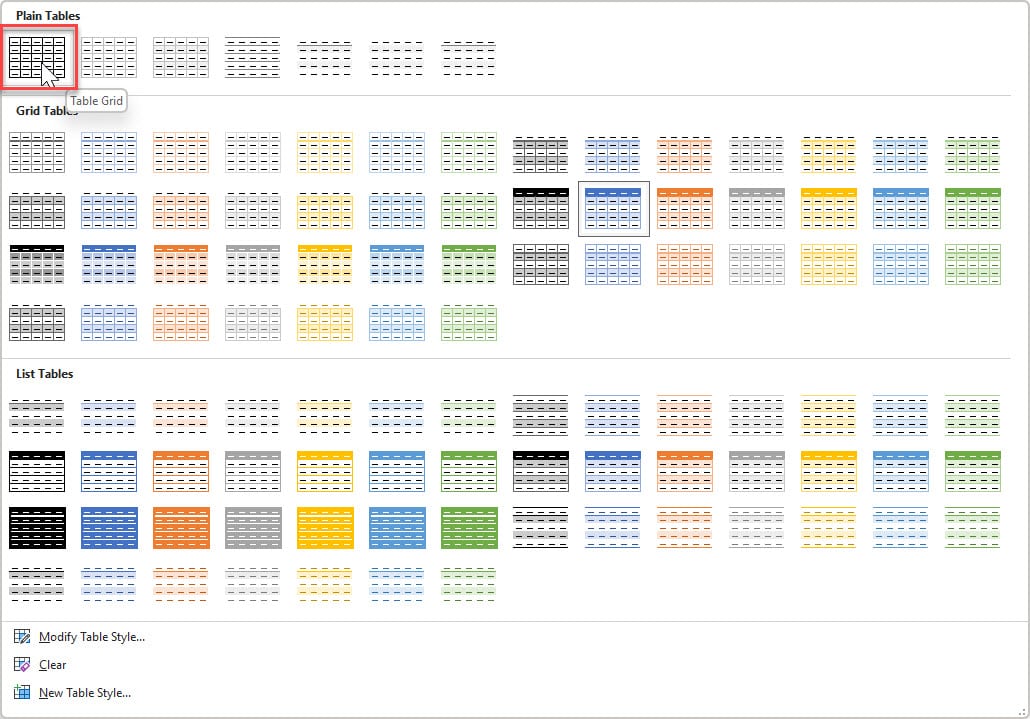
To return to the original Table grid style in Word
1. To change your table back to a single border with original spacing and no shading, from the Table Design tab, go to Table Styles Gallery.
Select the Table Grid style.
Your Table should now be back to the original Table appearance.
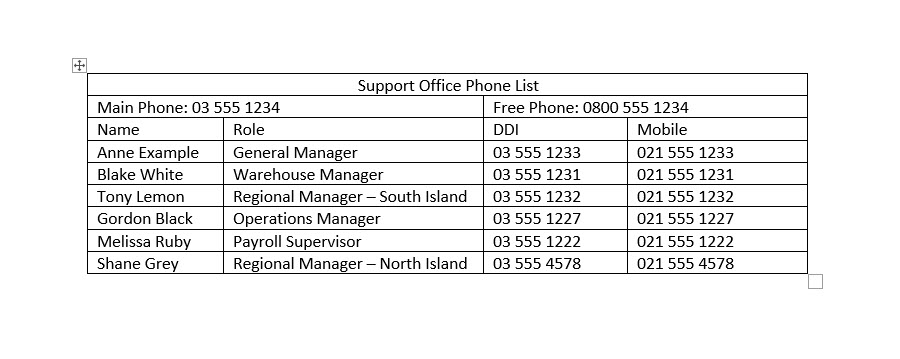
Note: When selecting Table grid, Word also clears margins and resets the paragraph spacing back to the default setting.
To reset your margins, refer to Add white space around the outside of the text.
To remove all Table styles in Word (Clear all formats)
Alternatively, you can clear all Table formats from your Word Table
1. From the Table Design tab, go to Table Styles Gallery.

2. Select Clear.
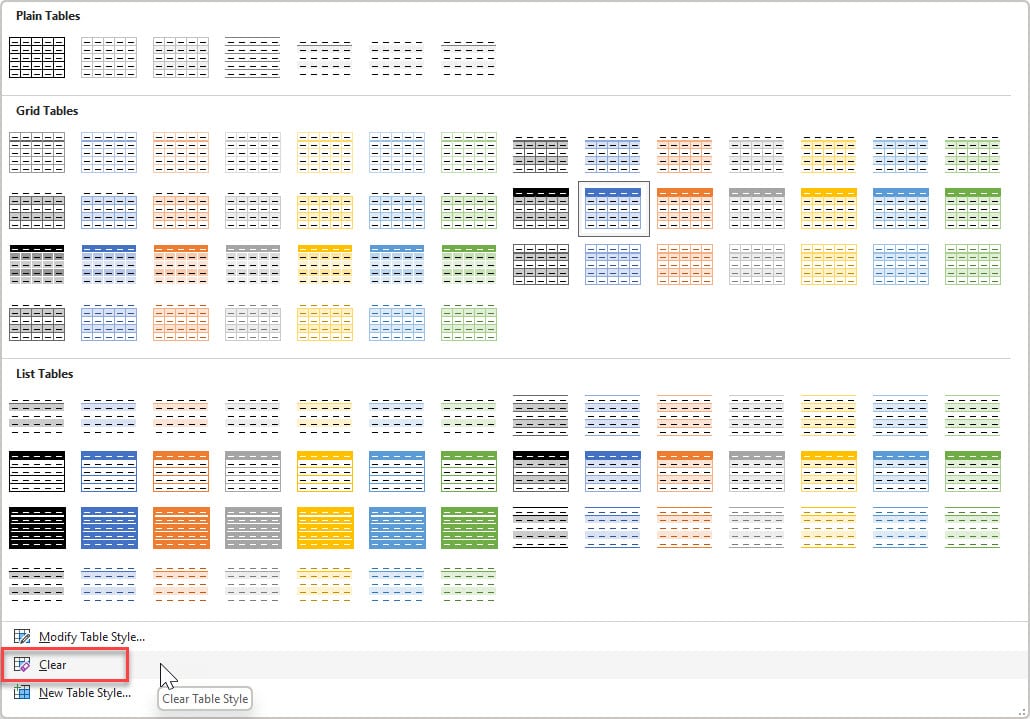
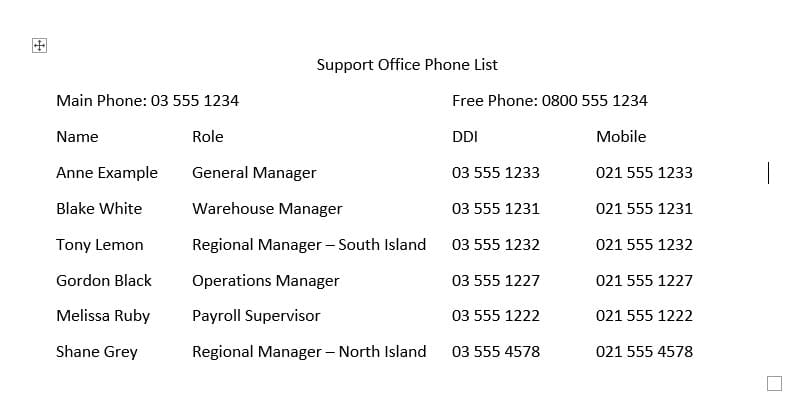
Your Table Style formats should now all be cleared. Any formats that you previously added to your table will remain.
View Table Gridlines
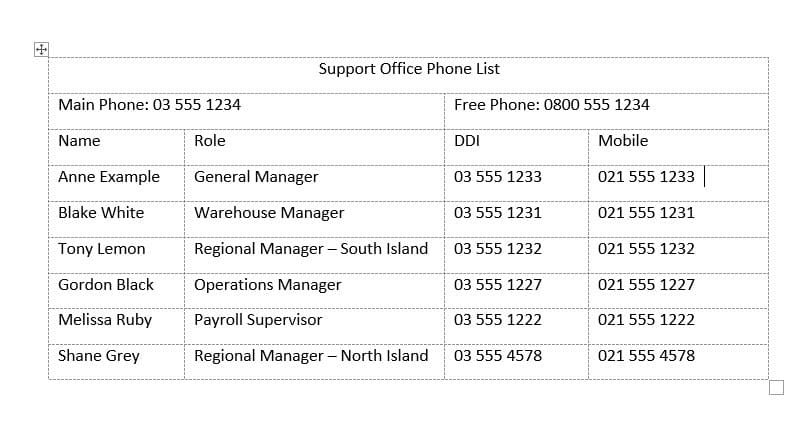
If your table no longer has borders, you can add Table gridlines so that you can easily see the layout of your Table.
1. Go to the Layout tab.

2. Select View Gridlines.

The dashes you see are the edges of your Table. They don’t print but they do allow you to work inside the Table easily.
Applying shading and border options to Word Tables
Applying shading is a great way to highlight important data or create visual separation between rows and data.
Apply shading to Word Table
1. Go to the Table Design tab.
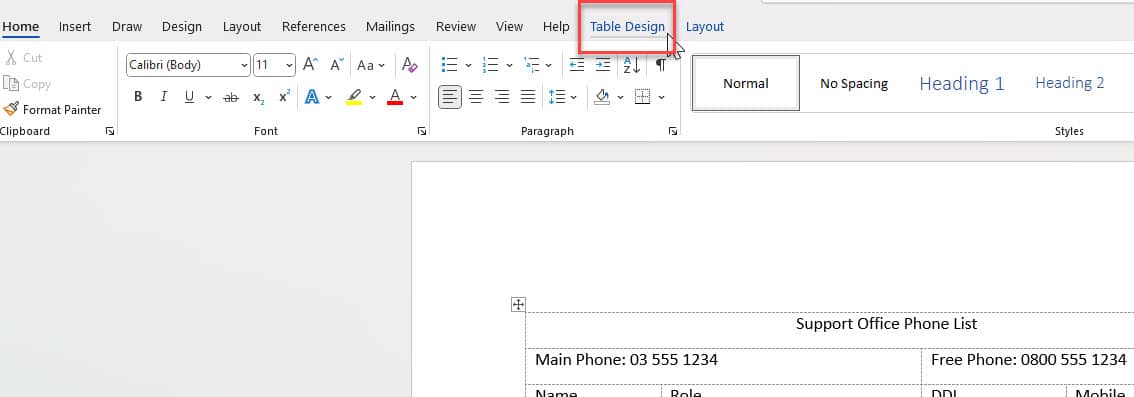
The shading and border options will be on the right of the ribbon.

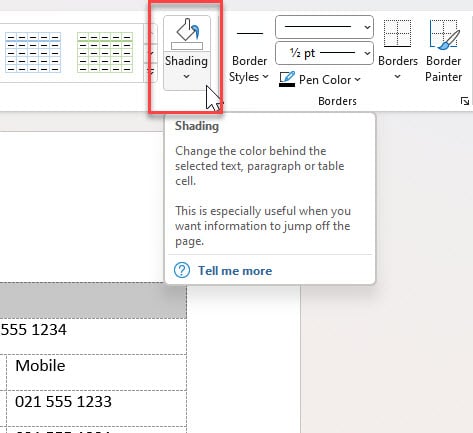
You can apply shading to a single cell, entire rows or the entire table.
2. Select what you want to be shaded. For our example, we want the top row of the Table to be shaded.
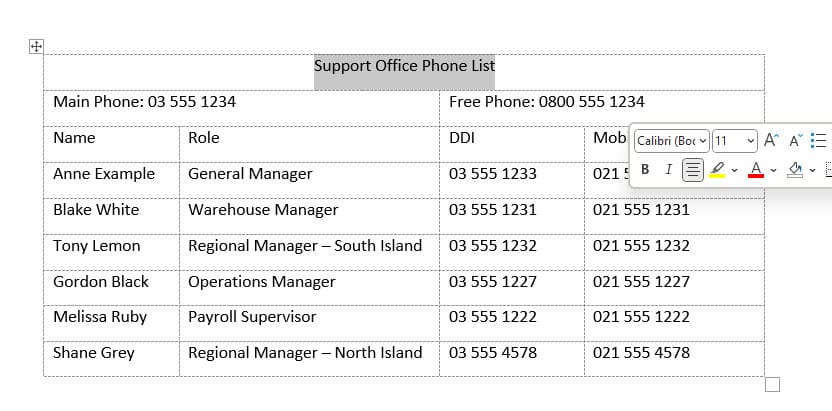
3. Select Shading.
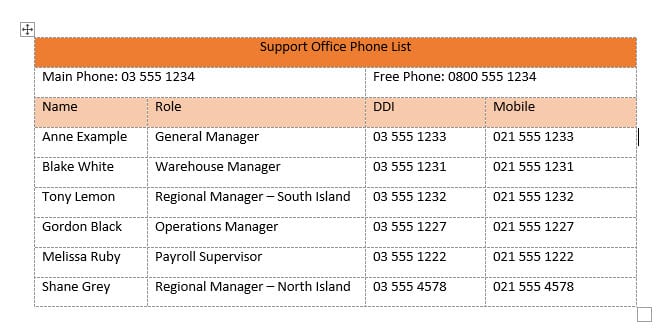
4. Apply the colour you would like. In our example below, we selected an orange accent shade.
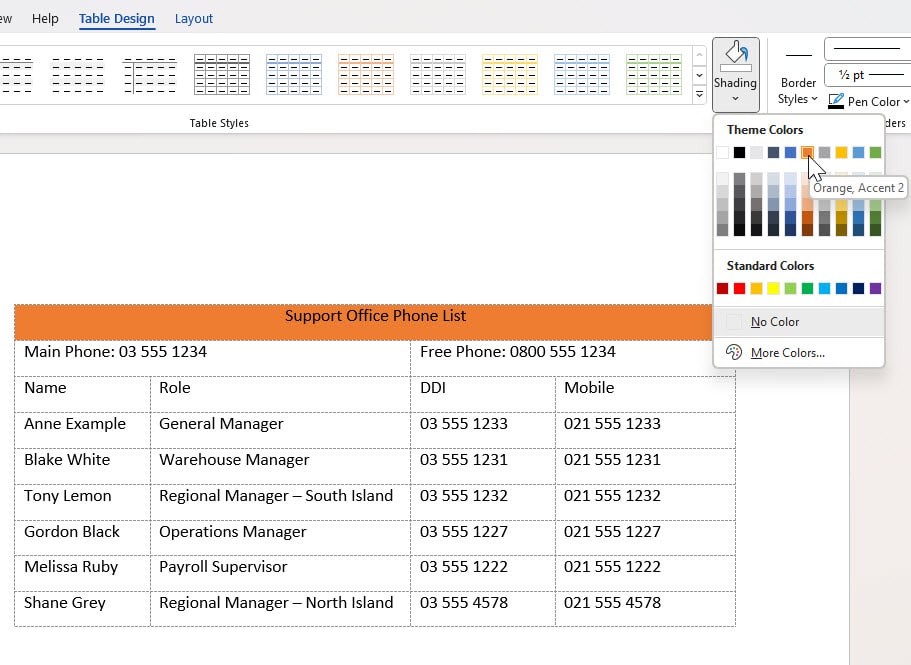
5. In our example below, we have also added a lighter orange accent to row 3.
Remove shading from Word Table
1. Select the cell or row with the shading.
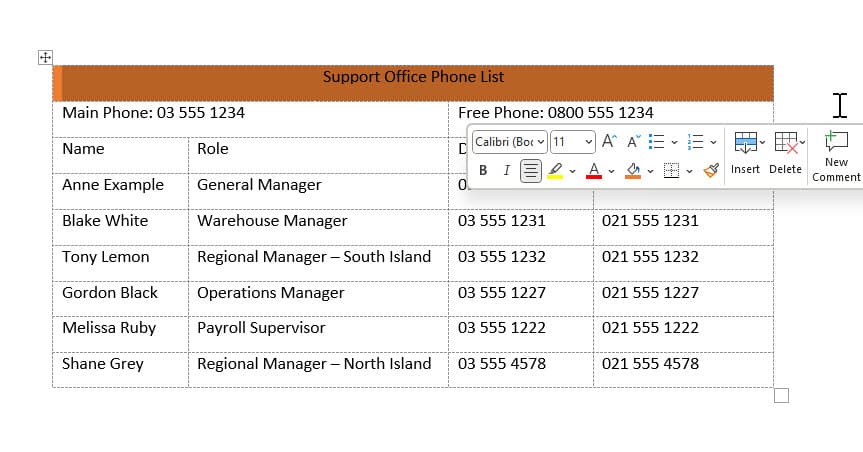
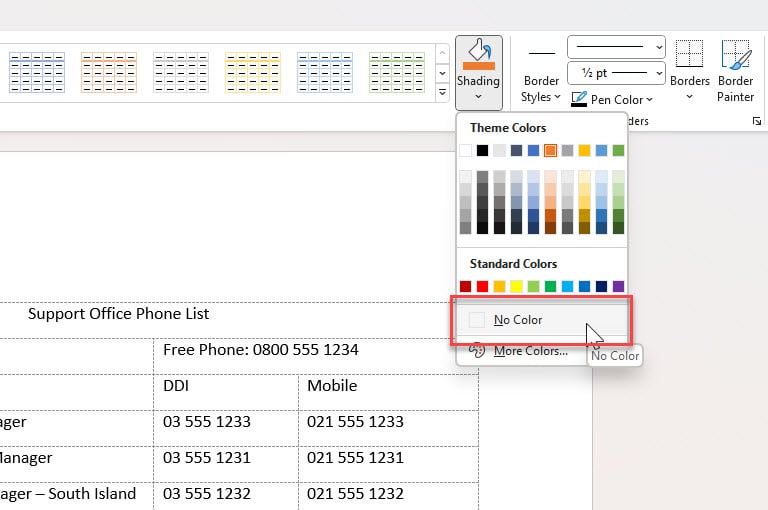
2. From the Table Design tab, go to the Shading option.

3. Select No Color.
Your shading should now be removed.
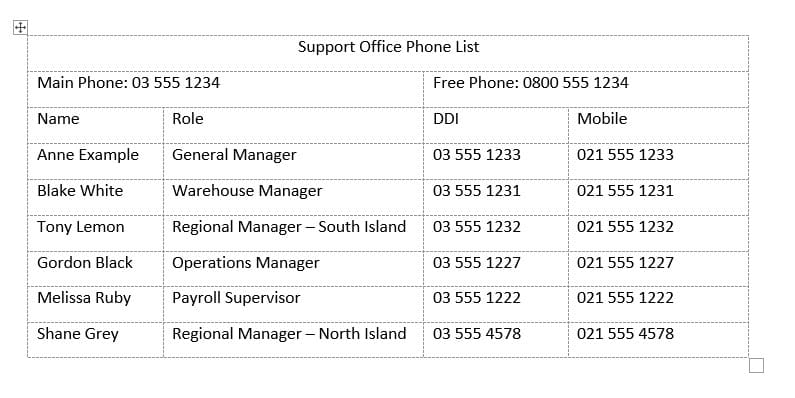
Note: Make sure you select No Color and not white.
Add border styles to Word Table
You can add preset border styles from the Border Styles drop-down menu.
To do this:
1. Go to the Table Design tab.
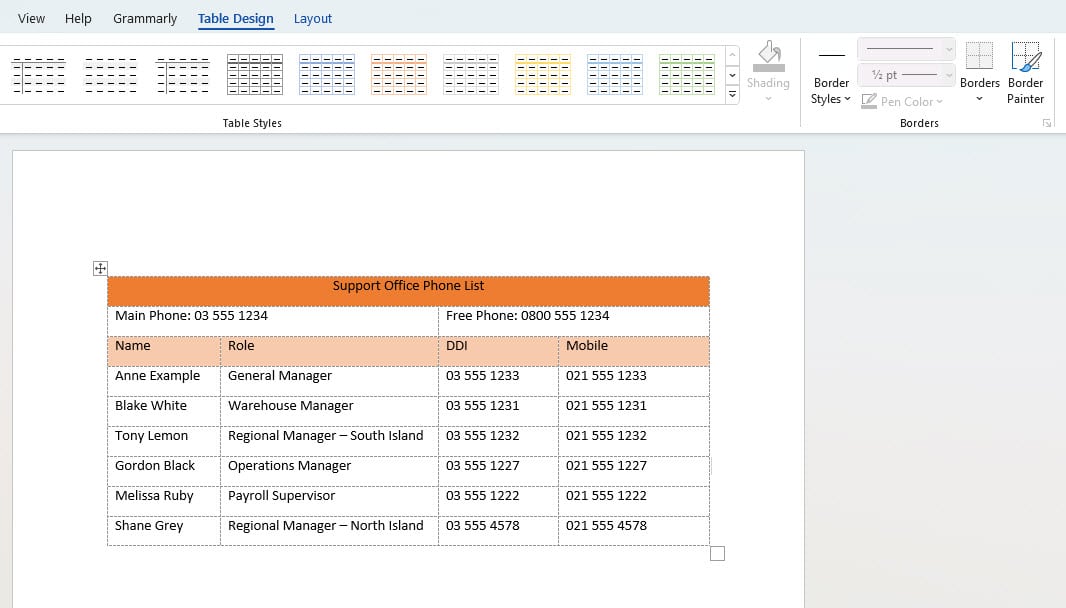
2. Select Border Styles.
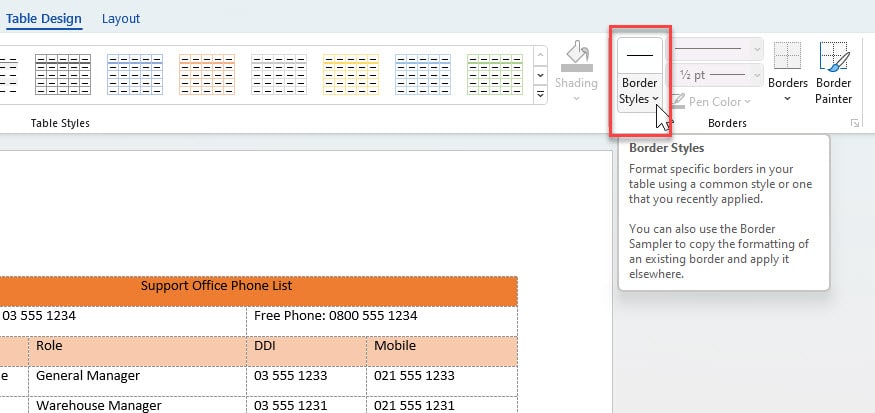
3. Select a preset style that you want to apply.
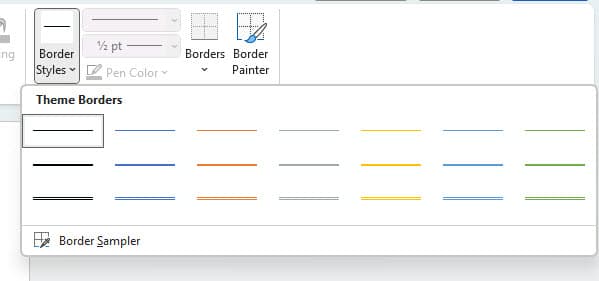
Note: The available preset styles automatically apply the line style, line weight, and line colour to the table. You can modify these options based on your preference in the Borders section of the Table Design tab. For instance, you can apply a preset style to the table and then adjust the weight of the style to match the table's requirements. You can also change the colour of the lines to your liking.
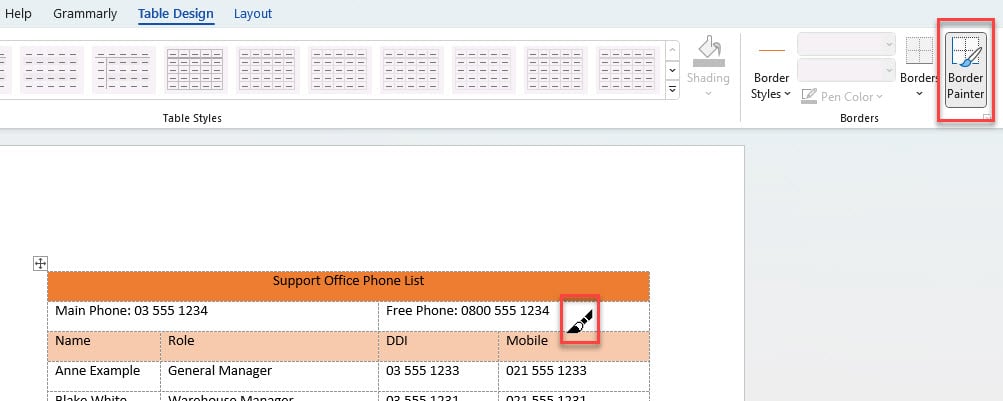
4. Once you choose a preset style, the Border Painter option will be turned on and your mouse will be loaded with the Border Painter. In our example, we chose an orange option to match our theme.
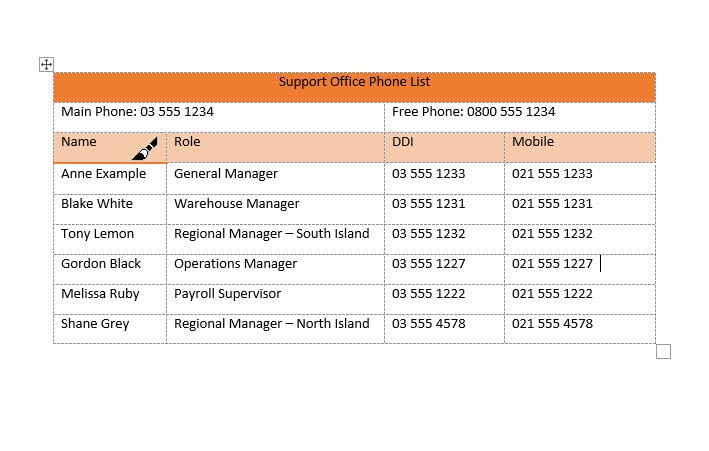
5. To apply the selected border style, select the border with your mouse that is loaded with the border painter.
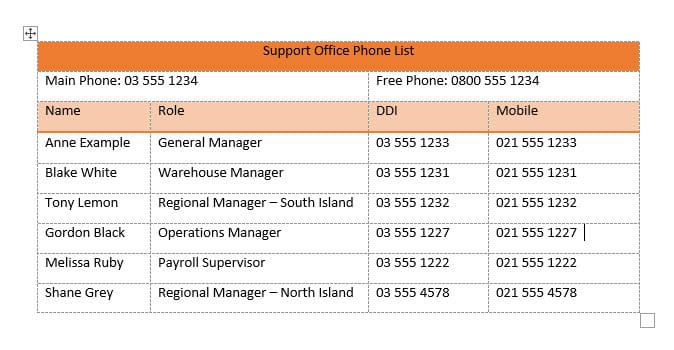
Tip: You can click and drag across cells to apply the border style.
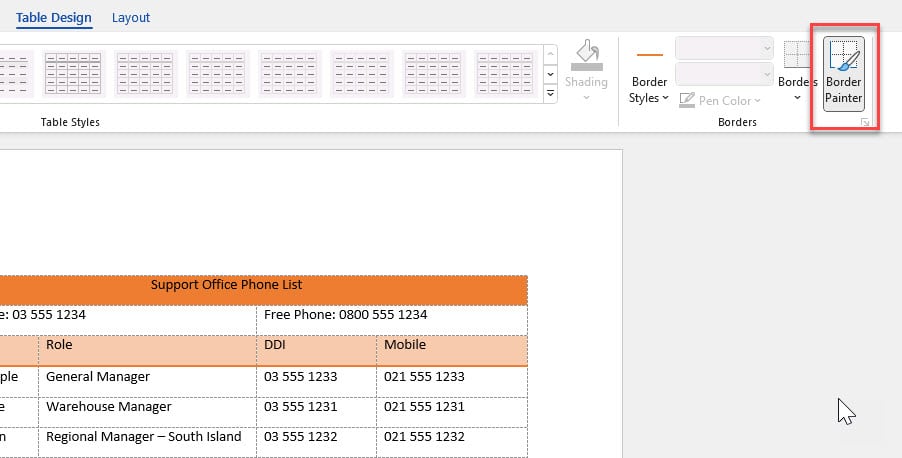
6. To turn the border painter off, select the Border Painter option.
To apply borders to the entire Table in Word
Make sure your border style settings are set to what you want before following these steps.
1. From the Border Styles options, select the Border Style you require.
2. Select the entire Table.
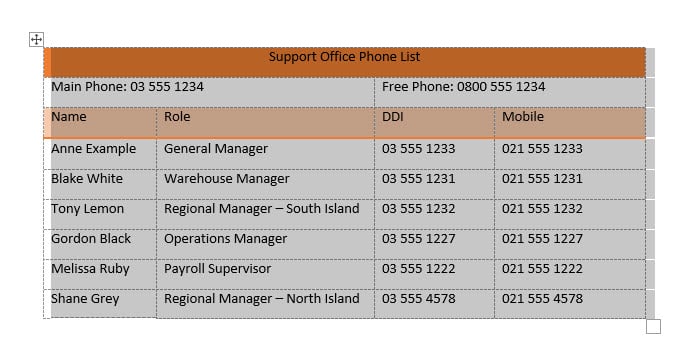
3. On the Table Design tab, select the Borders option.
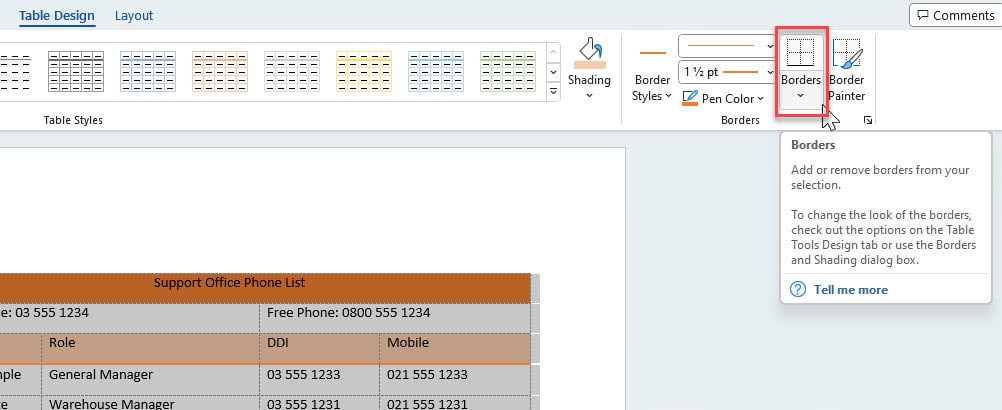
4. Select the border option you would like. In our example, we selected Inside Horizontal Border.
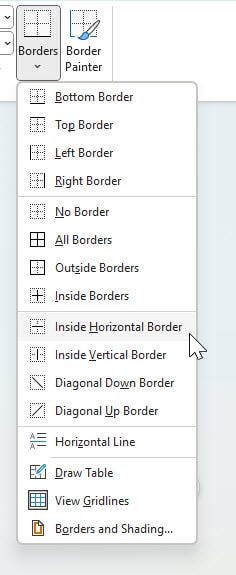
Your borders will now be quickly applied where you want them without the need to paint each and every one of the lines within the Table.
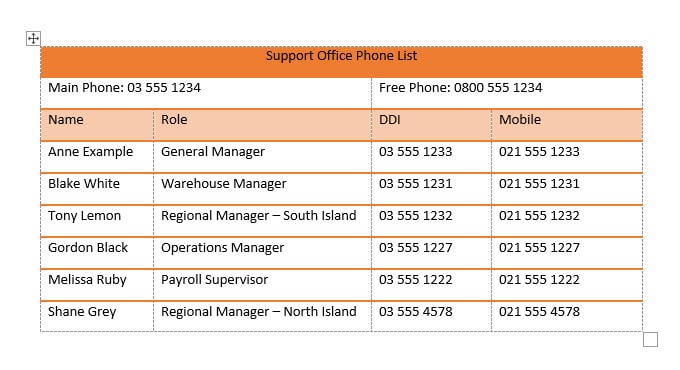
Remove borders from Word Table
1. Change the border style to No Border.
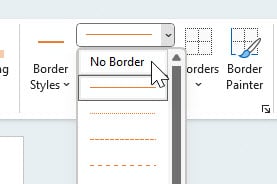
The Border Painter should now be turned on.
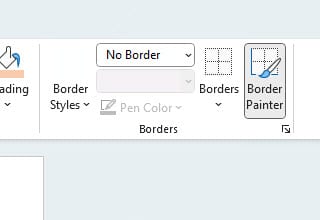
2. Select cells to remove the border.
Note: You can also click and drag to remove borders from multiple cells.
Remove the gridlines from Word Table
Removing the gridlines will now give you a better indication of how your Table is going to look.
To do this:
1. Go to the Layout tab.
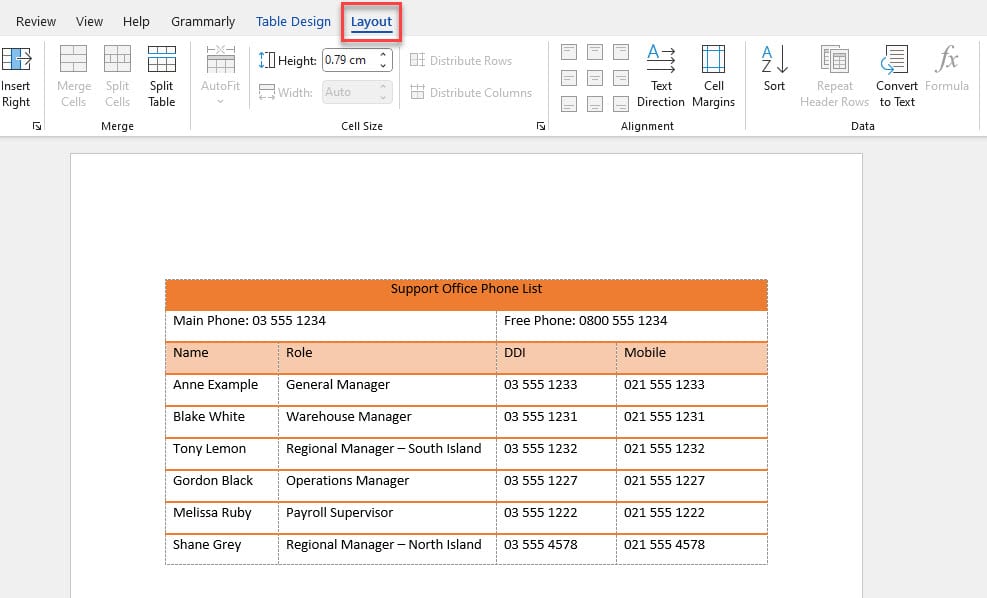
2. Select View Gridlines.
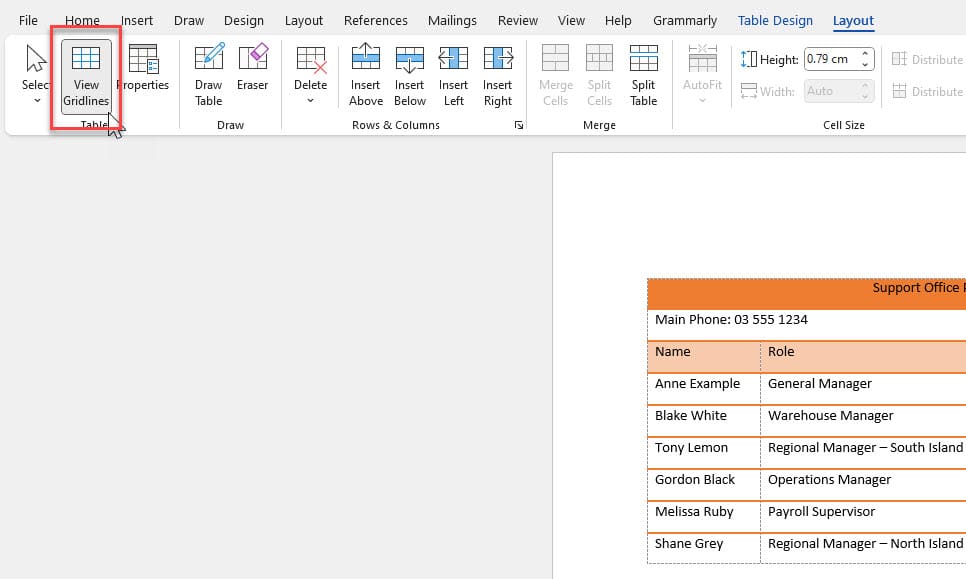
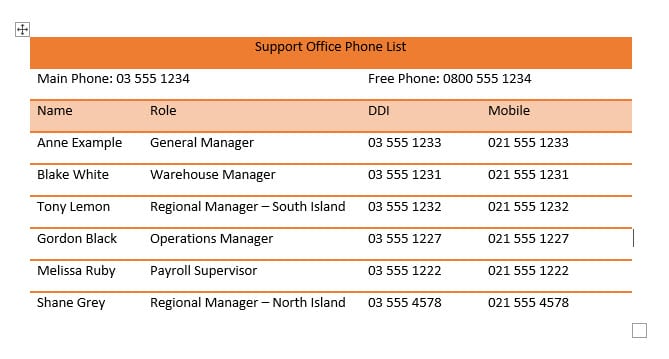
Your gridlines should be removed making it easier to see the Table's end result.
Conclusion
Throughout our journey of table formatting, we have discovered various techniques that can enhance the visual appeal and effectiveness of our documents. We have learned to add appropriate spacing to ensure better clarity and to use styles that make our tables more prominent. These valuable techniques can be mastered by anyone, whether a student or a professional, to create tables that are easy to understand and leave a lasting impression. So, keep practising with confidence and continue to improve your formatting skills!
Was this post helpful? Let us know in the Comments below.

