Needing assistance to remove a blank or extra page in Word? If you're struggling with unwanted page breaks, blank pages, or excessive space within your document, we've got you covered.
In this blog post, we'll provide you with several simple fixes to remove those extra pages, starting from the easiest methods to more advanced solutions.
Fix #1 – Remove Unwanted Extra Paragraphs
Fix #2 – Remove Unwanted Page Breaks
Fix #3 – Check the Pagination Settings
Fix #4 – Remove a Section Break (The Safe Way)
Fix #5 – Remove a Blank Last Page:
Fix #1 – Removing Unwanted Extra Paragraphs:
Clearing Empty Paragraphs and Regaining Page Space
The objective of this fix is to assist you in removing unwanted empty paragraphs from your document. By following these steps, you can eliminate unnecessary blank spaces and regain control over your page layout.
1. Go to the Home tab and locate the Show/Hide character button.
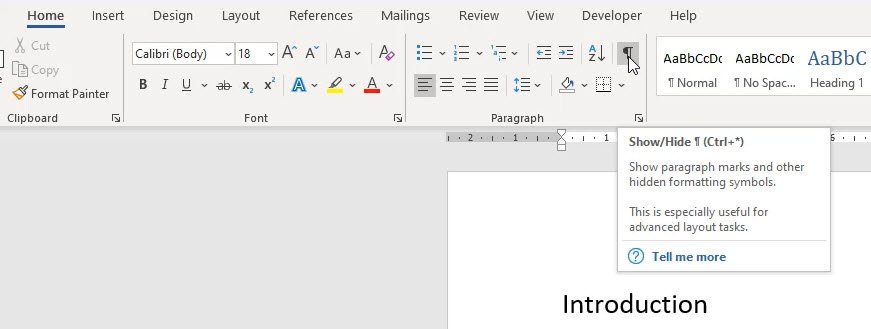
2. Click on the Show/Hide character button to reveal special symbols on your screen. These symbols represent where the Enter key has been pressed, indicating the start of a new paragraph.
3. If you notice numerous symbols, this indicates excessive use of the Enter key to start a new page. The empty paragraphs are causing the extra space.
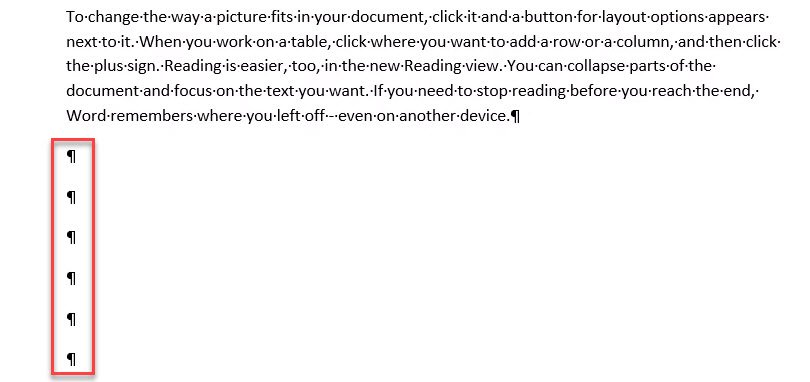
4. To remove these empty paragraphs and remove the extra space, follow these steps:
a. Select the symbols by highlighting them with your cursor.
b. Press the Delete key on your keyboard.
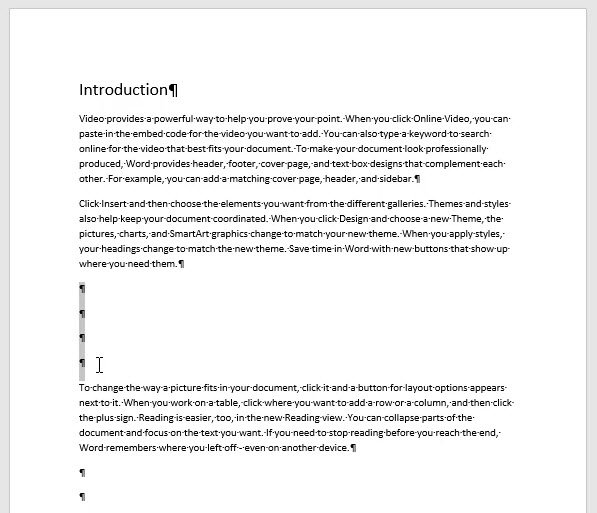
By deleting the empty paragraphs, you should successfully remove the extra space, removing any blank or unwanted pages in your document.
Fix #2 – Removing Unwanted Page Breaks:
Regaining Document Flow by Eliminating Page Breaks
The goal of this fix is to help you remove unnecessary page breaks from your Word document. By following these steps, you can get rid of disruptive page breaks that cause extra pages and create a more seamless reading experience.
1. From the Home tab, turn on the Show/Hide button. This will help you easily identify the locations where page breaks have been inserted in your document.

2. To remove the unwanted page breaks and restore the continuity of your text, perform the following steps:
a. Locate the page break symbol while the Show/Hide characters are still visible.
b. Select the page break symbol by clicking on it.
c. Press the Delete key on your keyboard.
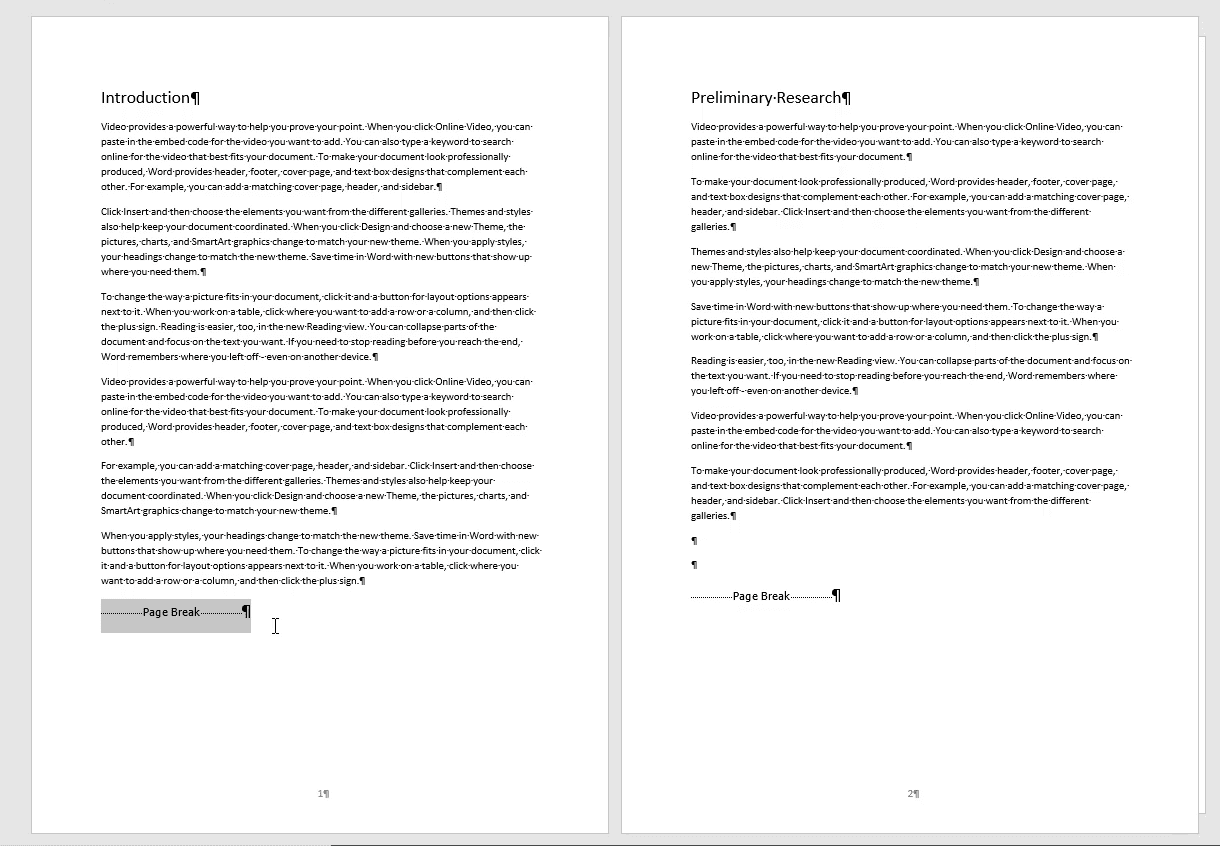
By deleting the page break symbol, you effectively remove the page break itself, seamlessly bringing your text together again. Removing unwanted page breaks is key to eliminating any extra pages that may have appeared in your document.
Fix #3 – Checking the Pagination Settings:
Bridging Gaps by Adjusting Pagination Settings
If you encounter a significant gap in your document without any visible paragraph markers or page break symbols, it's time to review your pagination settings. Follow these steps to make the necessary adjustments and eliminate those unwanted gaps:
1. Identify the paragraph located at the top of the next page, immediately after the troublesome gap.
2. Click inside that paragraph to select it.
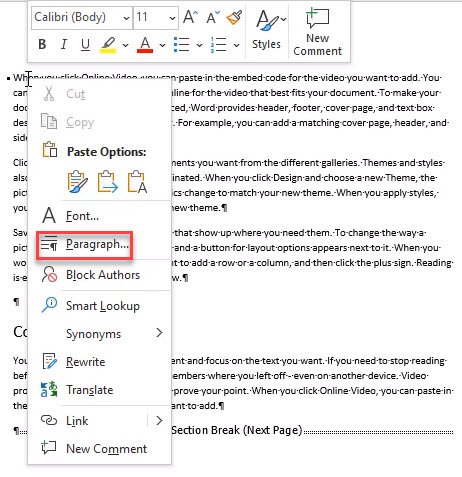
3. Right-click on the selected paragraph and choose "Paragraph" from the context menu. This action will open the Paragraph dialog box.
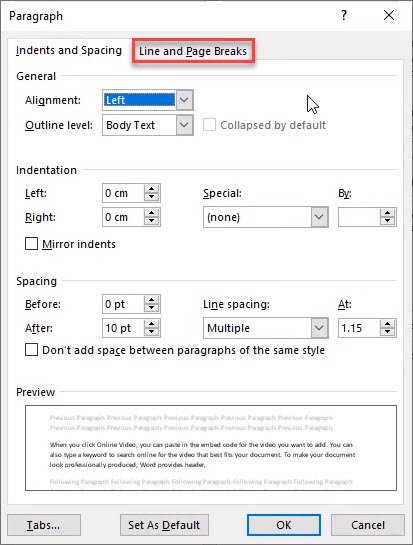
4. Within the Paragraph dialog box, navigate to the "Line and Page Breaks" tab.
5. Locate the option labelled "Page break before" and ensure that the checkbox beside it is unchecked.
6. Click "OK" to apply the changes.
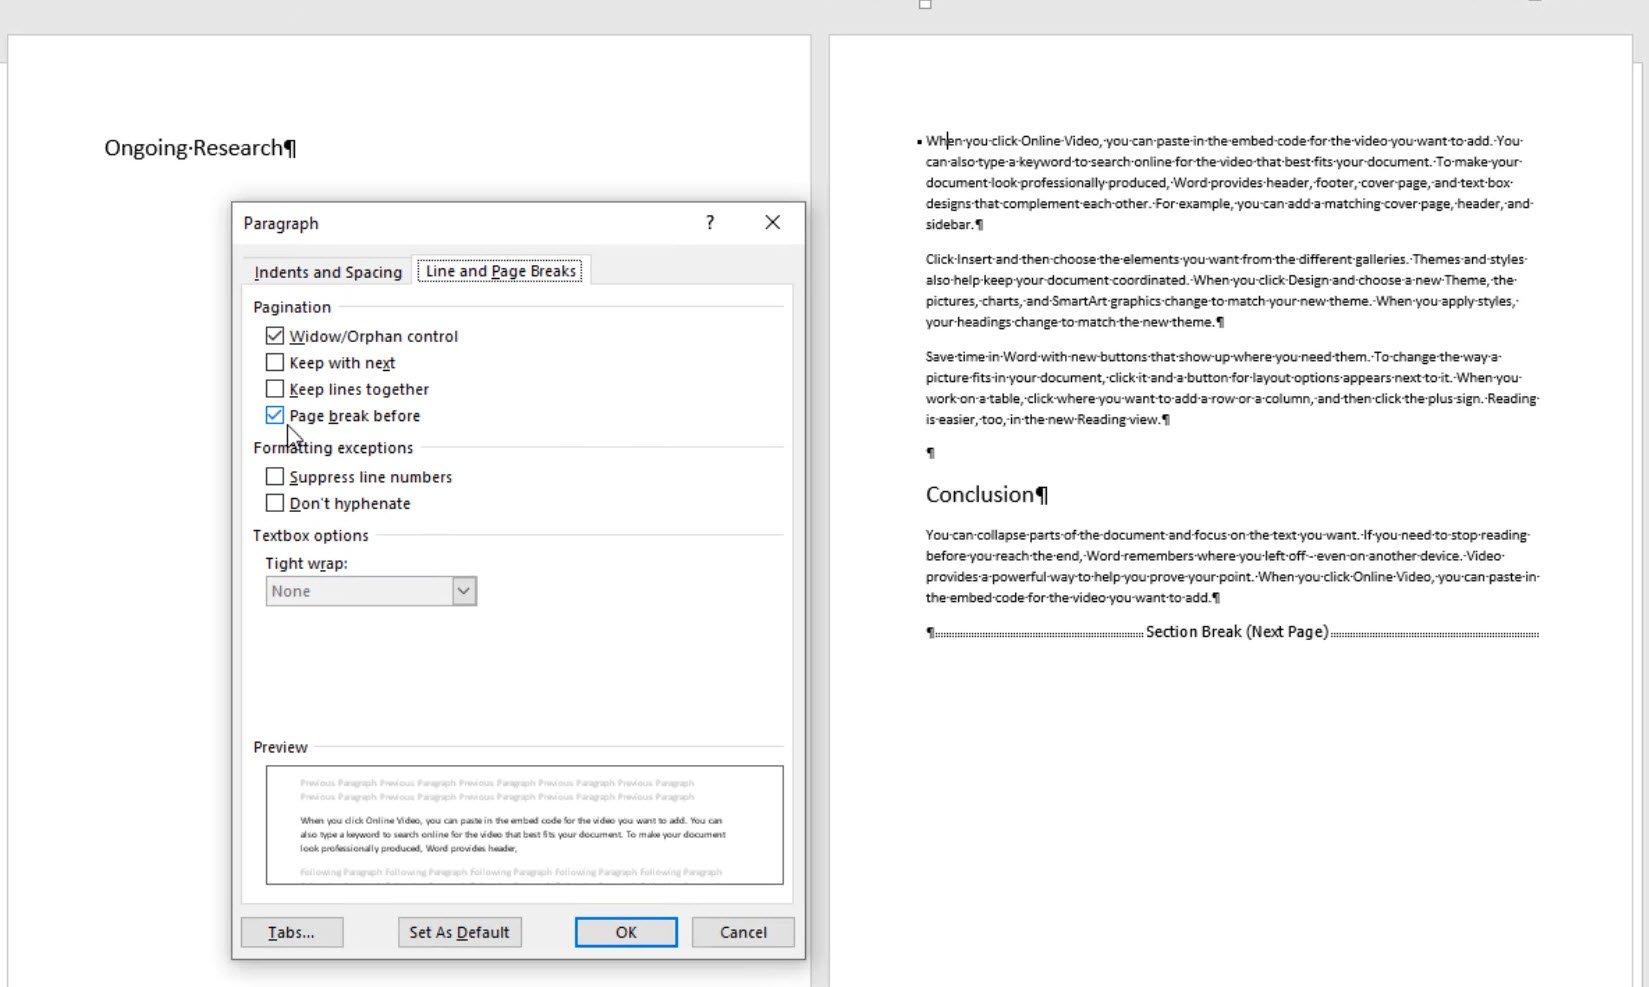
By removing the page break before the selected paragraph, you should successfully bridge the gap and bring your paragraphs back together.
With these adjustments to your pagination settings, you can effectively eliminate any unwanted gaps within your document, achieving a more coherent and visually appealing layout.
Fix #4 – Removing a Section Break (The Safe Way):
Preserving Headers and Footers while Eliminating Unwanted Section Breaks
Section breaks can inadvertently create extra pages within your document. However, it's crucial to proceed with caution when removing them to avoid unintended consequences, such as losing headers and footers.
Section breaks serve to "section" your document, allowing different page formats in various sections. For instance, in section 1, you may have a header and page numbering, while in section 2, you might choose to disable these elements.
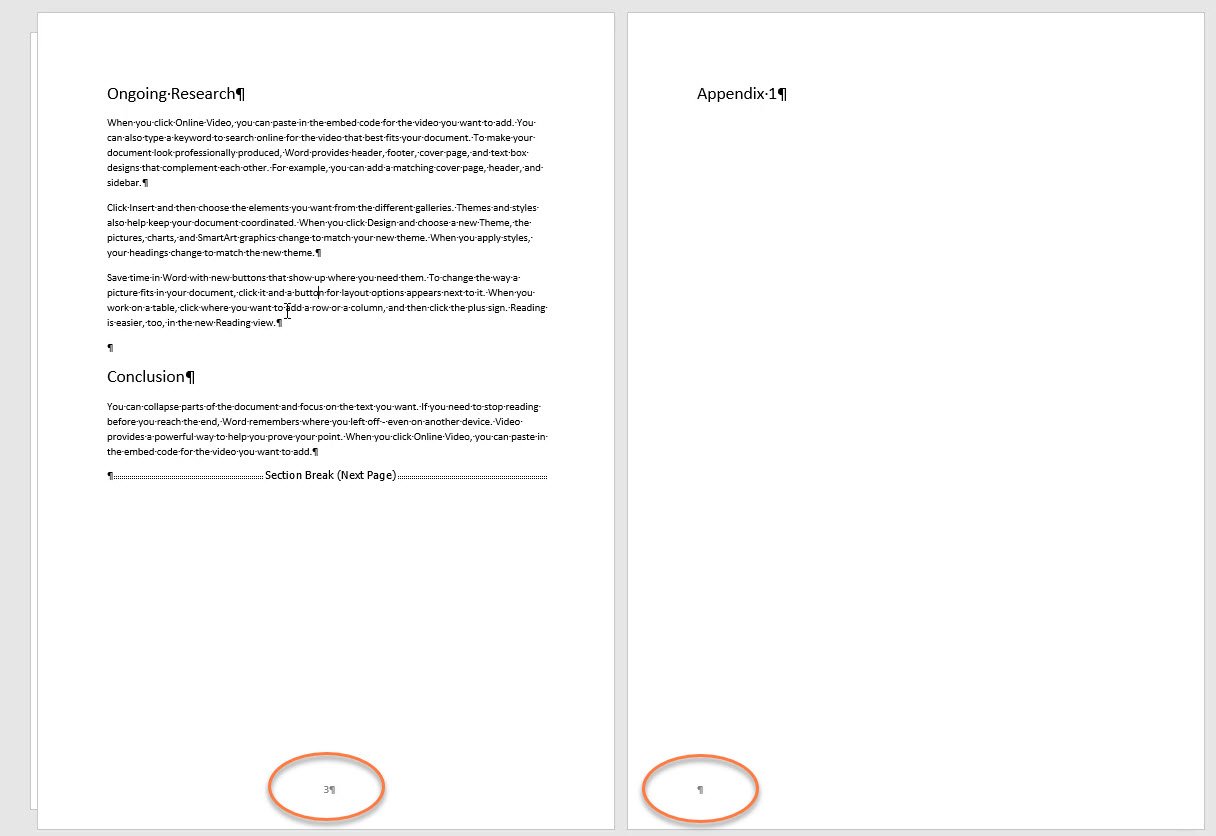
Deleting a section break between section 1 and section 2 without taking proper precautions can lead to the header and footer settings of section 2 overriding those of section 1. As a result, your header and page numbering will disappear. Therefore, it's essential to exercise caution during this process.
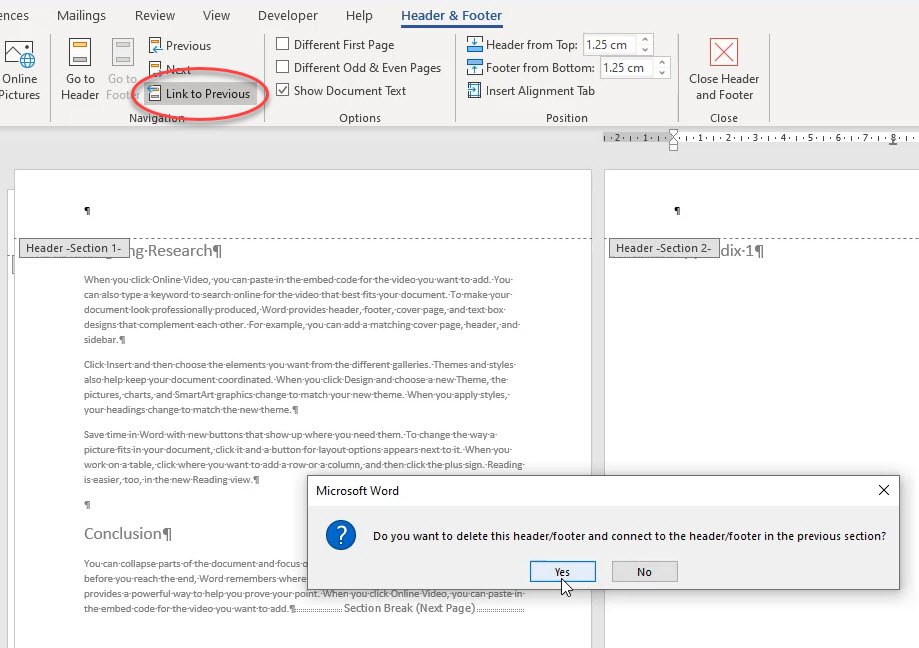
1. Before deleting the section break, you will need to access the Header, Footer, or Page Number settings for section 2. To do this, go to the Insert tab and click on the Header & Footer button to access the Header & Footer area.
2. Within the Header & Footer area, locate the "Link to previous" button. Clicking this button connects the settings from section 1 to section 2, ensuring that the same formatting settings continue into section 2, i.e. the headers and footers from section 1 will carry on into section 2.
3. When prompted, select "Yes" to confirm connecting to the Header/Footer in the previous section.
Now that you have connected the settings, you can proceed to remove the section break:
1. Enable the Show/Hide characters feature, if not already enabled, to view the Section Break symbol.
2. Within your document, locate the Section Break symbol that represents the break you wish to remove.
3. Select the Section Break symbol by clicking on it.
4. Press the "Delete" key on your keyboard to remove the section break.

By following these steps, you can successfully eliminate the extra page caused by the section break while ensuring your Headers and Footers remain intact.
Fix #5 – Removing a Blank Last Page:
Effortless Methods to Eliminate Unwanted Empty Pages
If you're struggling with a lingering blank last page in your document that refuses to disappear even after selecting the paragraph marker and pressing Delete, try the following simple techniques:
1. Enable the Show/Hide characters feature from the Home tab. This will reveal hidden symbols and formatting elements.
2. Navigate to the second-to-last page of your document, using the scroll bar or other navigation methods.
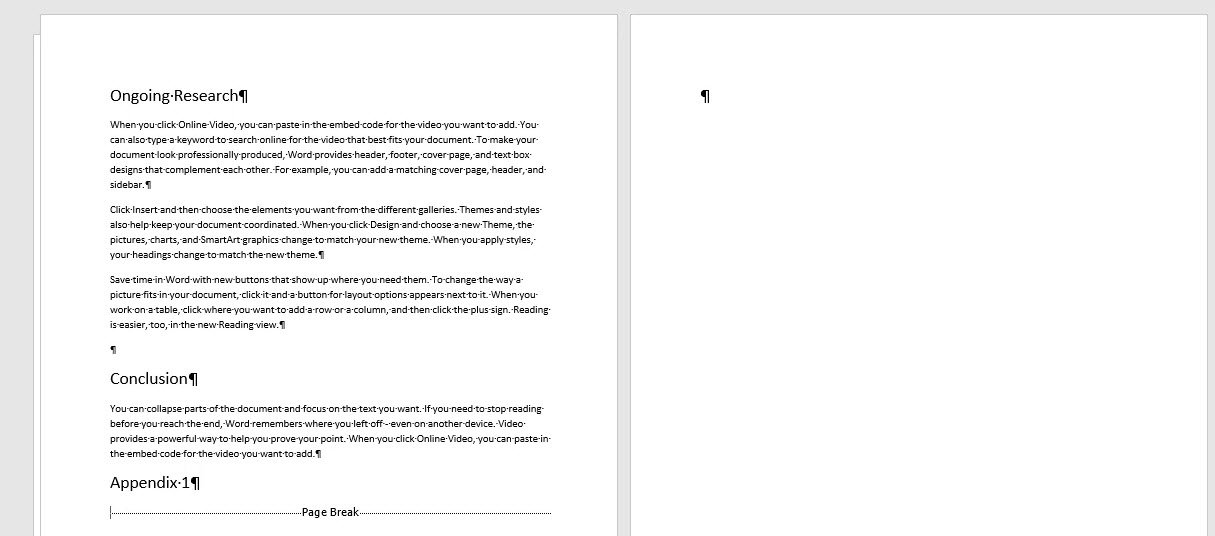
3. If you spot a page break symbol on the second-to-last page, select it and delete it.
4. Additionally, if you come across numerous paragraph symbols with empty paragraphs on the second-to-last page, select and delete them as well.
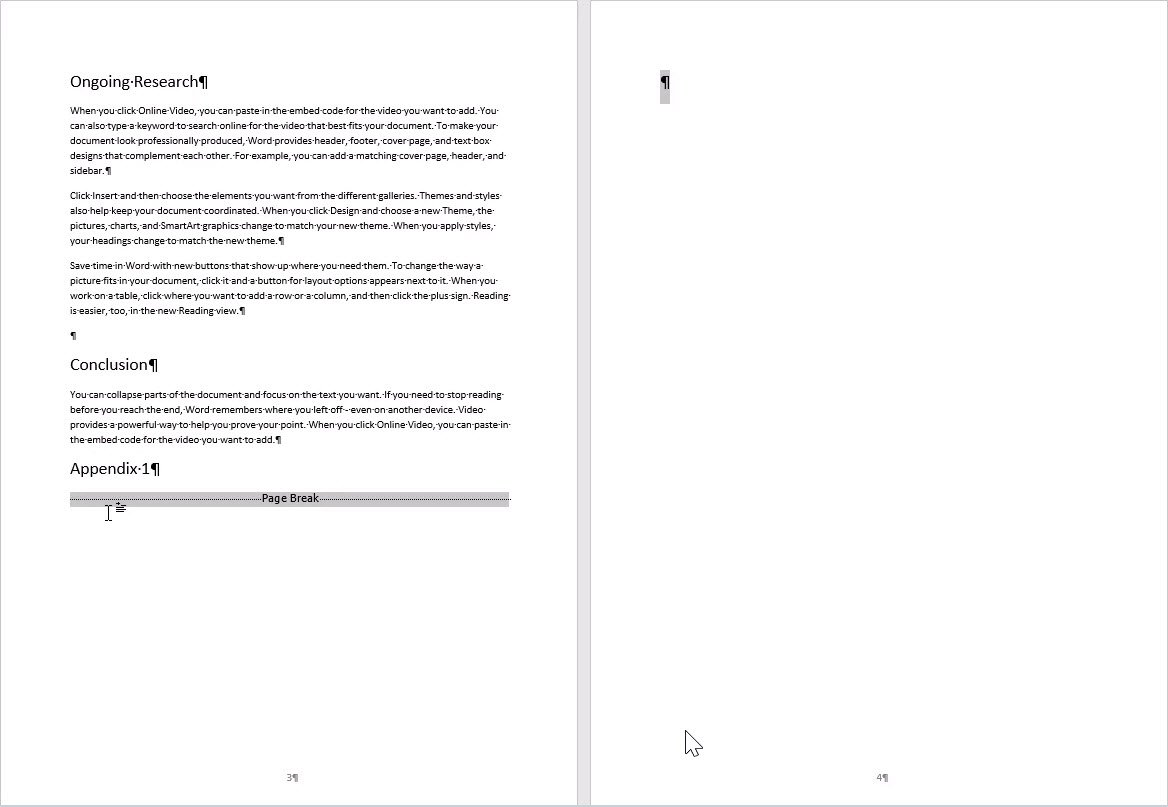
By implementing these steps, you can effectively remove any unwanted blank last pages from your Word document, ensuring a polished and professional appearance.
Conclusion:
With these easy-to-follow fixes, you can quickly remove unwanted extra pages in Word. Whether it's eliminating empty paragraphs, page breaks, section breaks, or blank last pages, these step-by-step instructions will help you clean up your document and achieve a polished final result. Say goodbye to those pesky extra pages and enjoy a clutter-free document in no time.
Was this blog helpful? Let us know in the Comments below.

How to Remove Extra Page in Word: Quick Fixes to Delete Blank Page
Have you been wrestling with an extra page break, a blank page or a lot of space in your Word document? Follow this step-by-step guide to learn several different fixes to delete a blank page in Word.
Instructions
Fix #1 – Removing Unwanted Extra Paragraphs
- Go to the Home tab.
- Select the Show/Hide character button. If you notice numerous symbols, this indicates excessive use of the Enter key to start a new page. The empty paragraphs are causing the extra space.
- Select over the symbols and press then Delete.
Fix #2 – Removing Unwanted Page Breaks:
- From the Home tab, turn on the Show/Hide button. This will help you easily identify the locations where page breaks have been inserted in your document.
- To remove the unwanted page breaks and restore the continuity of your text, perform the following steps:
- Locate the page break symbol while the Show/Hide characters are still visible.
- Select the page break symbol by clicking on it.
- Press the Delete key on your keyboard.
Fix #3 – Checking the Pagination Settings
- Click into the paragraph at the top of the next page (the paragraph after the big gap).
- Right-click over the paragraph and select Paragraph.
- When the Paragraph dialog box opens click on to the Line and Page Breaks tab.
- Locate the option labelled "Page break before" and ensure that the checkbox beside it is unchecked.
- Click OK.
Fix #4 – Removing a Section Break (The Safe Way)
Note: deleting a section break between sections can apply unwanted formatting settings. To avoid this from happening follow the steps below:
Link to Previous
- Go to the Insert tab and click on the Header & Footer button to access the Header & Footer area.
- Within the Header & Footer area, locate the "Link to previous" button.
- Click Yes to connect to the Header/Footer to the previous section.
Delete the section break:
- On the Home tab, click Show/Hide to turn this option on.
- Select over the Section Break symbol.
- Press Delete.
Fix #5 – Removing a Blank Last Page
- From the Home tab turn on your Show/Hide characters.
- Go to the second to last page of your document.
- If you can see a page break symbol, select it, and delete it.
- Additionally, if you come across numerous paragraph symbols with empty paragraphs on the second-to-last page, select and delete them as well.


Great help, thank you Sharyn!!
None of these work. wahwah
You are so welcome. I’m so happy it helped!
Oh no Paula. I’m sorry to hear that. Very frustrating for you I’m sure. Wish I could have offered a solution.
Thank you so much! I had a section break that was causing me grief with a blank last page. Using the show/hide characters helped me to finally solve the problem.
That’s fantastic Elizabeth! So happy it helped you and thank you for letting me know. Sharyn 🙂
Tried all options; but none worked….:(
Oh no! How frustrating. I’m sorry my instruction didn’t help 🙁
Word is truly horrendous. A program should not have to have articles, blogs, reddits and videos to show people how to delete a page.
Hi Bill. Yes, it can be very challenging!
it work for me by using the Show/Hide Characters. Thank you !
Fantastic Cindy! So glad I could help ?
Thank you so much for this. I was almost going mad before I stumbled on your article. It really helped delete a troublesome page.
I’m so happy it was helpful. Thank you for letting me know it helped. Sharyn
So helpful to me. Thank you very plenty for making me get rid of a stubborn page on my resume. Fix one worked for me!!!
Hi Vandi. I’m so happy this helped you! Thank you so much for letting me know. All the best with your resume. Sharyn ?
We had a similar problem with an extra page after a table in an appendix. The author had the table text spacing set at 1.15pt. We tightened it up a little bit (set at 1.08 spacing), and voila! It added enough “breathing space” under the table to make things shift back enough for the extra page to go away.
Thanks for sharing Terri. Really appreciate it. Sharyn 🙂
it is awesome .it helped to solve my problem .Thank you so much…..
I’m so happy it helped you Sanni! Thank you for letting me know ?
Was helpful. I was having a hard time deleting this last page of mine, and you came to my rescue. thanks
You are so welcome! So glad it was helpful 🙂
This is super useful! Thank you, Sharyn!
Thanks Ana! So great you found it helpful ?
Thank you. The best instruction for how to delete the blank last page.
Thank you so much for letting me know it helped Dr Rosengren 🙂
thank you so much for your info on how to delete that last blank page I couldn’t get rid of.
You are so welcome. I’m glad it was helpful to you 😊
Thanks very useful. Actually I was wondering from last 2 hrs for remove the page. Found somany bakwas content but when I found this page problem got resolved :).
Fantastic! So glad our article was helpful.