Don’t you hate it when you delete the last page within a court pleading document in Word and your line numbers disappear? If the answer is yes, you’re not alone!
In this blog, I am going to guide you through how to fix this issue within a Word document.
Court Pleading document with extra page
Let’s look at an example in Microsoft Word.
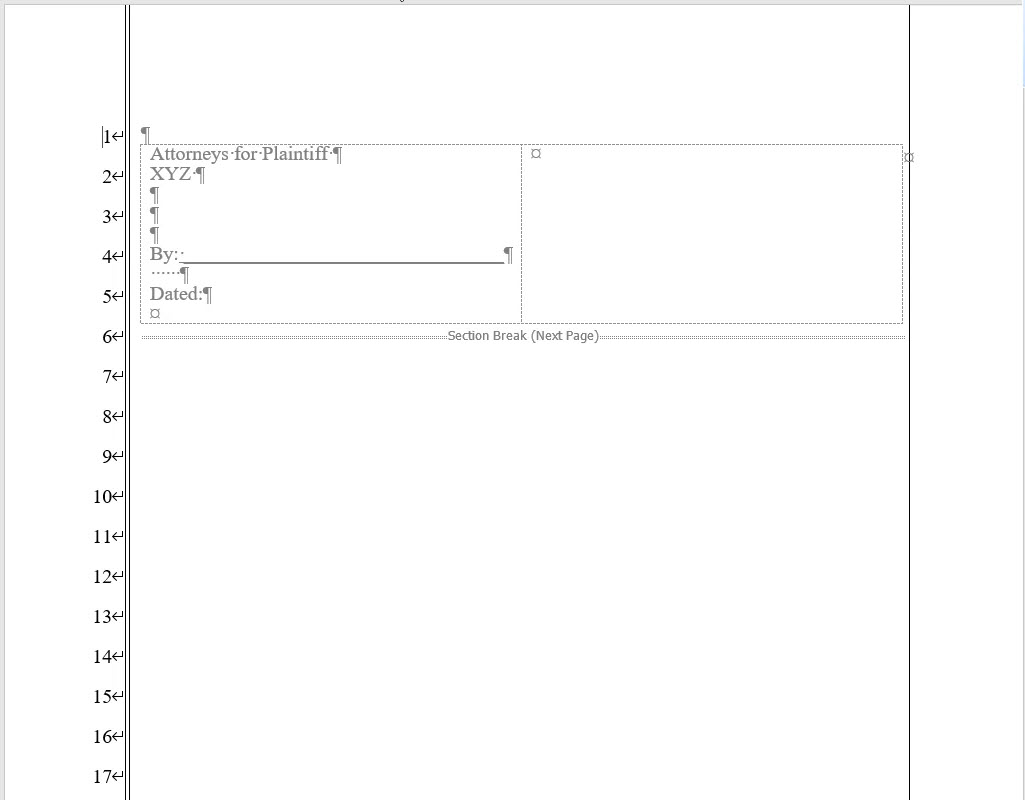
Here we have a court pleading document. The image below shows the first page of the document with the line numbers displayed on the left (greyed out).
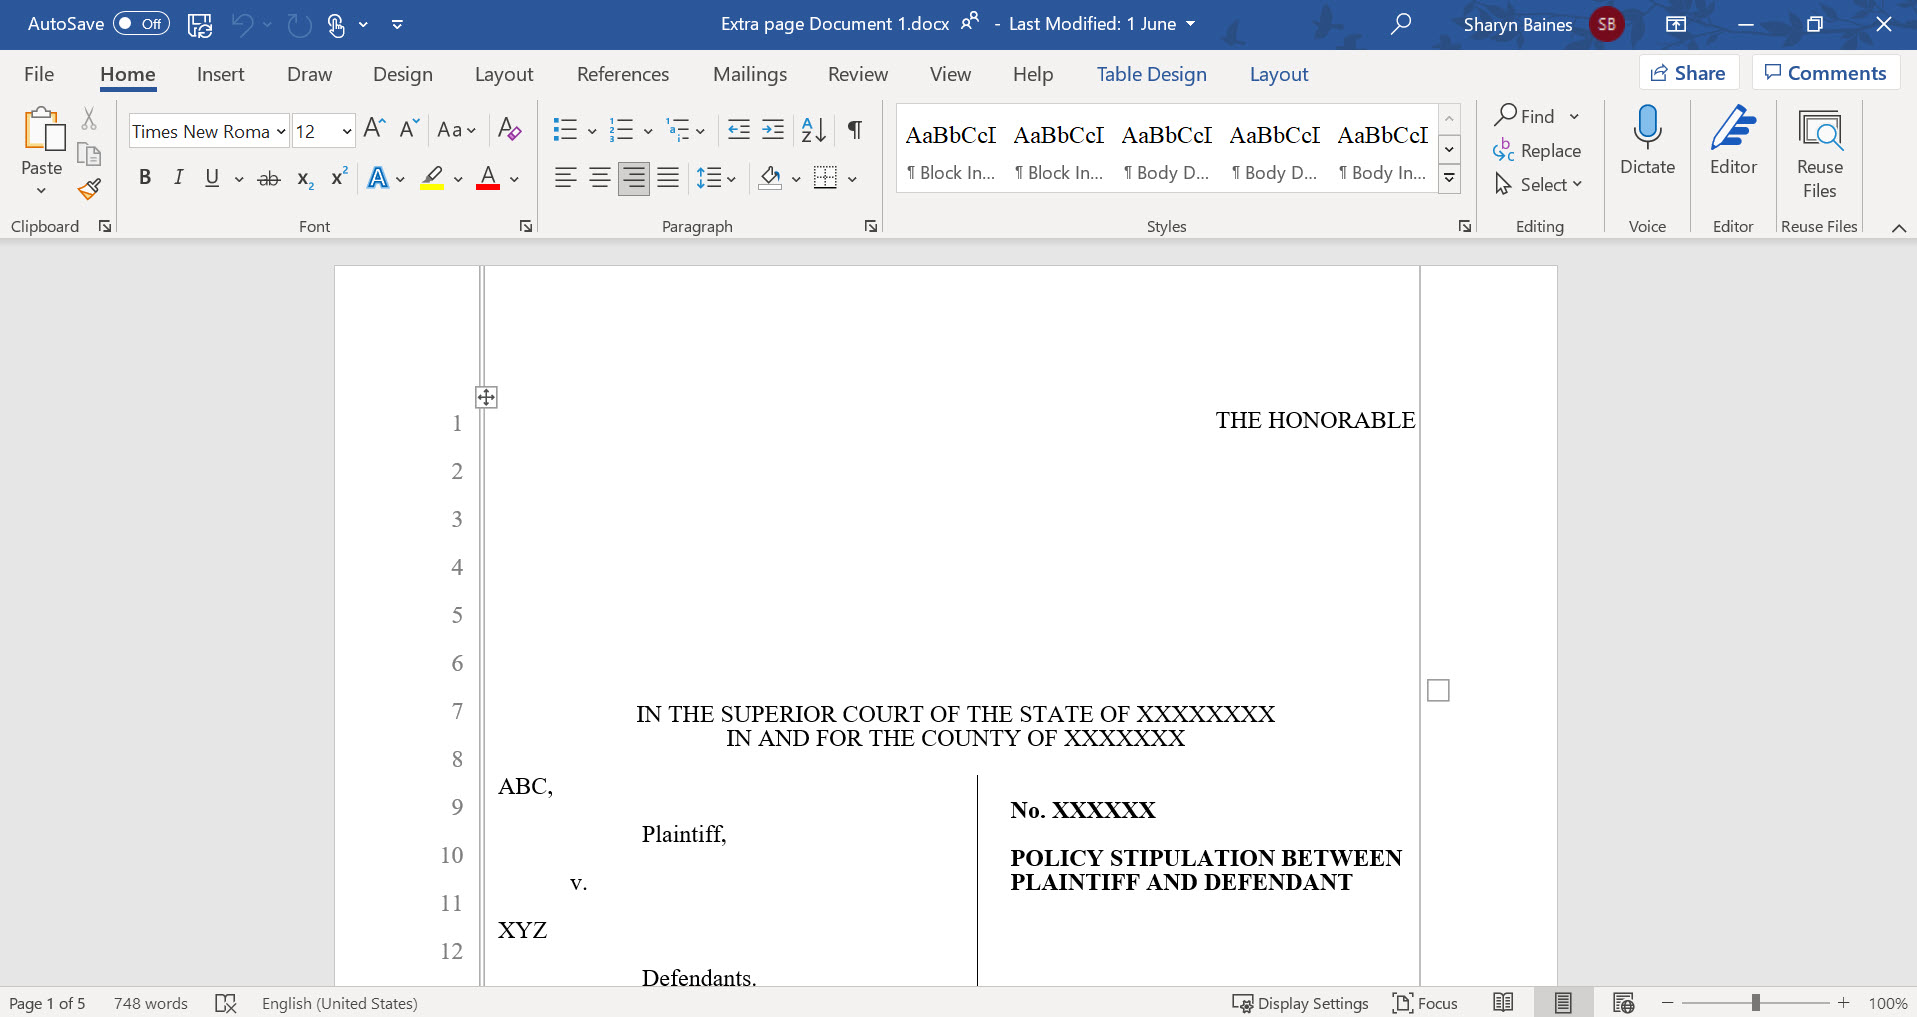
In this document, when we go to the last page of the document we are greeted with an unwanted extra page and the line numbering is no longer displayed.
Tip: Press Ctrl + End to move quickly to the last page of your document.
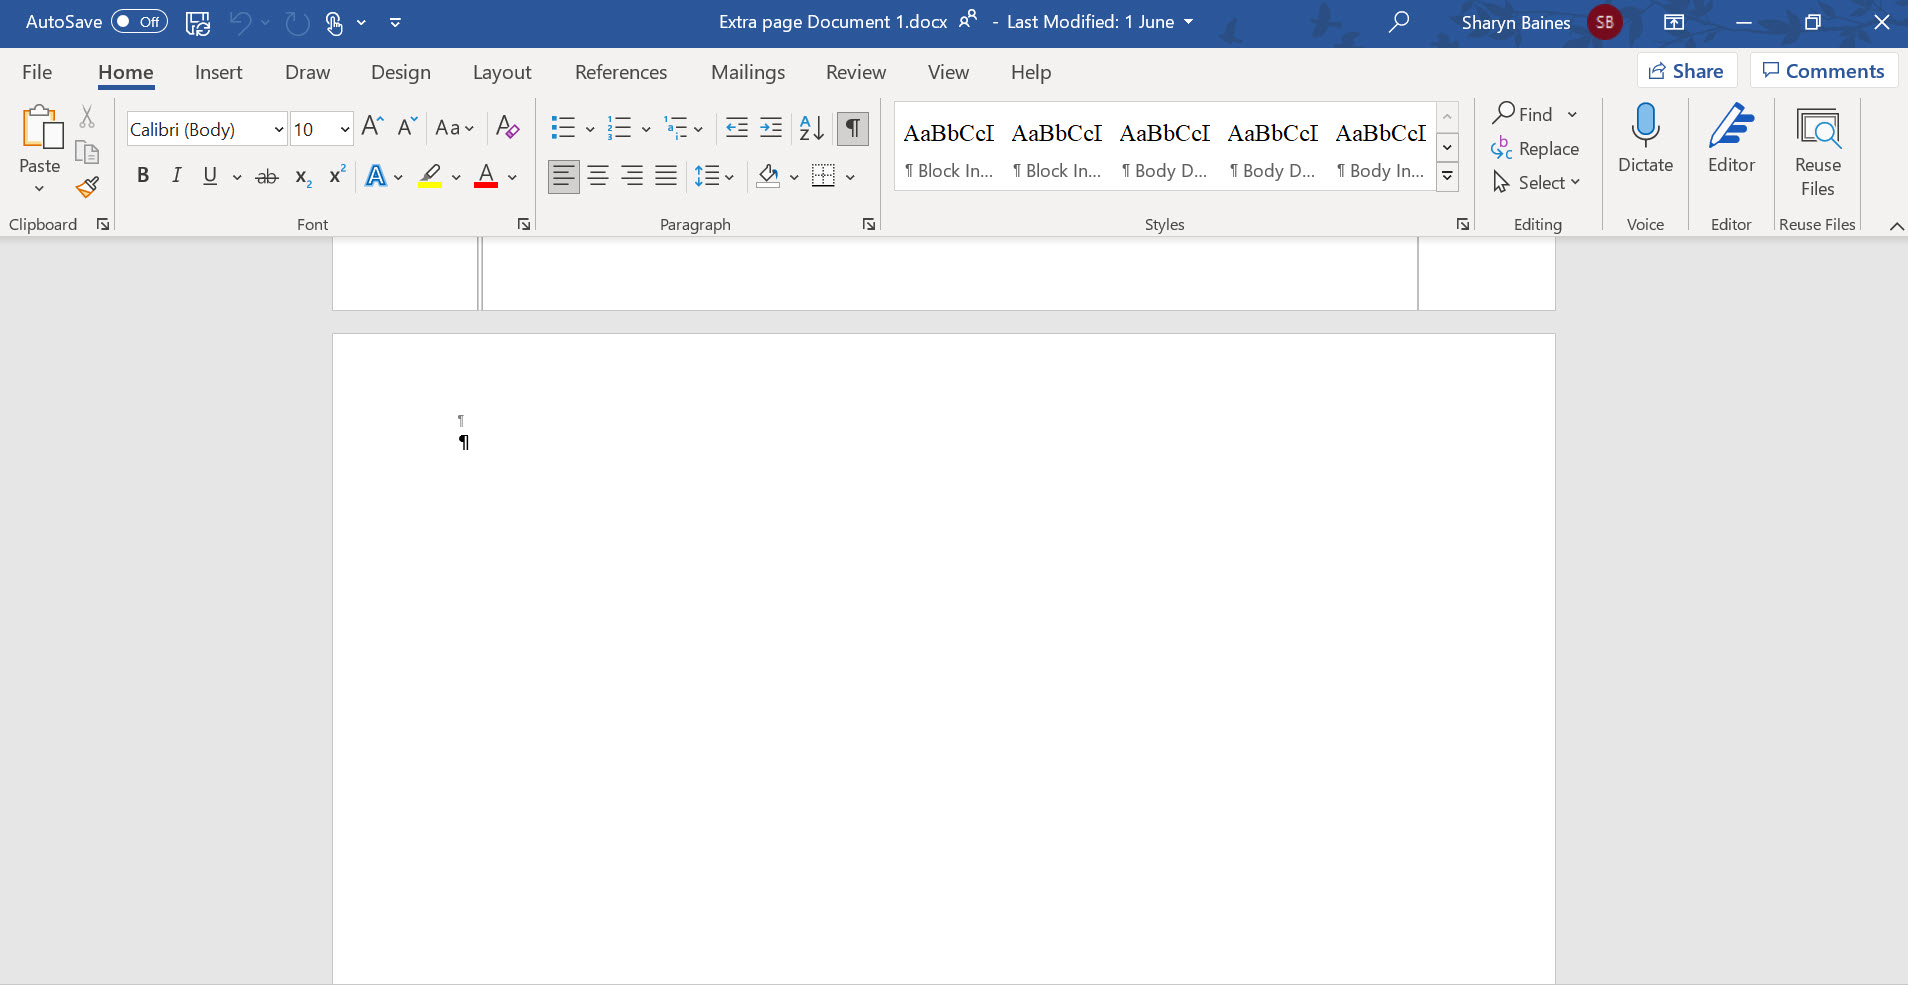
This last page isn’t useful at all and needs to be removed from the document.
However, it can be super frustrating when you try to remove the unwanted page only to find your pleading numbers, headers and footers have disappeared from the document.
The problem is linked to the different Section Breaks within the document.
What are Section Breaks?
Our example document has been formatted using Sections.
Microsoft Word uses Sections to lock off parts of the document so that you can apply different formats to each section without these formats affecting any other part of the document.
For example, sections are used so that you can have different headers, footers or page numbering within the one document. Section 1 can have a different header from Section 2, and so on.
Each section is contained using Section Breaks.
Section Break symbols indicate where one section finishes, and another starts.

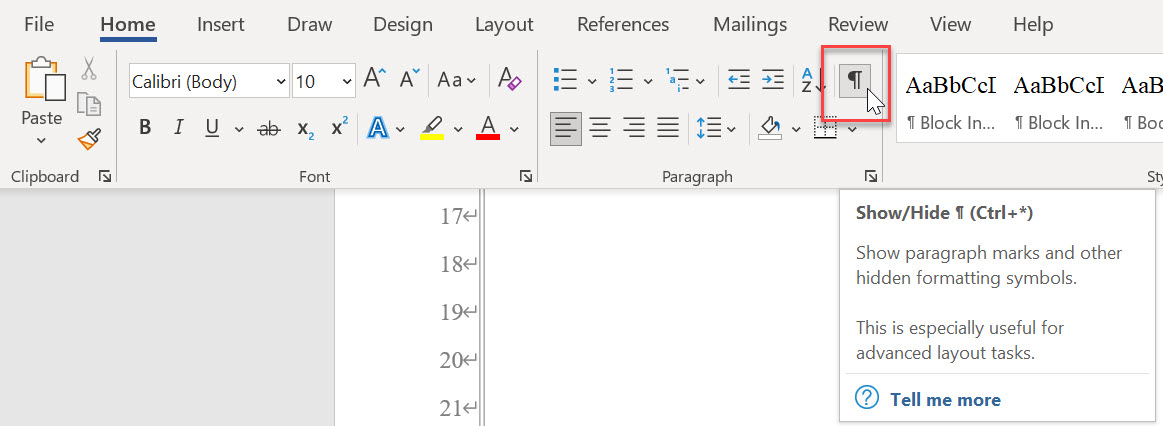
Tip: To see Section Break symbols in your document, go to the Home tab and select Show/Hide characters.
Why are Word Section Breaks causing the issue?
In our example, the first pages of the document are included in Section 1. These have the line numbering.
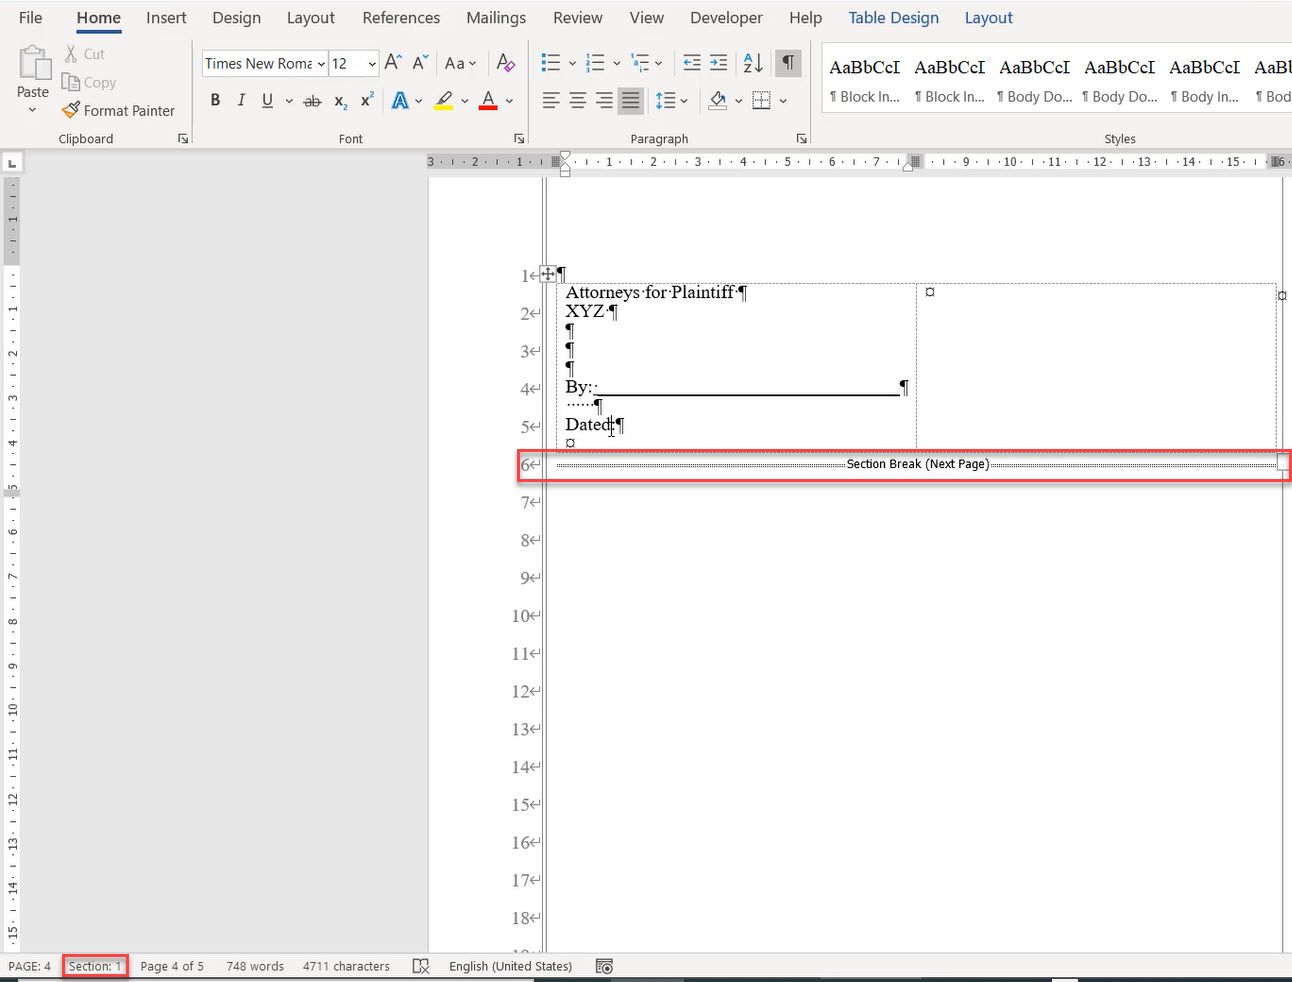
The extra page of the document is in Section 2 of the document. We can see this simply by clicking on to the page and then checking the Section number in the Status Bar at the bottom of the screen (see below).
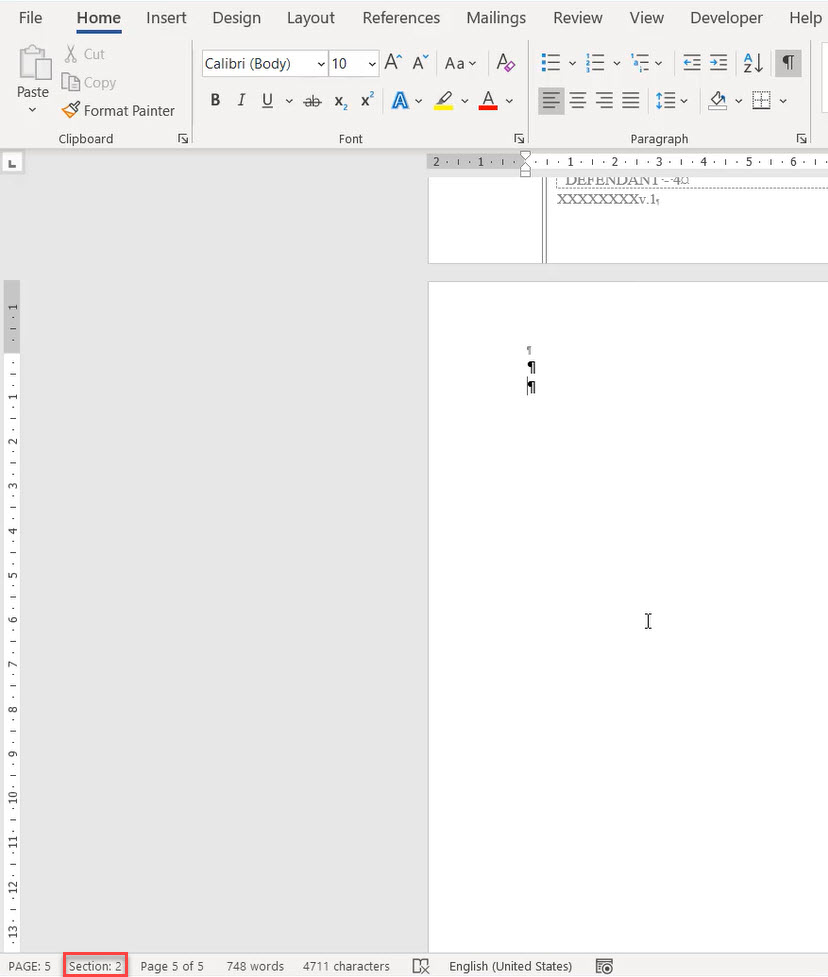
Section 2 is formatted differently from Section 1 in that it has no line numbering.
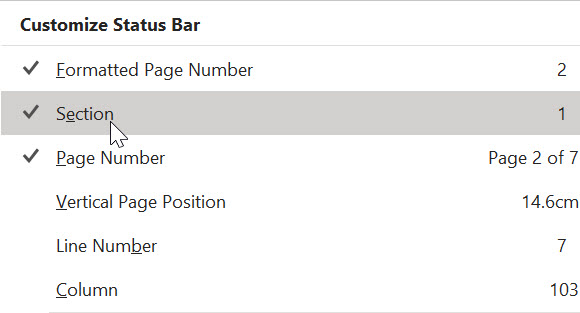
Tip: if you can’t see the Section number, right-click the Status Bar (the bar at the very bottom of the screen, where you can see the Page number) and then select Section from the Customize Status Bar list.
The problem is, when we try to remove the extra page, either using backspace to remove the extra paragraphs or deleting the Section Break, Word also removes the line numbers from Page 1 (as shown below), which isn’t ideal in a pleading document.
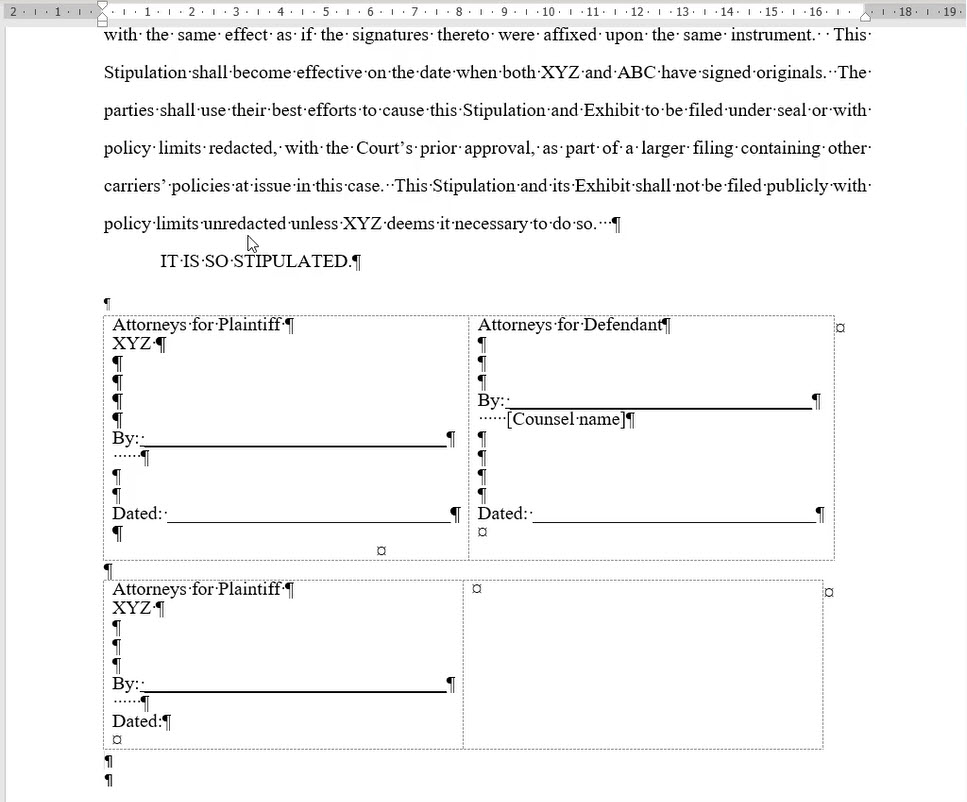
This is all linked to the different format settings in Section 1 and Section 2.
Let’s walk through the steps that will allow you to remove the section break AND keep the numbering.
Fix # 1 Delete the Section break and keep the numbers
To be able to delete the extra page we must first understand how each section within the document is formatted.
Click on to any paragraph on the first page of your document and take note that the numbering shown on the page is greyed out. This is because the numbers actually live in the Header area of the document, not in the actual document body text.
Make your way to the extra page. Click your insertion point on to a paragraph on this page. In our example this page is in Section 2.
You will notice that this page no longer has numbers, unlike Section 1. This is because Section 2 has a different header setting than Section 1. Section 2 has no header.
Follow the steps below.
Step 1: Make sure you are on the extra page and then from the Insert tab click Header, Edit Header. The Header& Footer tab will be displayed and your insertion point will be in the Header area. In our example we are in Section 2.
As you can see that there are no line numbers in Section 2 of this document.
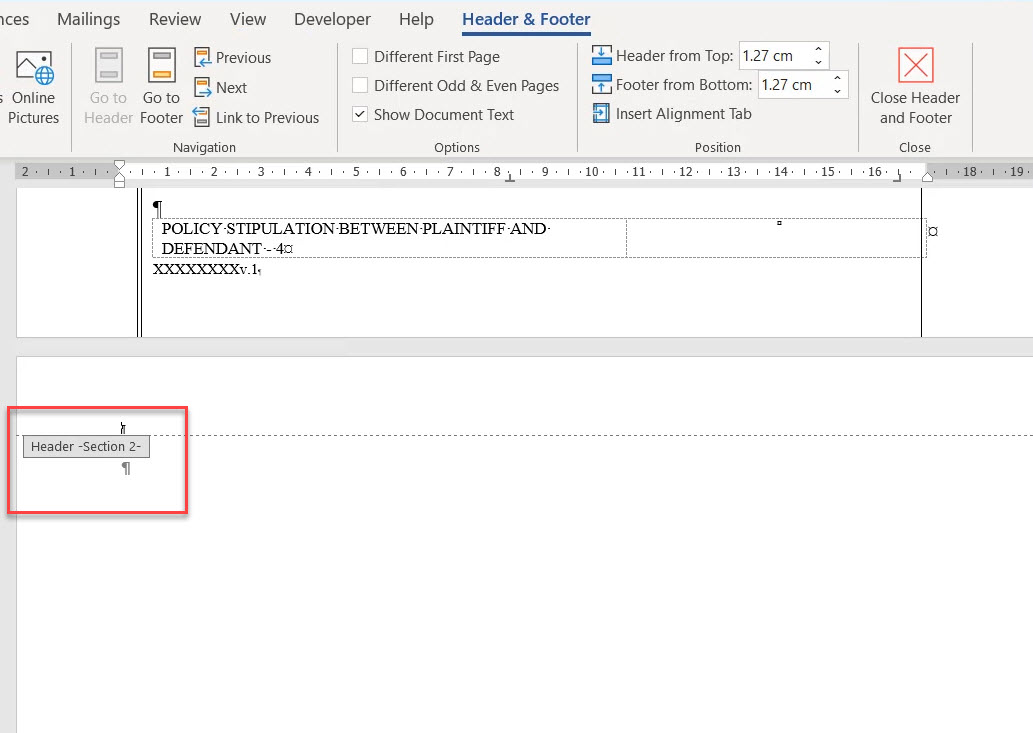
Step 2: When you make your way up to the previous section (Section 1) you will now be able to see the line numbers. If you needed to you could at this point make edits to the numbers from here.
Super tip: To move to the previous section in a Word document, in the Header & Footer tab select Previous and this will move you up to the section above.

The different Headers is where the issue lies.
Each section within the document has different settings. Section 1 has the numbers and Section 2 doesn’t. When we delete the section break between the two sections, Section 2 becomes Section 1 and since Section 2 does not have line numbers, the line numbers are removed from the document.
If this is happening to you try the following steps to correct your file.
Step 1: Make sure your insertion point is on the extra page (Section 2), and then from the Insert tab click Header, Edit Header.
Step 2: On the Header & Footer Ribbon, click Link to Previous. This will link this section to the previous section (Section 2 to Section 1).
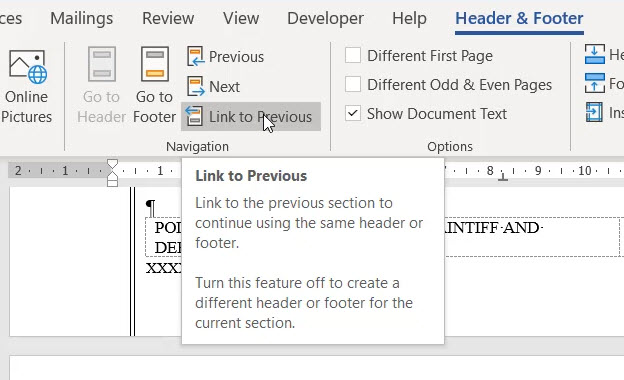
Step 3: A confirmation will pop up asking ‘Do you want to delete this header/footer and connect to the header/footer in the previous section?’

Step 4: Select Yes. This will now delete the Section 2 header (which has no numbering) and connect it to the Section 1 header (with numbers).
Step 5: You should now have line numbers on the left of your document as you have linked the header from the previous section to this section, therefore copying the content of Section 1 into Section 2.
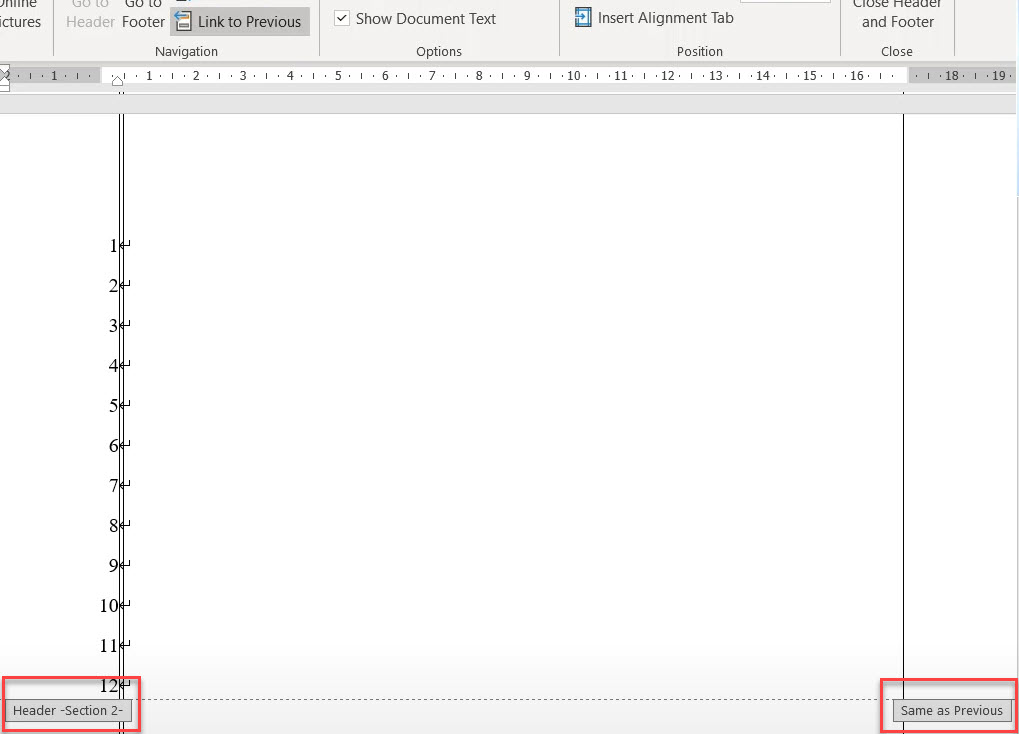
Note: if only a few numbers have copied over into Section 2 you might like to check your margin settings are the same as Section 1. To do this just click on to a page in Section 1 and check the margin settings. Now return to Section 2 and make sure that the settings are the same as Section 1.
Step 6: If you need to link the document footer through to Section 2, click the Go to Footer button on the Ribbon and then follow the same process as step 2 above to link the footer in Section 2 to the footer in Section 1.
Unlink the Headers and then remove the Section Break in Word
Once the headers and footers are linked, Section 2 will now be a replica of Section 1.
Now you need to unlink the sections so that they are no longer connected.
This then allows you to make changes to either section without the changes being updated in both sections.
Step 1: To unlink the two sections, click Go to Header and then click Link to Previous again to remove the link. If required, click Go to Footer and do the same.
Step 2: Now click Close Header and Footer to return to your normal document view.
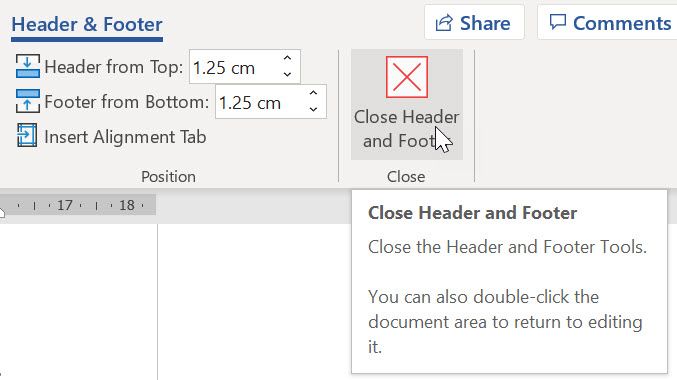
Step 3: Place your insertion point in front of the section break symbol between Section 1 and Section 2 and then press DELETE.

Step 4: Because Section 2 was a replica of Section 1 your numbers will remain.
Linking the sections to copy the content from the first section into the next is so helpful. Once this is done it’s just an easy unlink and then delete to remove the section break that's creating that last unwanted page.
Of course, it is a bit tricky but I’m hoping that the steps above have helped.
Fix # 2 Remove the Header Different First Page option
If the steps above still haven’t helped and you still have an extra page, let's look at another setting that may be causing the problem.
It may be that your document has an extra setting selected in the Header & Footer tab.
To check this, either double-click the header or footer area in your document or from the Insert tab select Header, Edit Header.
Now check to see if the Different First Page option is checked. If it is, this could be your problem.
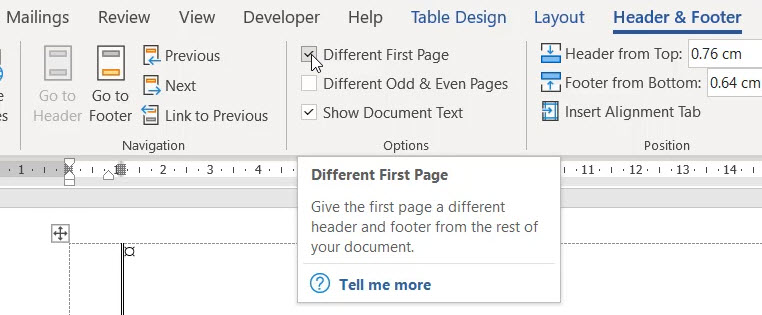
When this option is turned on it creates a section-within-a-section.
What that means is within one section it's almost like you've got two sections because you can have a different first page from following pages in the one section. For example, the first page in Section 1 can have different formats from all other pages in Section 1.
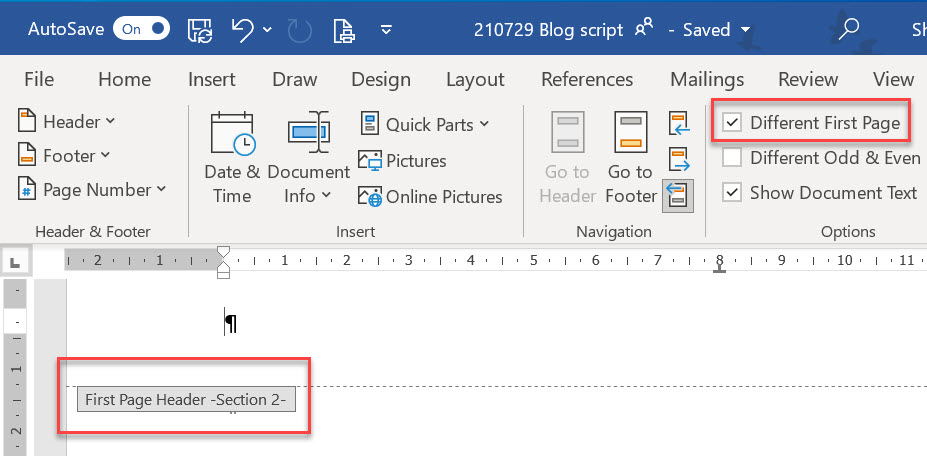
I know, very confusing right?!
So possibly what's happening is when you’re deleting the section break it’s sucking up the formats from the Different First Page section which most likely doesn’t have numbers.
To stop this from happening remove the check from the Different First Page option box.
Make sure you do the same in the Footer area too.
Click Close Header and Footer to return to your document.
Now try deleting the section break so that you remove the extra page.
I’m hoping these steps have now removed the page and kept your line numbers.
For a deeper dive into these steps please check out my YouTube video.
Was this blog helpful? Let us know in the Comments below.
If you enjoyed this post check out the related posts below.

