Are you having trouble with your Word Table splitting?
Are you wanting to prevent your Table breaking in between sentences and paragraphs in the same row?
If this sounds like you then you have come to the right place.
Having your Table break onto multiple pages is a common issue but there are easy ways to solve it.
In this blog I’ll cover several ways to keep your Word Table from splitting across pages along with a super tip on how you can repeat the Header Row when a Table breaks on to another page, AND tips on how to distribute rows when you are left with a large gap when a Table split is unavoidable.
When a Word Table breaks across pages
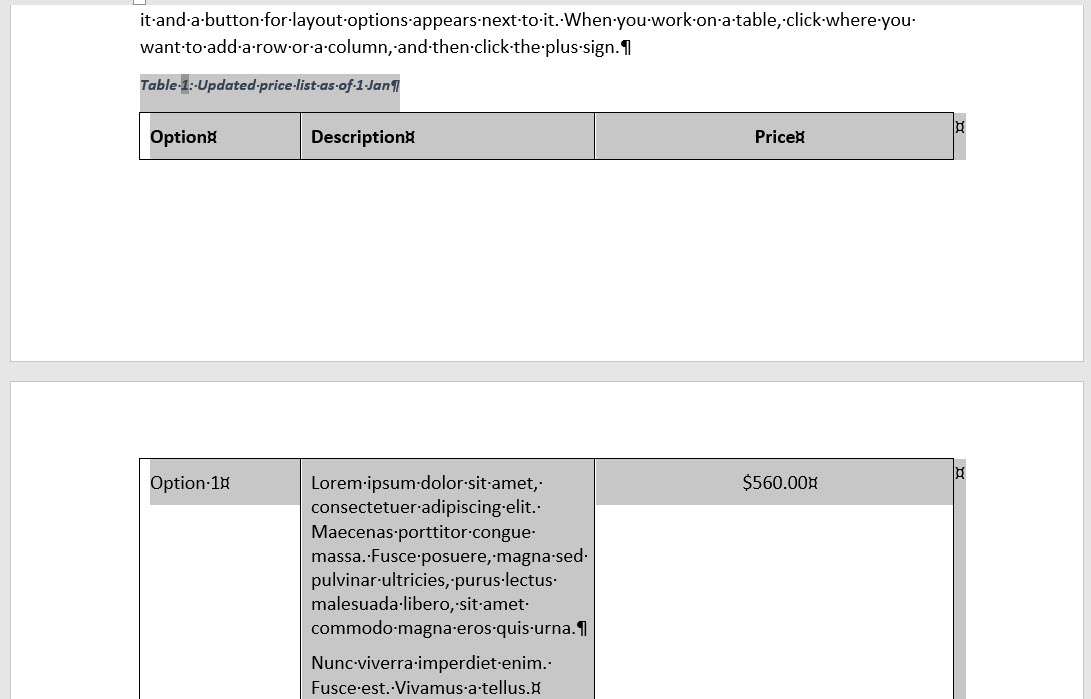
Below is an example of a Table splitting in Word, where you can see the second row of the Table is splitting and continuing on page 2.
Not only can the break make it difficult to read the information in the Table, but it doesn’t look that great either.
In our example the row holding information about ‘Option 1’ has been split over 2 pages. Additionally, the Table headings have remained on page 1, leaving the rows on the following pages with no headings at all.
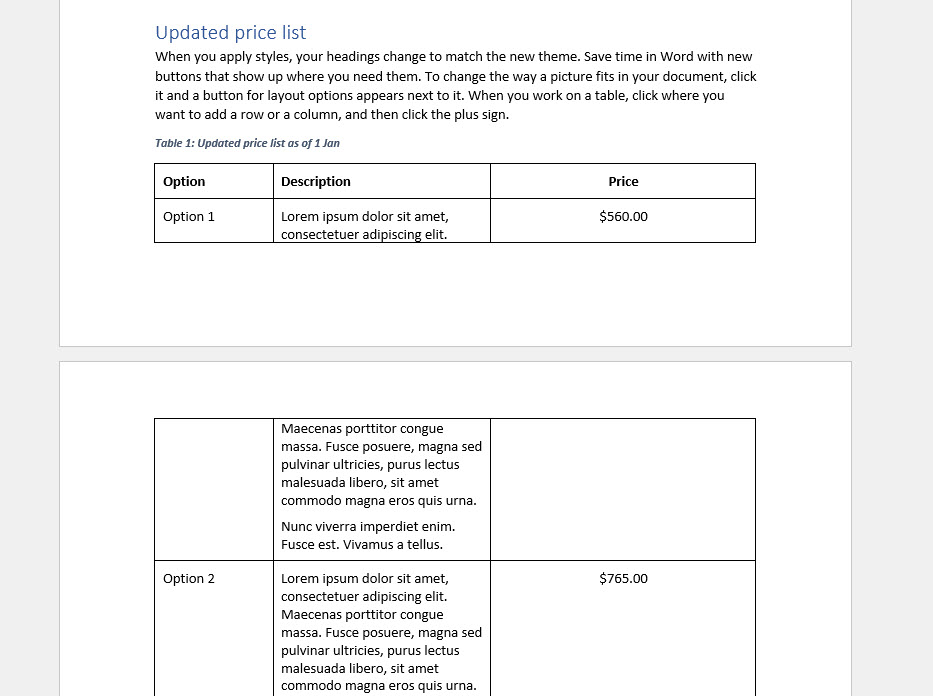
Let’s look at how we can easily stop Word from splitting a Table across pages.
1. Stop a Table row breaking across pages
It’s common for a Table row to split across pages.
You can try resizing your columns to see if a wider column allows the row to stay on one page, or you can tell Word that the row must not be split.
To prevent your Word Table row splitting across pages follow these steps.
Step 1: Click into the Table row that is breaking on to the next page.
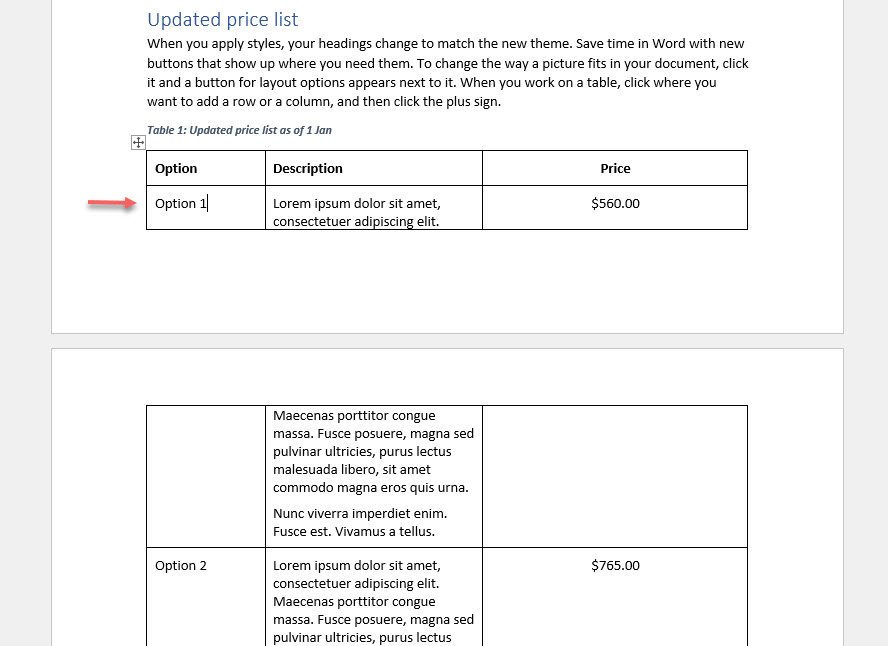
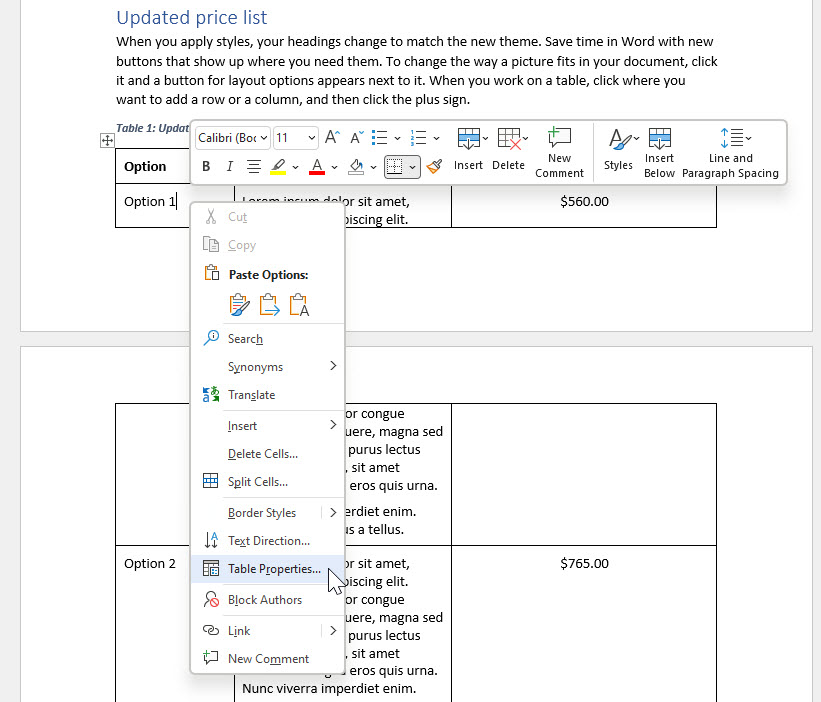
Step 2: Right-click and select Table Properties from the list.
Step 3: In the Table Properties dialogue box, select the Table tab.
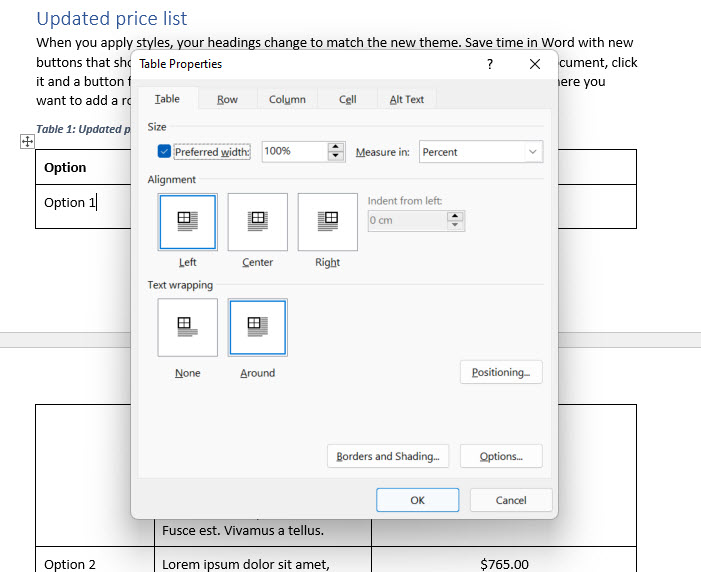
Step 4: Under Text Wrapping, check that the option is set to None.
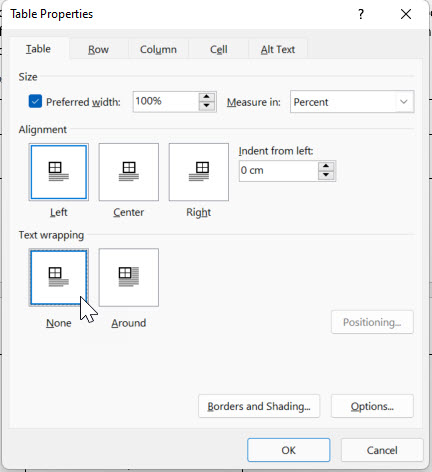
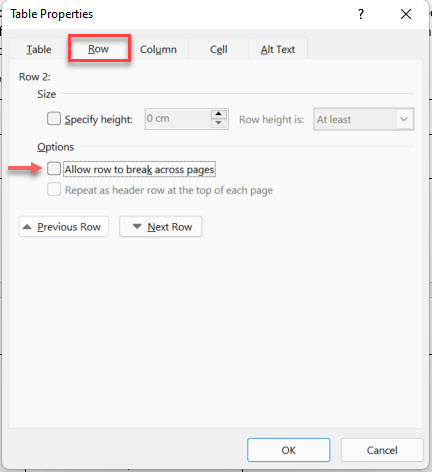
Step 5: Go to the Rows tab and uncheck the Allow row to break across pages option.
Important: if you skip to Step 4 without checking Step 3 you may find your Word Table row will still be breaking across pages.
Note: Removing Allow row to break across pages means you don’t want the row of your Table to break on to a new page.
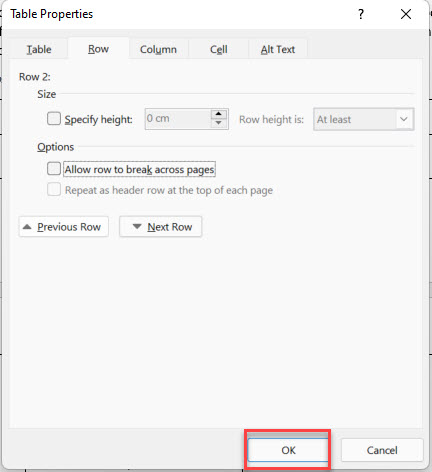
Step 6: Click OK.
The entire row should now be on the new page.
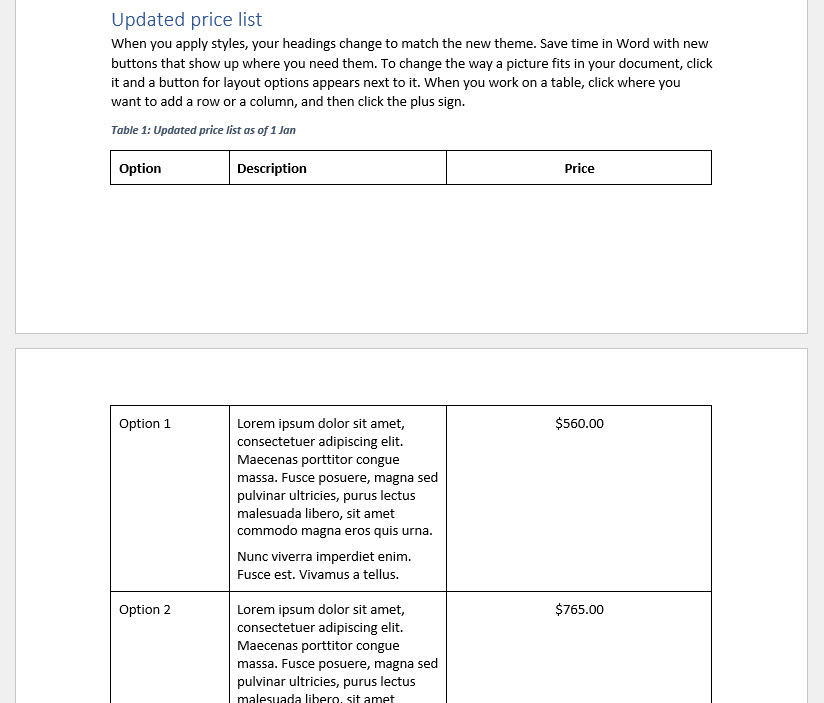
This option is great when you are wanting to stop a single row from splitting on to the next page.
However, when you need to keep paragraphs outside of the Table, like captions, or certain rows together on the same page you may like to use fixes 2 & 3 below.
2. Keep external paragraphs and selected rows on the same page as the Table
In our example, the Table caption and the Heading Row are still left on the previous page.
This can make it more difficult for others to read the information in the Table and understand what it relates to.
It also will result in any cross-references to the Table caption incorrectly referencing the page that the caption is on when most of the Table is on the following page.
If this is happening to you and you want certain paragraphs and headings on the same page as the Table, follow the steps below.
Step 1: Select everything that needs to stay together. In our example we will select the paragraph that holds the caption, along with row 1 and row 2.
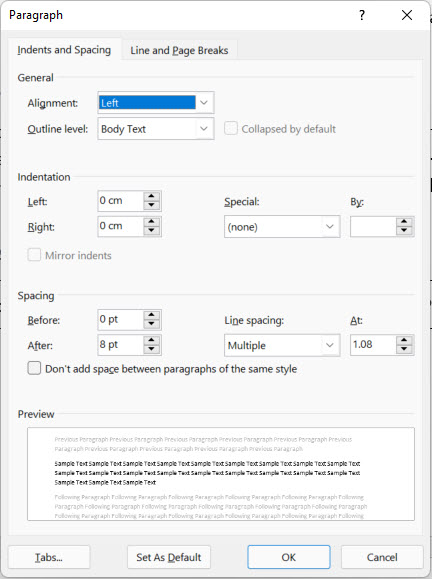
Step 2: On the Home tab, select the dialogue box launcher for the Paragraph Settings which is shown as a little arrow at the bottom right of the Paragraph area.

This will open the Paragraph Settings dialogue box.
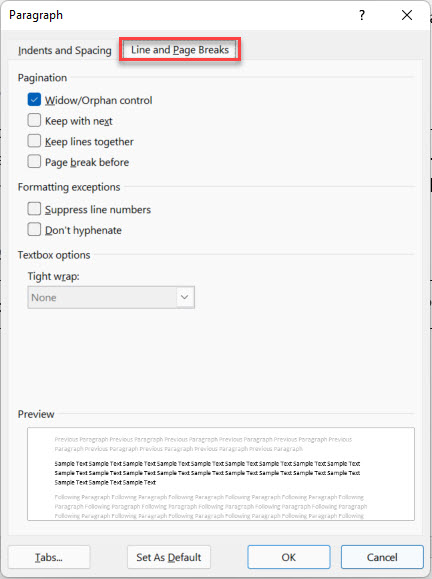
Step 3: Select the Line and Page Breaks tab.
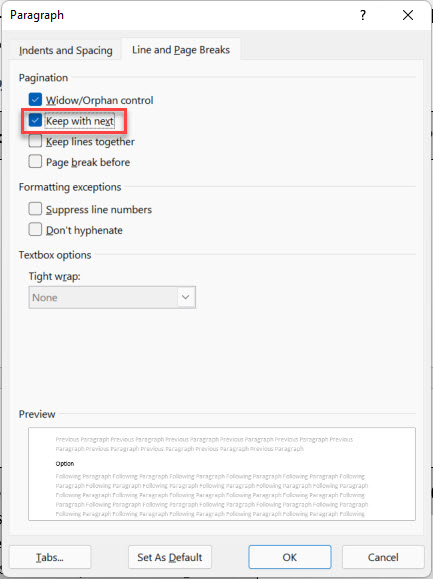
Step 4: Click the option Keep with next.
Note: Keep with next means the caption and Header Row will travel with the next paragraph of information.
Step 5: Select OK.
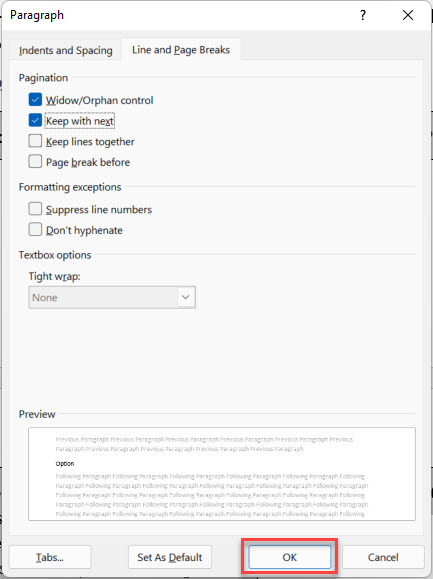
The selected information will now travel together and stay on the same page.
In our example the caption paragraph, the Header Row and the 2nd row of the Table are now on the same page.
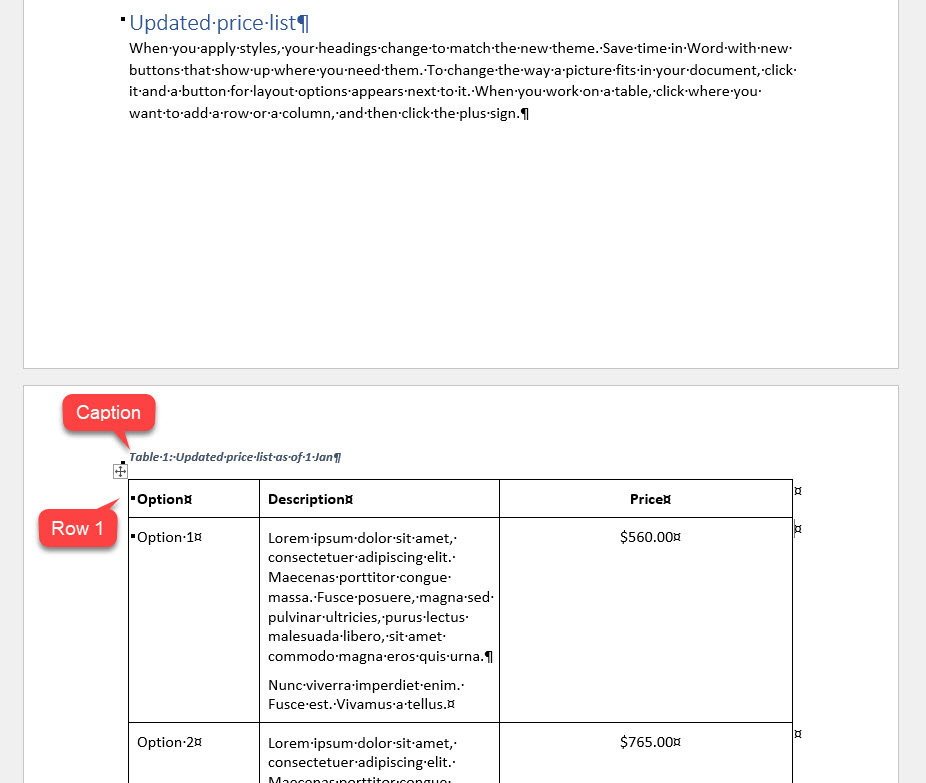
Tip: Show/Hide characters are good to have turned on if you are trying to identify where parts of your Table have a pagination setting, such as Keep with Next.
If you want to turn these on go to the Home tab and select Show/Hide.

In our example, with Show/Hide turned on you can see little black squares to the left of our paragraphs.
These symbols show we have applied a pagination setting. In this case, the Keep with next setting.

3. Prevent a page break from separating a row from the next row
When you want to keep related rows together on the same page do the following:
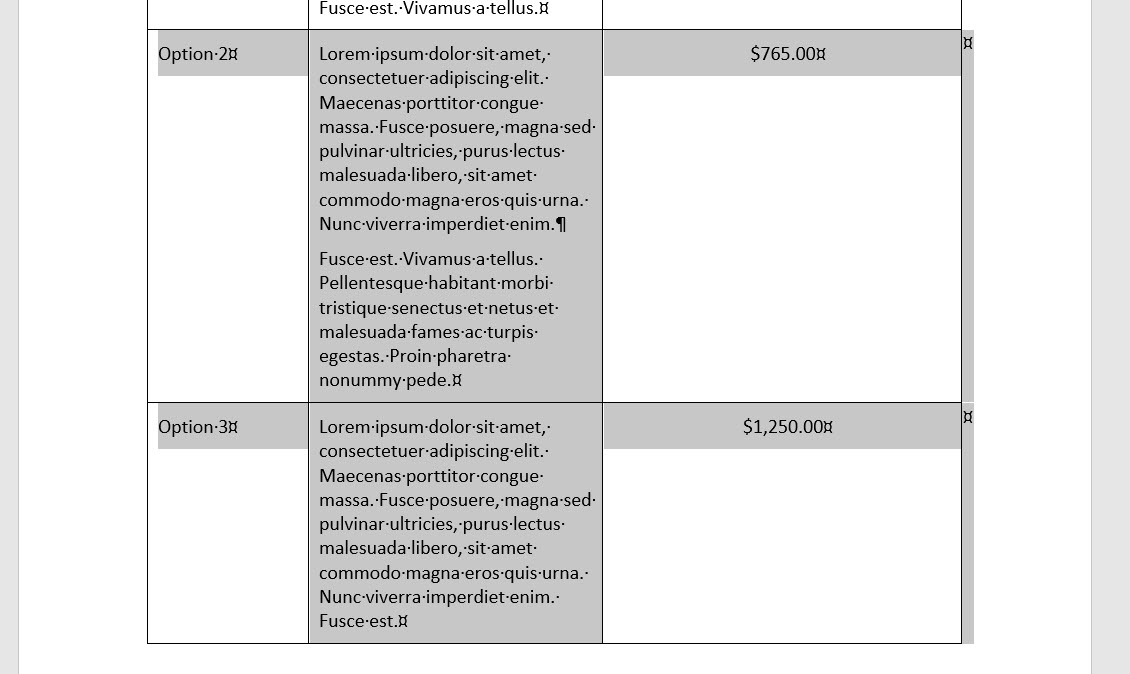
Step 1: Select the rows you want to keep together on the same page .
Step 2: On the Home tab, select the dialogue box launcher for the Paragraph Settings which is shown as a little arrow at the bottom right of the Paragraph area.
Step 3: Select the Line and Page Breaks tab.

Step 4: Click the option Keep with next.

Step 5: Select OK.
The selected rows will now travel together and stay on the same page.
Repeating the Header Row on every page of the Table
In our example we now have an orphaned row on a new page without a Header Row.
This makes it very difficult for readers to understand what the information within the orphaned row represents.
To fix this we can tell Word to repeat the Header row from the following page on to any new pages the Table travels on to.
There are two different options that we can use to repeat the Header row of a Table.
Option #1 Repeat Header row on every page setting in Table Properties
In this option we will use the Table Properties to repeat the Header Row on each page.
To do this, follow the steps below.
Step 1: Click into Header Row.
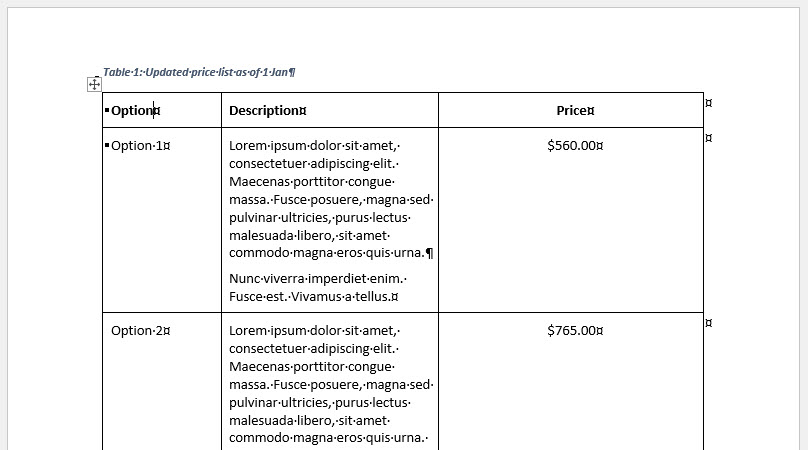
Step 2: Right-click and select Table Properties.
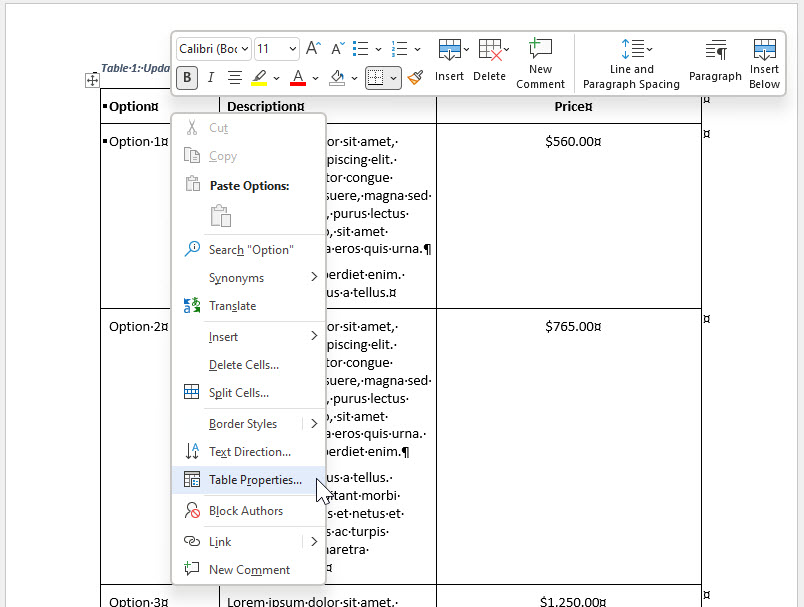
Step 3: Go to the Row tab and select Repeat as header row at the top of each page.
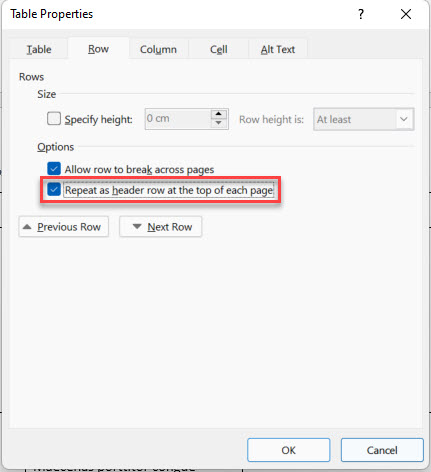
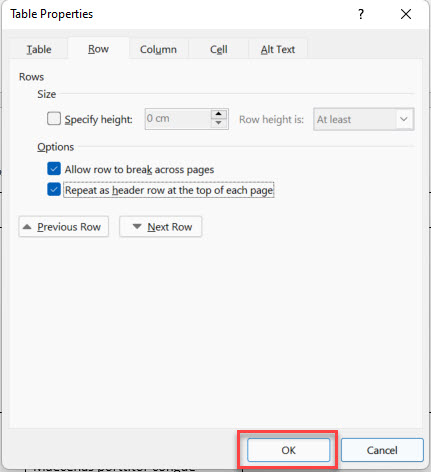
Step 4: Select OK.
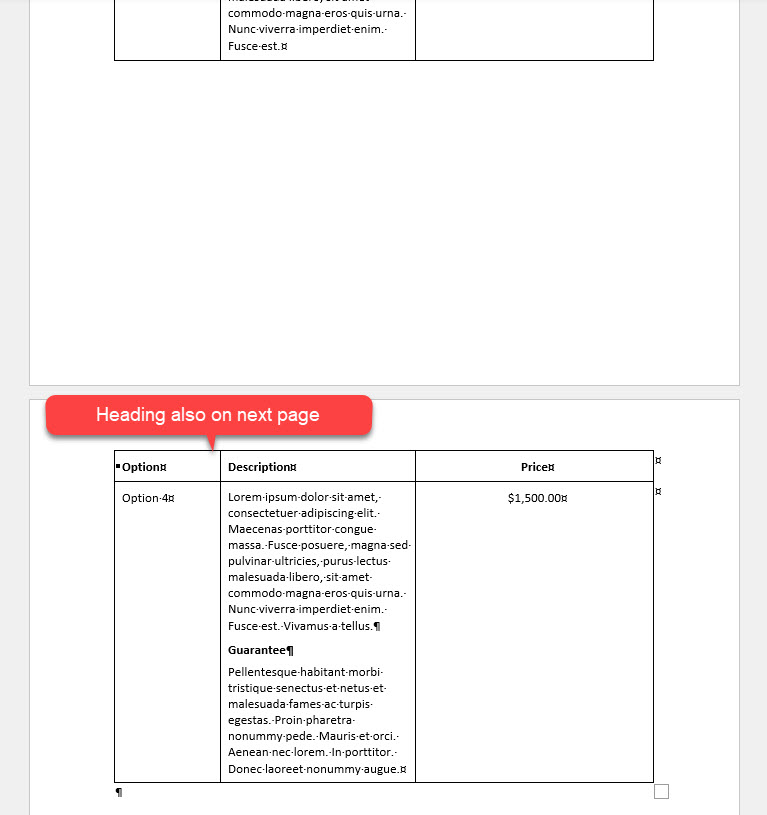
The header should now be repeated at the top every page that contains the Table.
Option #2 Repeat Header row on every page button on the Layout tab
In this option we use the Layout tab to repeat the Header Row on each page.
You can do this following the steps outlined below.
Step 1: Click the Header Row.

Step 2: Go to Layout tab.
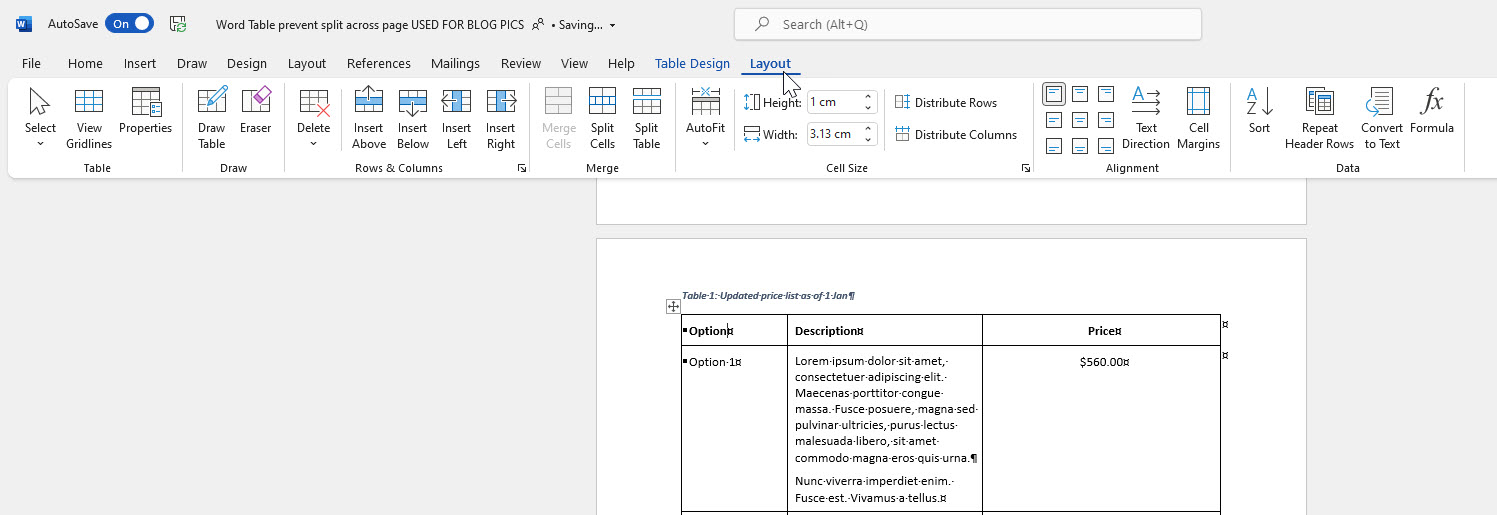
Step 3: Select Repeat Header Rows.
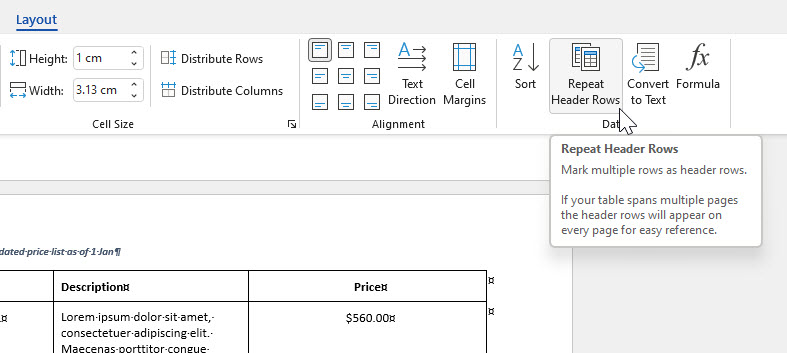
The header should now be repeating on all pages that contain the Table.
You can also turn it off by selecting Repeat Header Rows again.
Tips for balancing Table rows
In our example for fix number 2, the bottom row of our Table split on to the next page due to the Title row and caption being moved onto the same page as the Table.
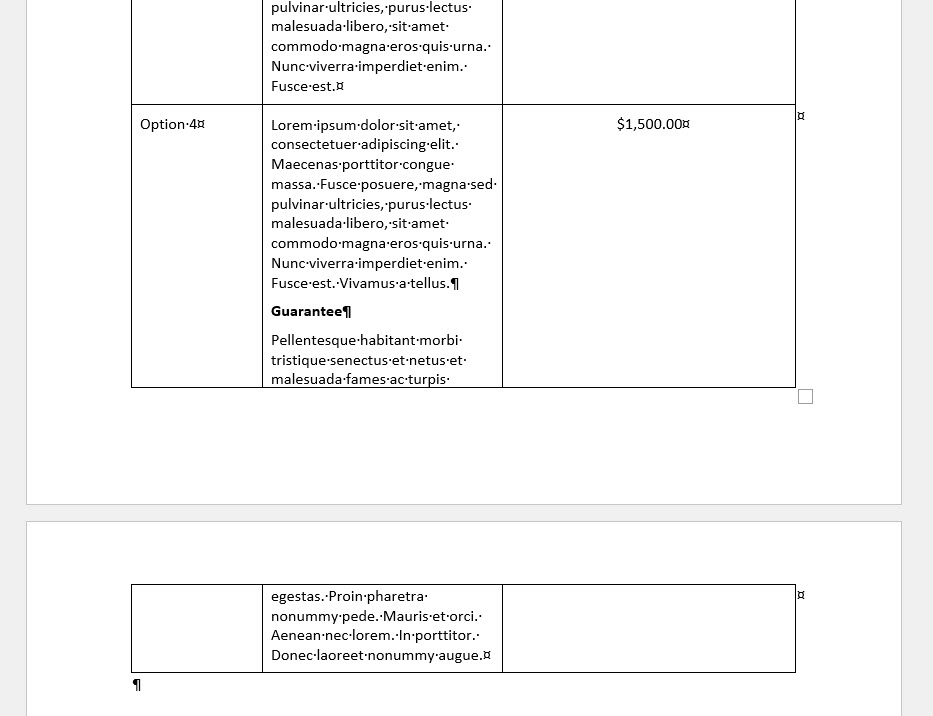
To ensure the entire row is included on the page we can repeat the steps we have already covered in fix number 1 and then balance the row height.
Step 1: Click into the row.
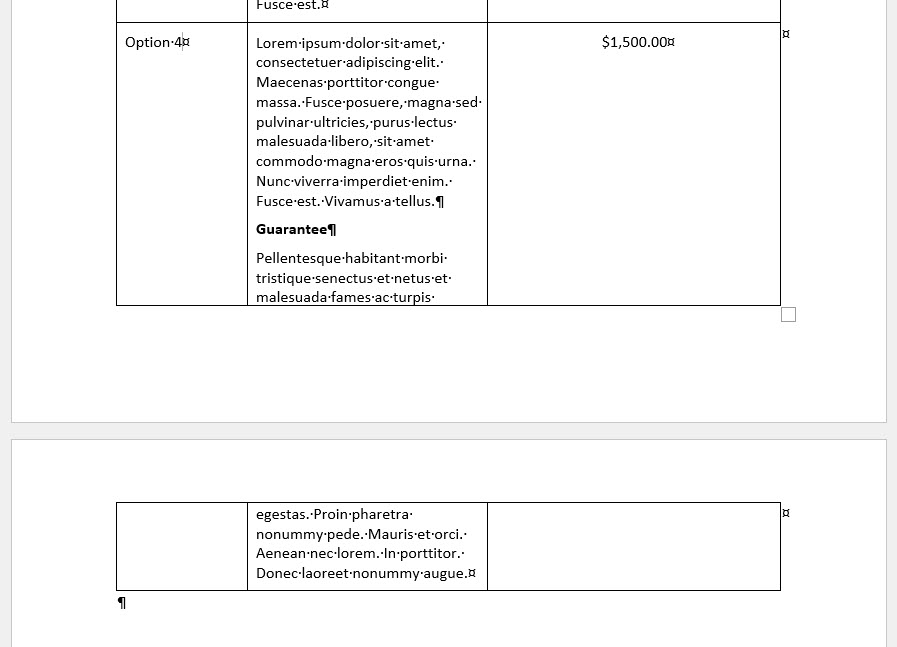
Step 2: Right-click and select Table Properties.
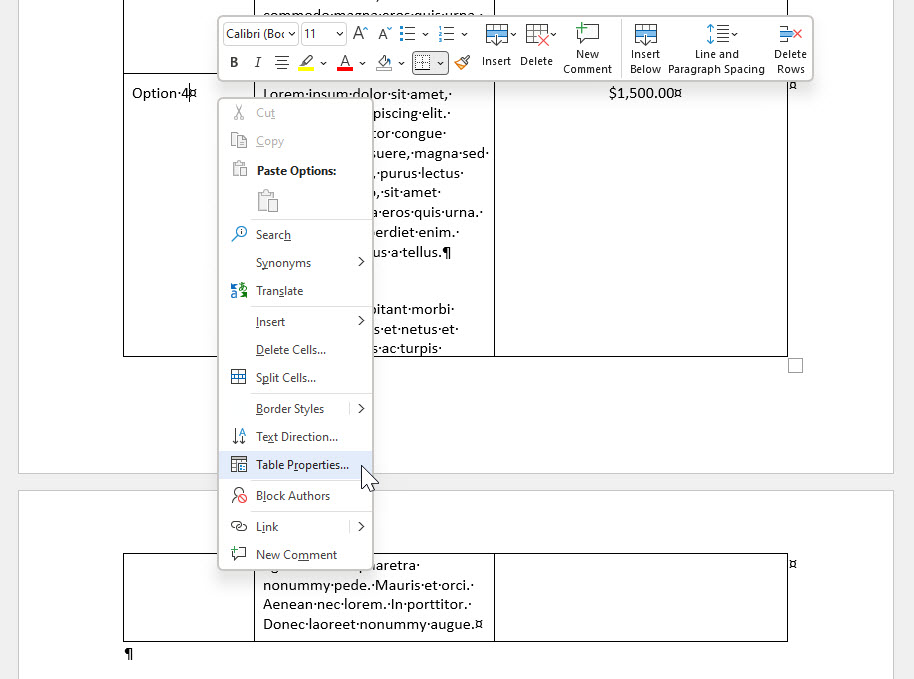
Step 3: Go to the Row tab.
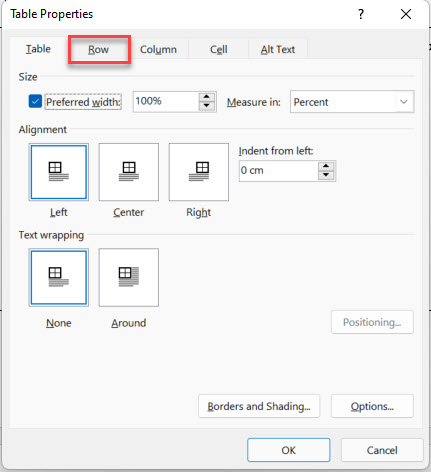
Step 4: Unselect Allow row to break across page.
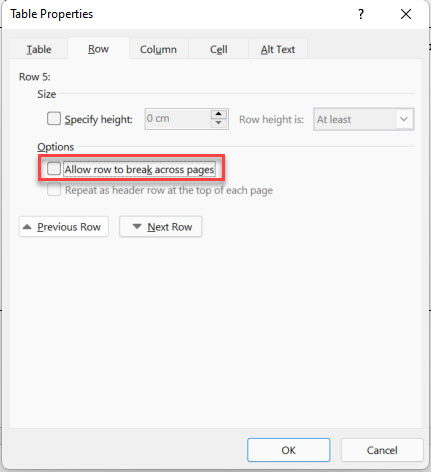
Step 5: Select OK.
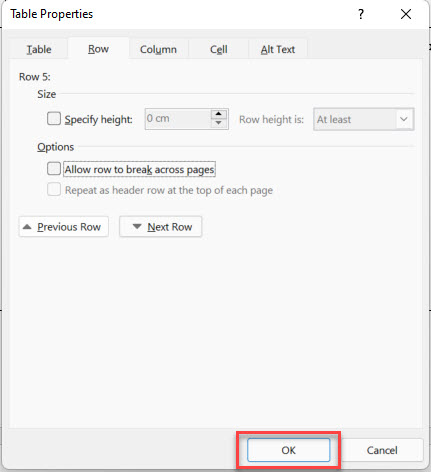
The entire row will now be pushed onto the next page.
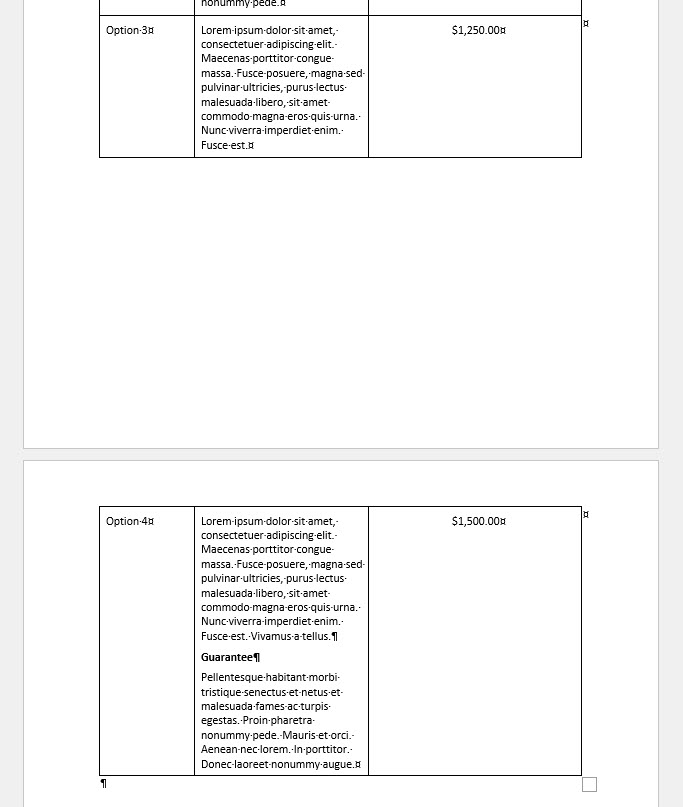
However, the Table rows are now unbalanced and there is a large gap at the bottom of Table on the previous page.
If you don’t like the gap that is left between rows, you can play around with line and paragraph spacing to see if you can fit it onto one page or minimise the gap size.
Here are some helpful tips to get your Table rows more balanced on the page.
Tip #1 Use Distribute Rows
To balance the Table rows so that they are equal height select the Table rows you want to distribute evenly and then from the Layout tab click Distribute Rows.
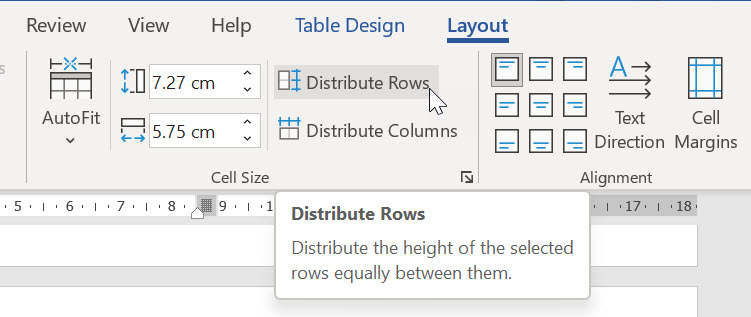
The rows of your Table will distribute equally.
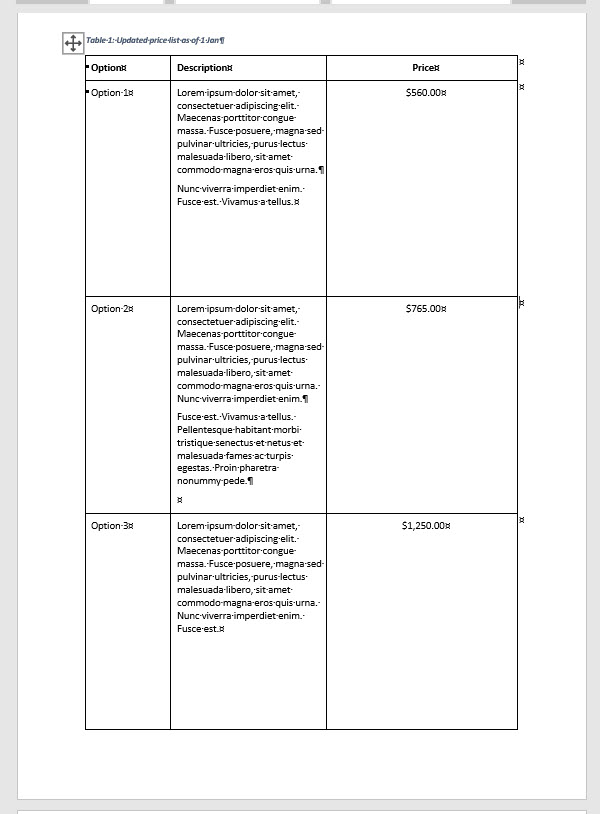
Tip #2 Change the Line and Paragraph spacing within the rows
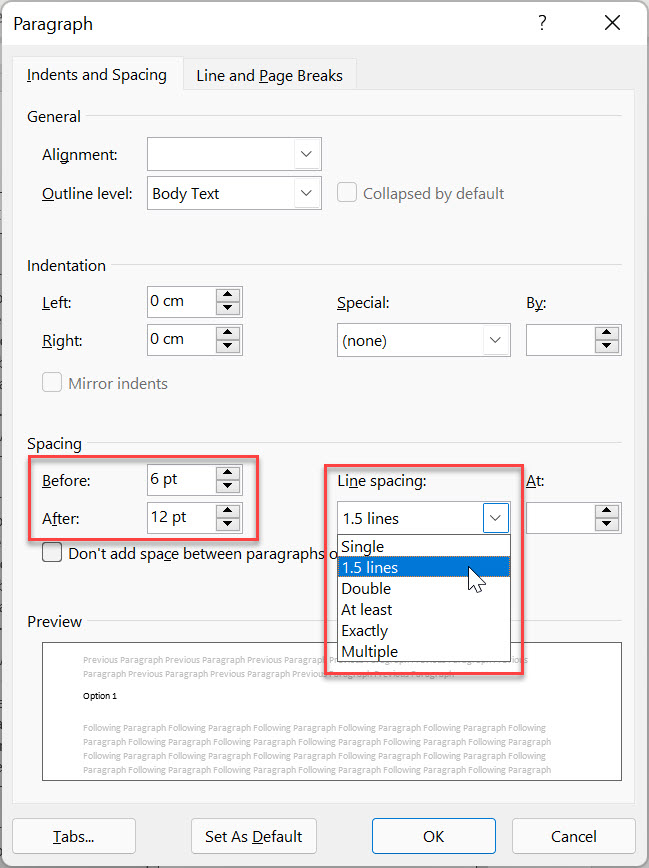
You can also increase the Line and Paragraph spacing options to increase the amount of space used inside a Table row.
When more space is needed the height of the row will increase, therefore filling up the gap at the bottom of the page.
To try this option, follow the steps below.
Step 1: Select the rows that you would like to balance.
Step 2: On the Home tab, select the dialogue box launcher for the Paragraph Settings which is shown as a little arrow at the bottom right of the Paragraph area.

This will open the Paragraph Settings dialogue box.
Step 3: Increase the Paragraph Spacing options for Before and After the paragraph, and/or increase the Line Spacing setting.
Step 4: Click OK.
The Table rows will now be more balanced on the page.
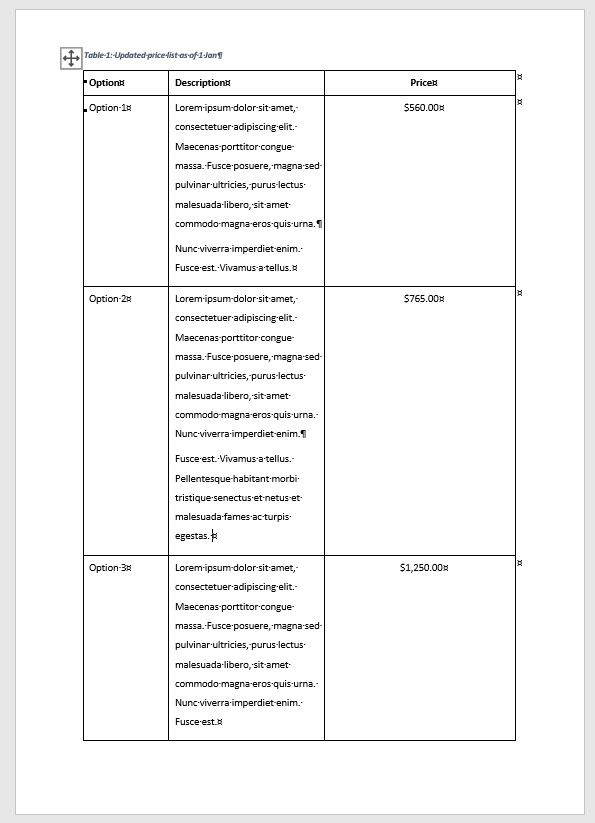
Tip #3 Click and drag to increase the height of each row
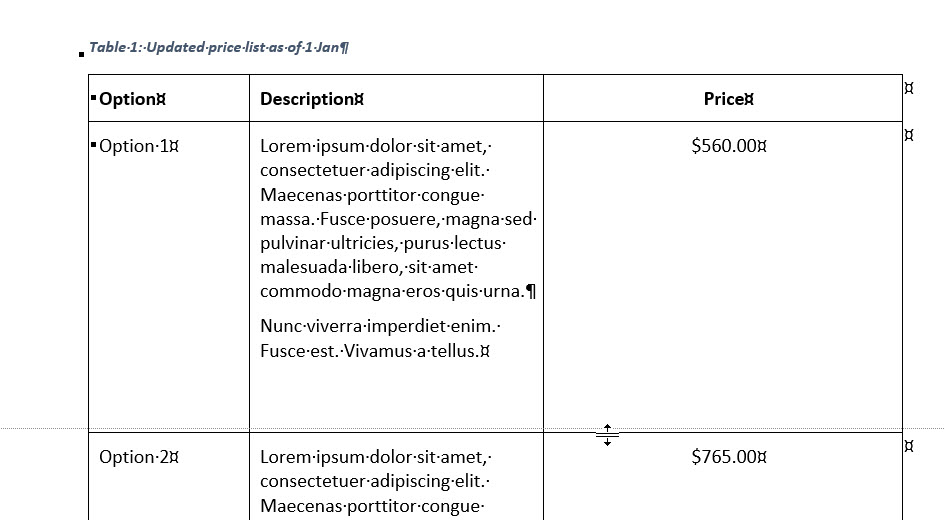
Place the mouse pointer over the bottom border of any row.
The pointer will change to include vertical arrows pointing up and down.
Click and drag the row border to give it the height you require.
Using this method, you can manually adjust the Table rows to fill up the white space at the bottom of the page.
To Sum up
I hope these steps have helped you to stop a Table from splitting across two pages and helped you control splits if they are unavoidable.
Preventing your Word Table rows from splitting and repeating the Header row on each page not only makes your document look great, it also improves the document flow for the reader.
If you want to follow along these steps with me, check out my YouTube video Word Table Do Not Split Across Pages.
If you want more information on how to work with split Tables in Word, check out our article, Word Tables allow rows to break across page which covers how to deal with your entire Word Table or row moving to a new page and leaving an unwanted gap.
Was this blog helpful? Let us know in the Comments below.
If you enjoyed this post check out the related posts below.

