Let's look at how to set row one to print on every page of your Microsoft Excel spreadsheet.
This feature is called Print Titles and it saves you from having to copy and paste your column headings wherever there is a page break in your worksheet.
How to set Row 1 on every page
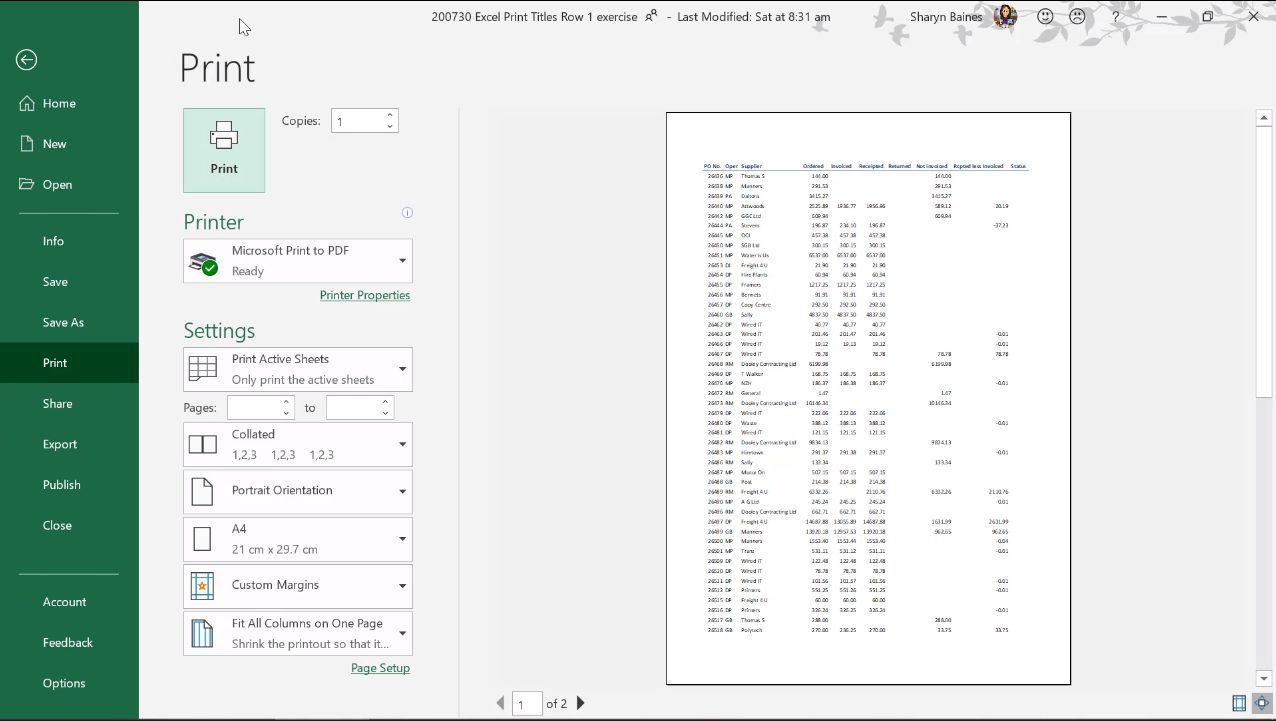
For example, let's have a look at this report in Print Preview.

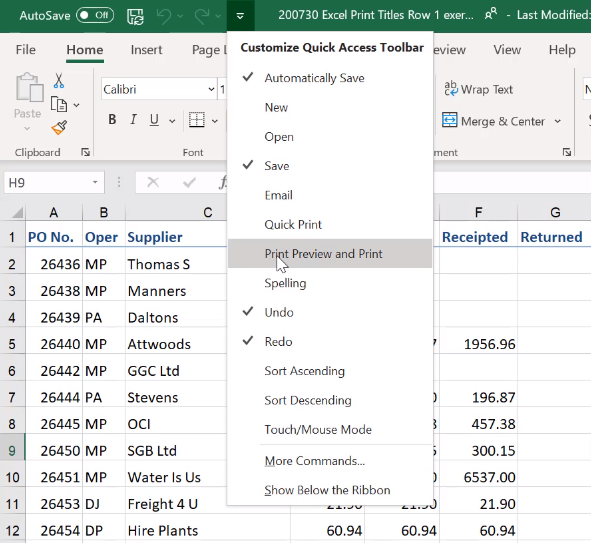
Useful tip: To save time add the Print Preview button to your Quick Access Toolbar so you can by-pass File, Print, and access Print Preview straight from the toolbar. To do this click the arrow at the end of the QAT and then select Print Preview and Print from the menu.
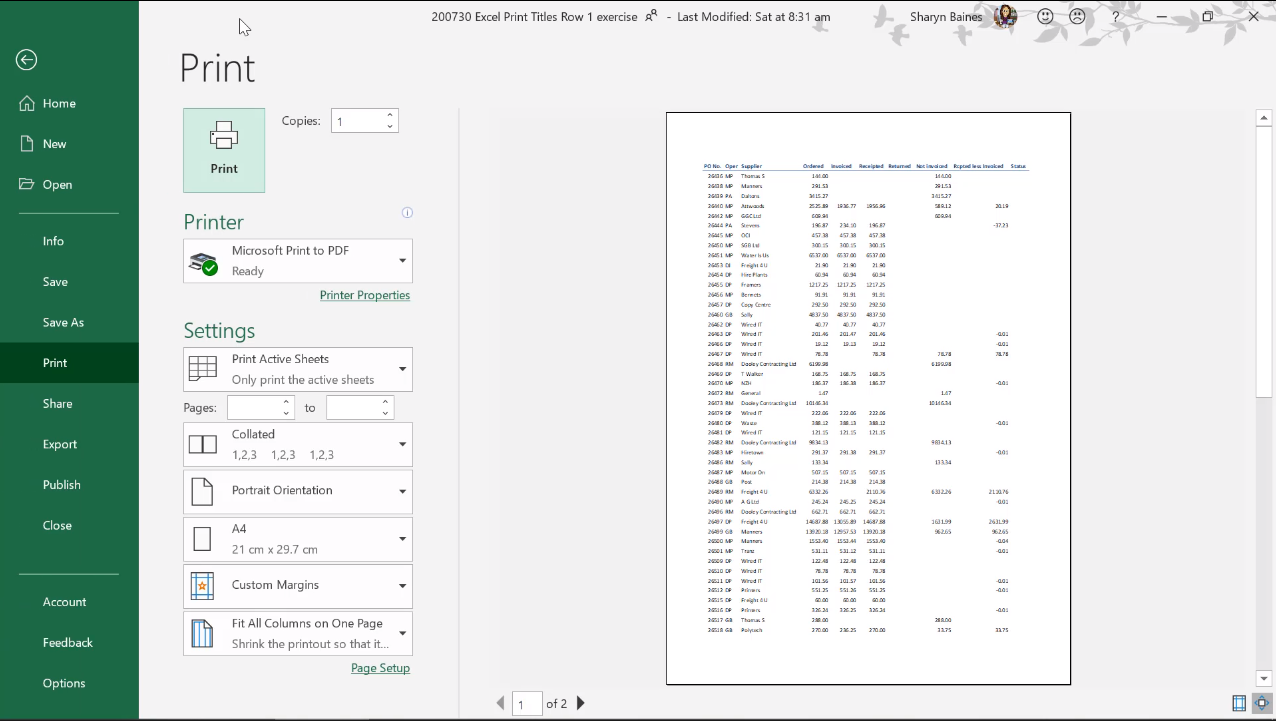
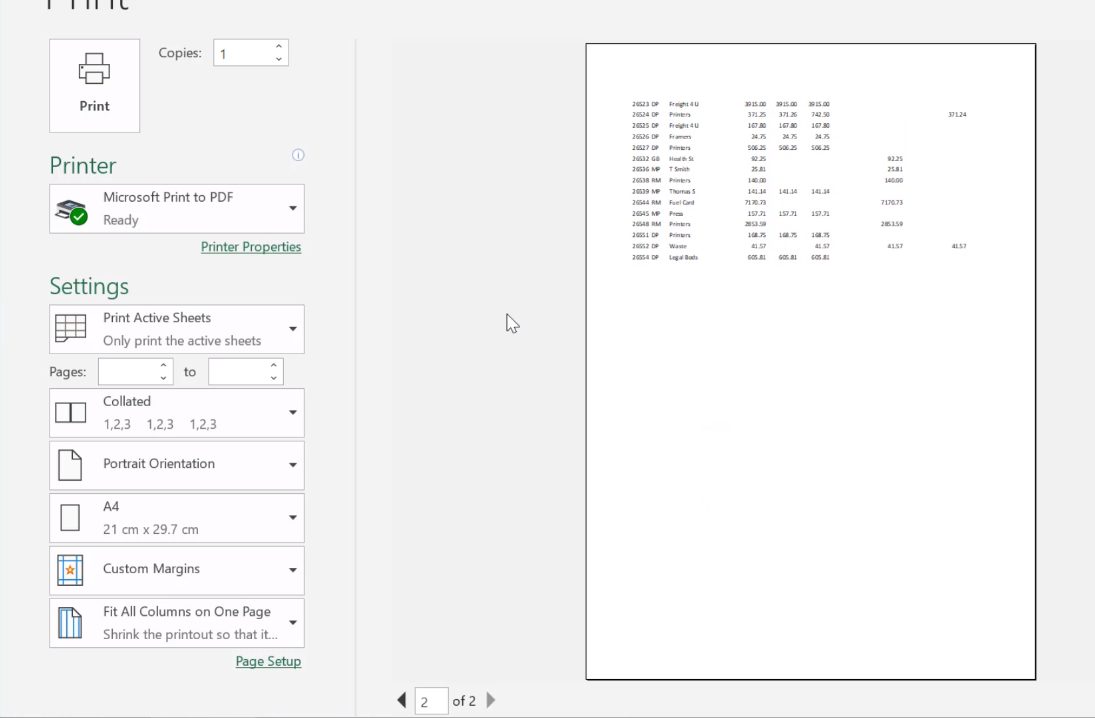
Here we are looking at a two-page report in Print Preview.
The first page has a heading row at the top of page 1.
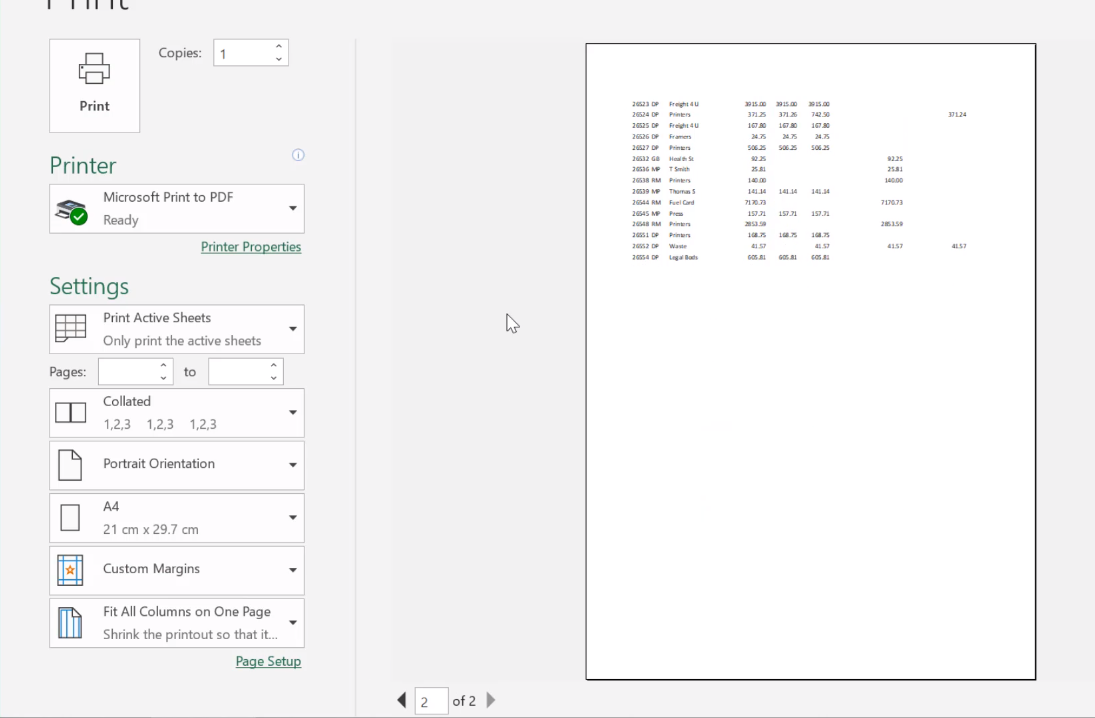
But page 2 loses this heading and all of a sudden we don't know what each one of the columns is actually referring to.
So how can you have the headings from page 1 print at the top of every page?
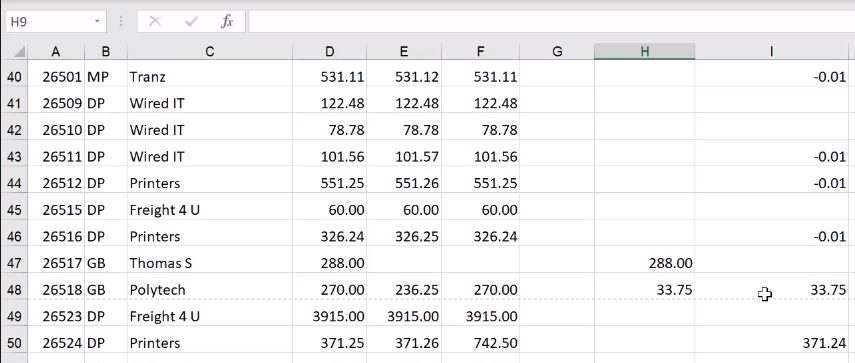
Once you’ve been into Print Preview and returned to your worksheet, you will be able to scroll down and see where the page break is going to be.
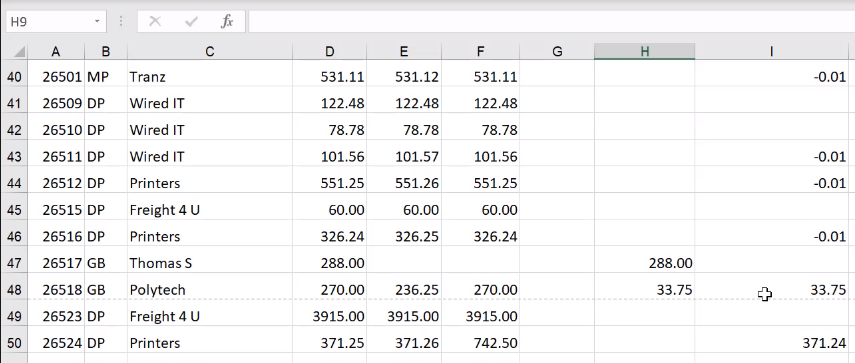
One thing people try to do is copy the row of titles at the top of the worksheet and paste it right underneath the page break in order to get the titles at the top of the second page. However, this is not the most effective way to solve this issue.
Rather than doing that, try the following.
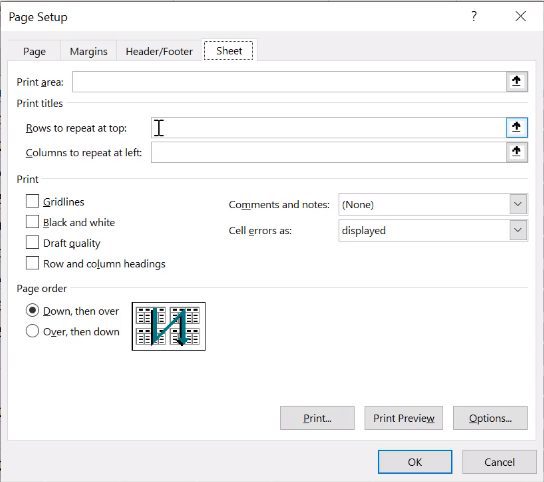
1. Go to the Page Layout tab and go to Print Titles.
2. Under Print Titles, click into the Rows to repeat at top text box
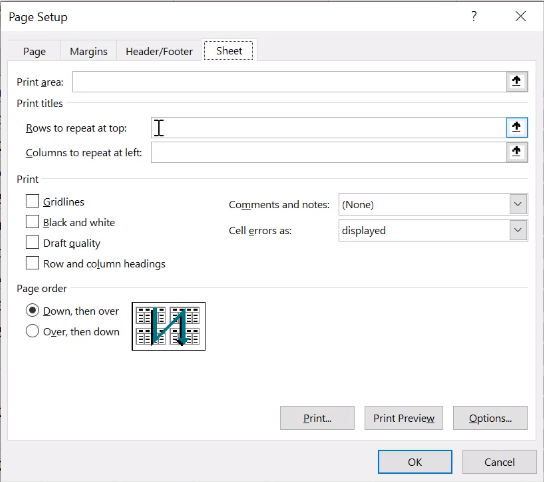
3. Now move your mouse pointer to row one in the worksheet.
4. Make sure you've got your arrow over row one and click to select it. By doing this you will add the reference for row one into the Rows to repeat at top box. If you wanted to include more than just Row 1, click and drag over additional rows, e.g. rows 2 and 3, and these will be repeated also.
5. Click OK.
Now if you go back to Print Preview and go through to page 2, you will see that the column titles in Row 1 are now visible on that page. So good right?
To make it even better, if there were more pages, it would just keep on repeating at the top of every page.
How to remove Row 1 that has been set to print on every page
Sometimes you will receive files from people that actually have these turned on and you'll be looking through your data table and going, “Where is that heading coming from?” “Why is it repeating?”
Now you know why it's repeating.
It's also really easy to get rid of them.
1. Go to the Page Layout tab, then Print Titles and delete the reference out of the Print titles area.
2. Click OK.
3. Go to Print Preview and when you go through to page 2, the repeating row will now be gone.
Was this Blog helpful? Let us know in the Comments below.
Related posts

How to set Row 1 to print on every page
Are you copying and pasting your titles whenever there is a page break in your worksheet so that the titles are printed at the top of every page? Follow this step-by-step to learn how to set row one to print on every page.
Instructions
How to set Row 1 on every page
- On the Page Layout tab click Print Titles.
- Under Print Titles, click into the Rows to repeat at top text box.
- Now move your mouse pointer to row one in the worksheet.
- Make sure you've got your arrow over row one and click to select it. By doing this you will add the reference for row one into the Rows to repeat at top box.
- Click OK.
How to remove Row 1 that has been set to print on every page
- Go to the Page Layout tab, then Print Titles and delete the reference out of the Print titles area.
- Click OK.
Notes
Note: If you wanted to include more than just Row 1, click and drag over additional rows, e.g. rows 2 and 3, and these will be repeated also.
Useful tip: To save time add the Print Preview button to your Quick Access Toolbar so you can by-pass File, Print, and access Print Preview straight from the toolbar. To do this click the arrow at the end of the QAT and then select Print Preview and Print from the menu.


Very helpful thanks for the timely intervention.
You are very welcome! Thank you so much for letting us know our article was helpful to you 🙂