Microsoft Teams is a platform that enables teams to collaborate and communicate online.
Having a smooth meeting experience when using Teams is crucial, as many businesses and individuals rely on it for effective communication.
To ensure seamless meetings, you can use the Microsoft Teams Test Call feature, which helps identify and resolve any issues before joining the meeting.

Purpose of Testing Microphone and Camera Before a Meeting
To get ready for your meeting, it’s essential to be prepared. Microsoft Teams has a Test Call feature that helps you check the quality of your microphone and camera for audio and video.
This is similar to tuning an instrument before a performance, ensuring that your voice and visual presence are clear and free from any technical issues that could disrupt the meeting.
This blog covers making a Microsoft Teams Test Call and shares tips on elevating your Microsoft Teams experience.
- Test Microphone Audio without Joining a Meeting
- Test Camera Video without Joining a Meeting
- What to do when the Teams “Make a Test Call” Option is Missing
- 7 Tips for a Successful Teams Meeting
- Additional Resources – Troubleshooting Teams and Check Teams Issues Today
Teams Test Call – Test Microphone Audio without Joining a Meeting
Here’s a step-by-step guide on testing your microphone's audio quality on Microsoft Teams without joining a meeting.
1. Open Microsoft Teams and Sign In
Launch the Microsoft Teams application on your desktop. If you haven’t already, log into your account using your credentials.
2. Access Teams Settings
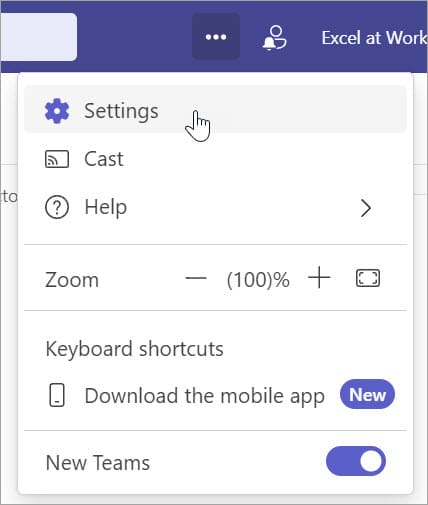
Navigate to the upper right corner of the Teams interface, where your profile picture or initials are displayed. Click the three dots to the left of your profile picture to reveal the “Settings and more” drop-down menu.

From the menu, select "Settings."
3. Select "Devices"
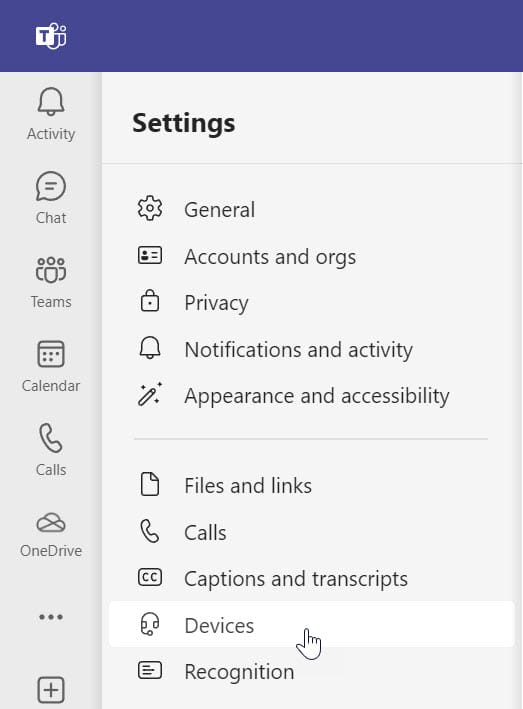
Find and click on the "Devices" tab within the Settings window. This is where you can manage your audio and video settings.
4. Select "Audio Settings"
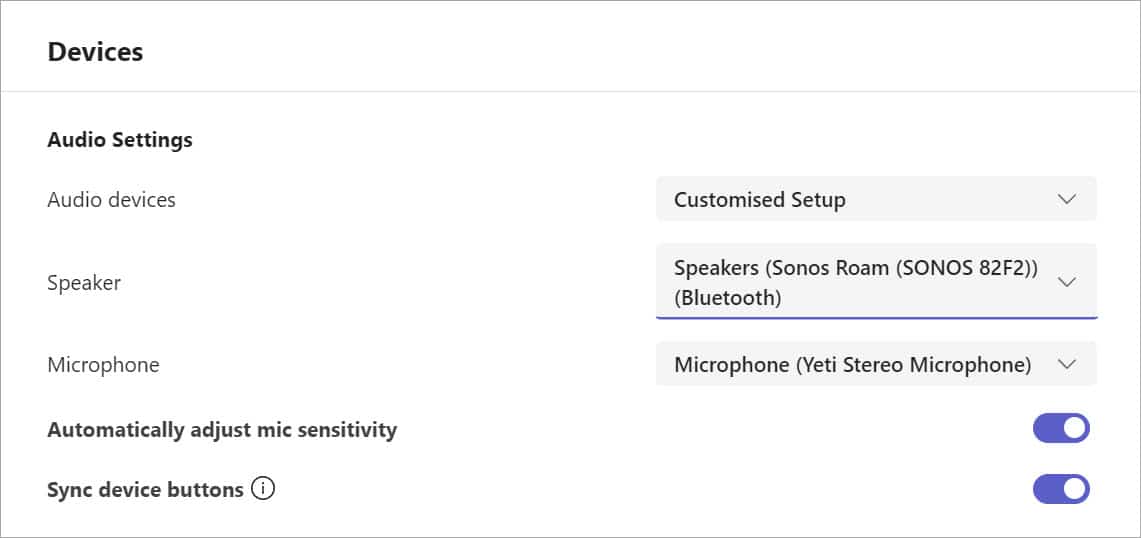
Locate the "Audio Settings" options. From here you can choose the microphone and speakers you want to use and make necessary changes to your audio input and output settings.
5. Make a Teams test call
Once you've chosen your microphone settings, look for the "Make a test call" button. Click on it to initiate a Teams test call.

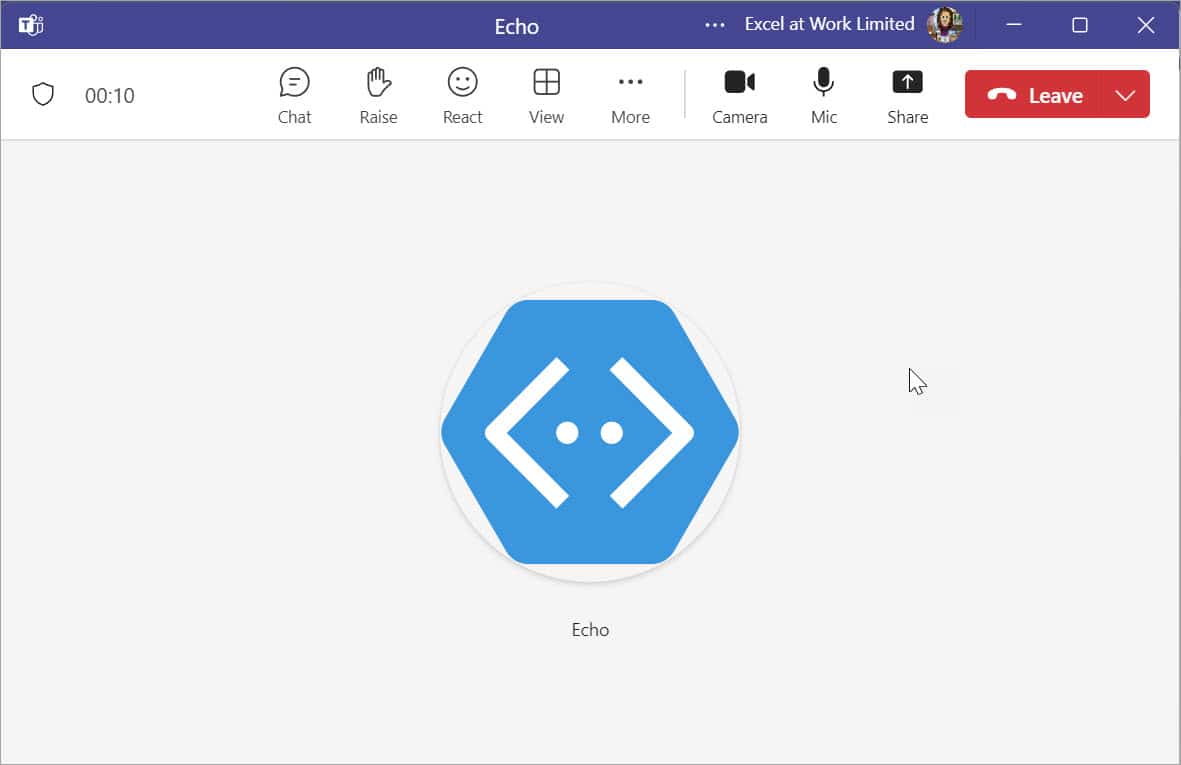
You will be connected to a Teams test meeting using the Teams Echo bot, which will prompt you to speak. Teams will record your audio input and play it back to you, confirming your microphone works properly.
6. Adjust Settings if Needed
If the Teams test call indicates any issues or you want to fine-tune your audio settings, leave the test call and adjust the microphone volume and other settings in the same "Devices" tab. Make another test call to check your settings are now working.
These steps ensure that your microphone functions correctly and your audio settings are optimised for Microsoft Teams meetings.
Teams Test Call – Test Camera Video without joining a meeting
Here is a step-by-step guide on how to test your camera on Microsoft Teams without joining a meeting.
1. Open Microsoft Teams and Sign In
Open the Teams application on your desktop and if you haven't already, log in.
2. Access Teams Settings
Navigate to the upper right corner of the Teams interface, where your profile picture or initials are displayed. Click the three dots beside your profile picture to reveal a drop-down menu. From the menu, select "Settings."
3. Select “Devices”
Find and click on the "Devices" tab within the Settings window. This is where you can manage your audio and video settings.
4. Select “Video Settings”
Scroll down the window until you locate the "Video settings" options. From here you can choose the camera you want and change your camera settings.

5. Preview Video Settings
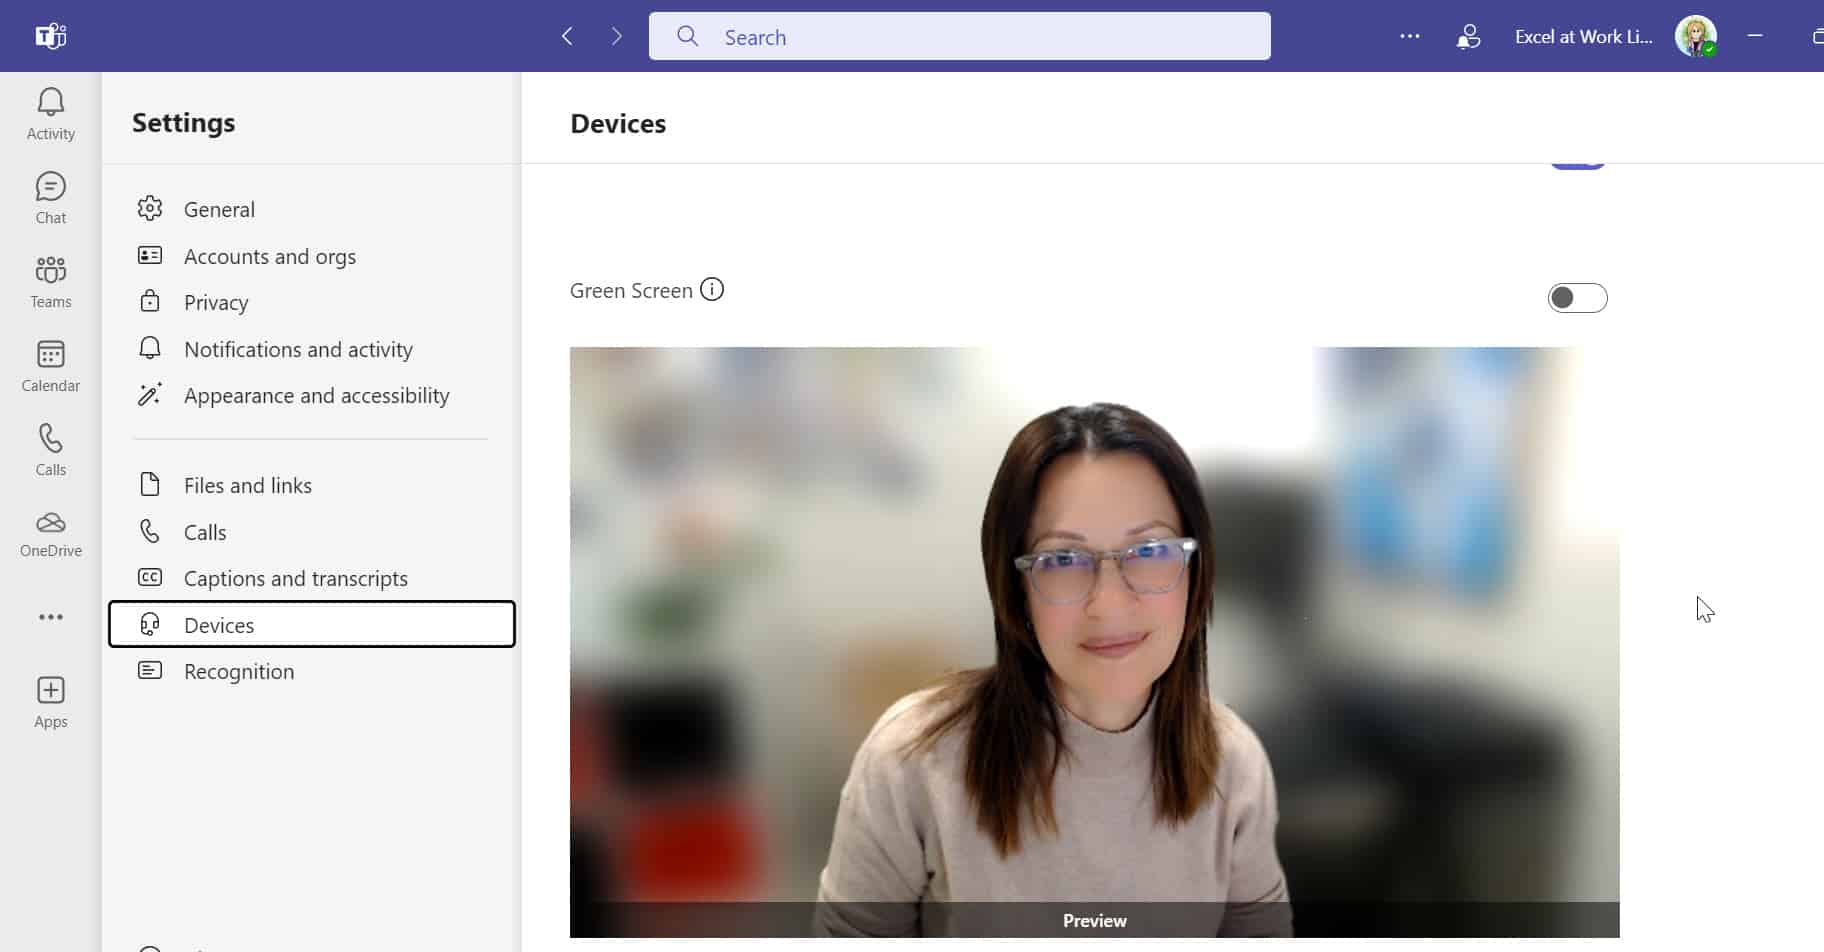
Use the Preview window to check your video settings before you do your Teams Test call. The preview window showcases the live feed from your camera.
Pay close attention to the video quality, ensuring the image is clear, sharp, and distortions-free. Check you are well-centred and properly visible within the frame. Use this opportunity to make any necessary adjustments to your camera's positioning or angle.
What to do when Teams “Make a Test Call” Option is Missing
The Teams Make a Test Call option is currently only available on paid-for versions of Teams.
If you use the free version of Microsoft Teams and the “Make a Test Call” option is missing, try the steps below to use "Meet Now" to test your video and camera.
Create a “Meet Now” Meeting
1. Open Microsoft Teams
Launch the Microsoft Teams application on your desktop or access it through your web browser.
2. Sign In
If you haven’t already, log in to your Microsoft Teams account using your credentials.
3.Navigate to the Calendar
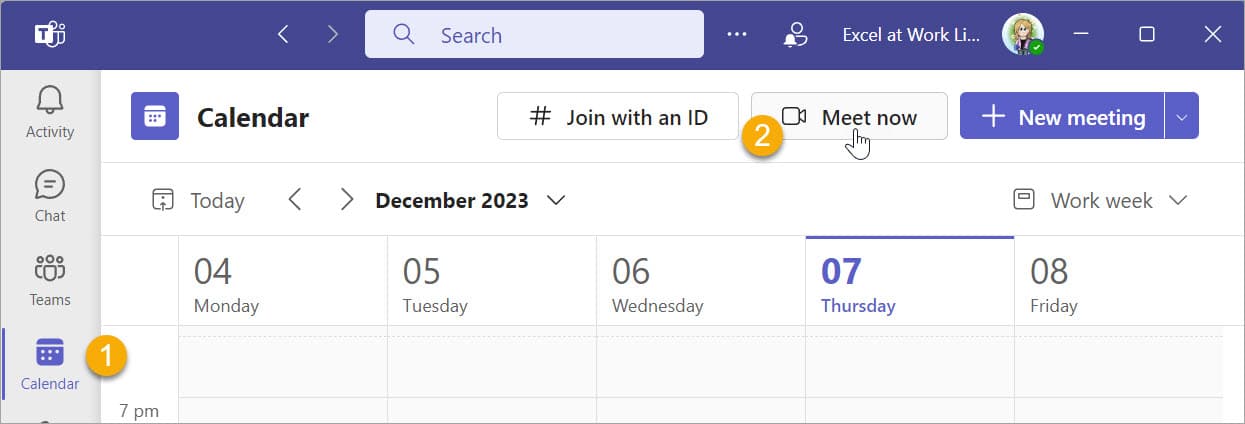
[1] On the left-hand side of the Teams interface, locate and click on the "Calendar" tab. This will open the calendar view.
[2] In the calendar view, look for the "Meet Now" button. This button is usually located in the top right corner of the screen, near the "+ New meeting" button.
4. Click "Meet Now"
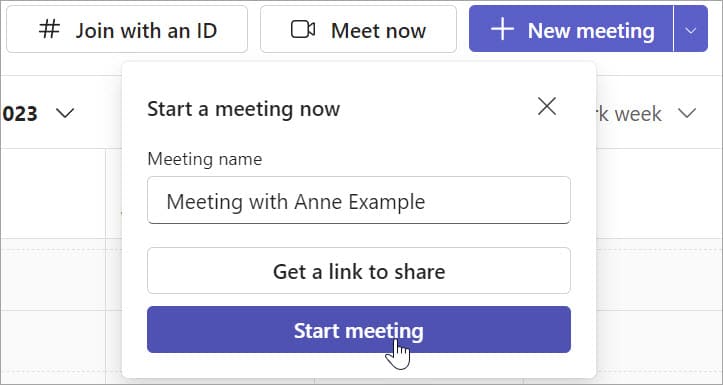
Click the "Meet Now" button to start an instant meeting. Click Start meeting.
5. Adjust Meeting Settings (Optional)
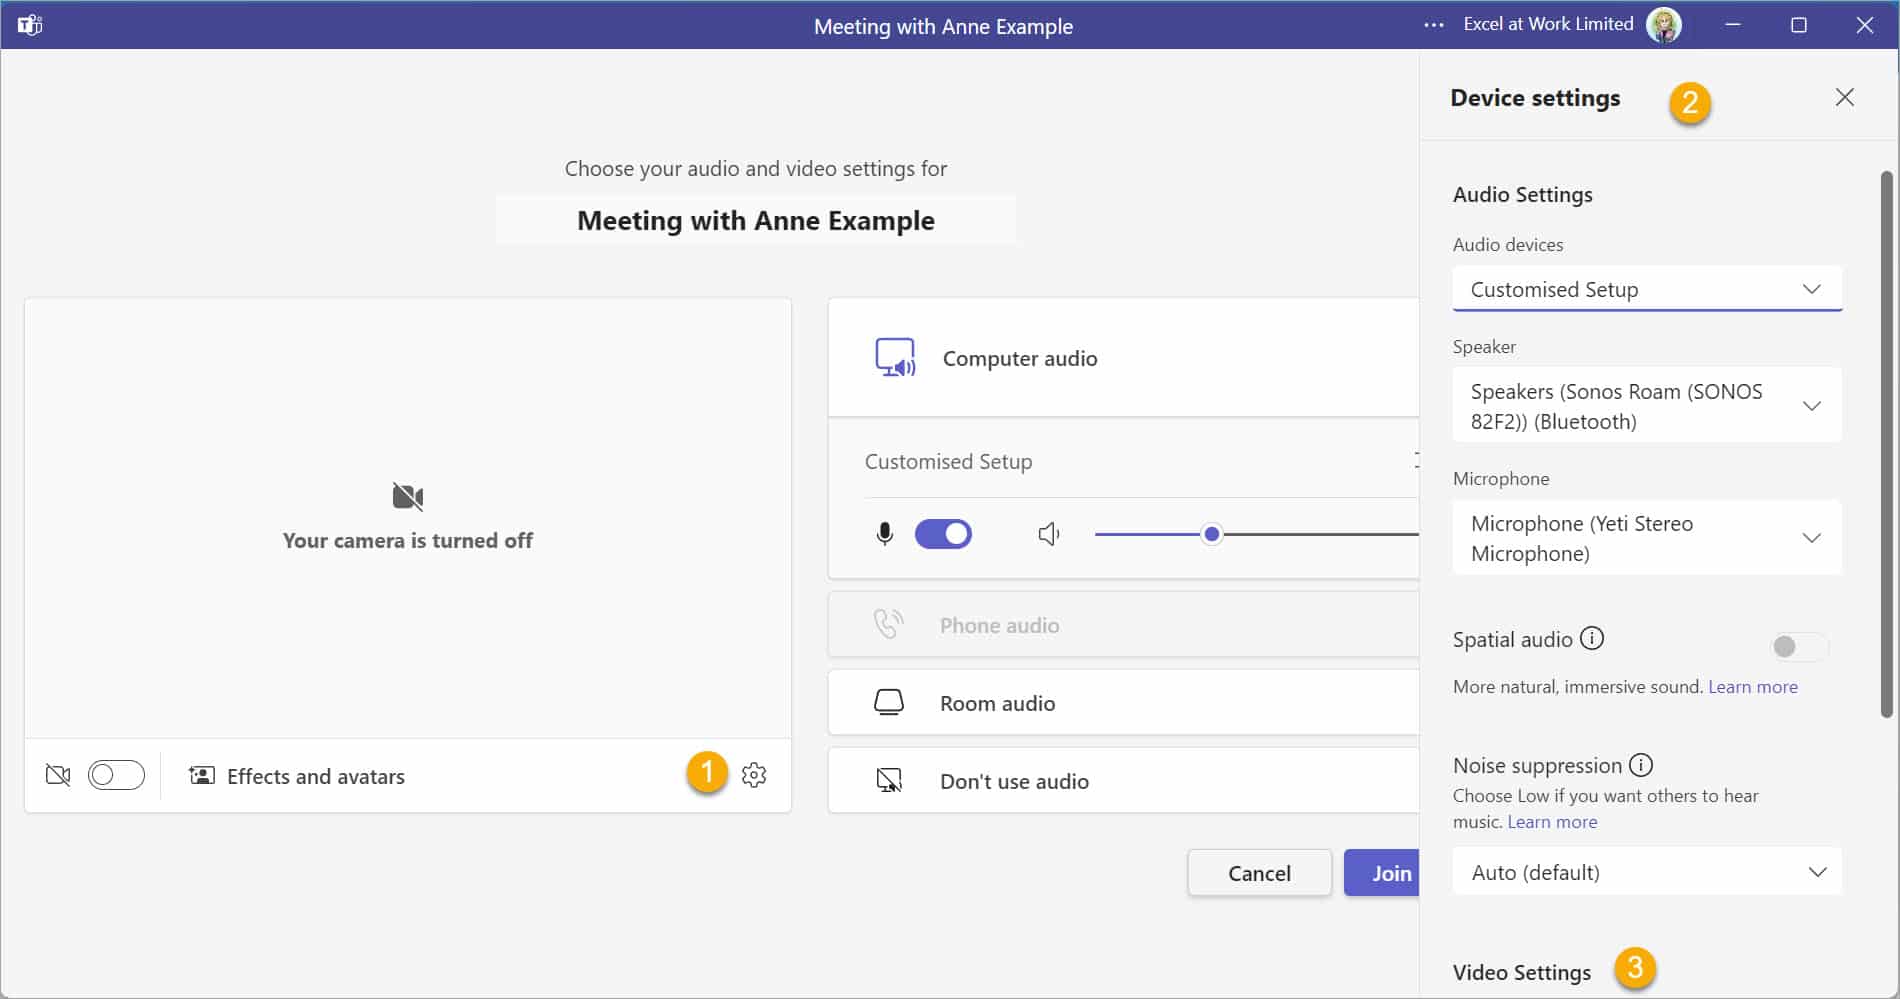
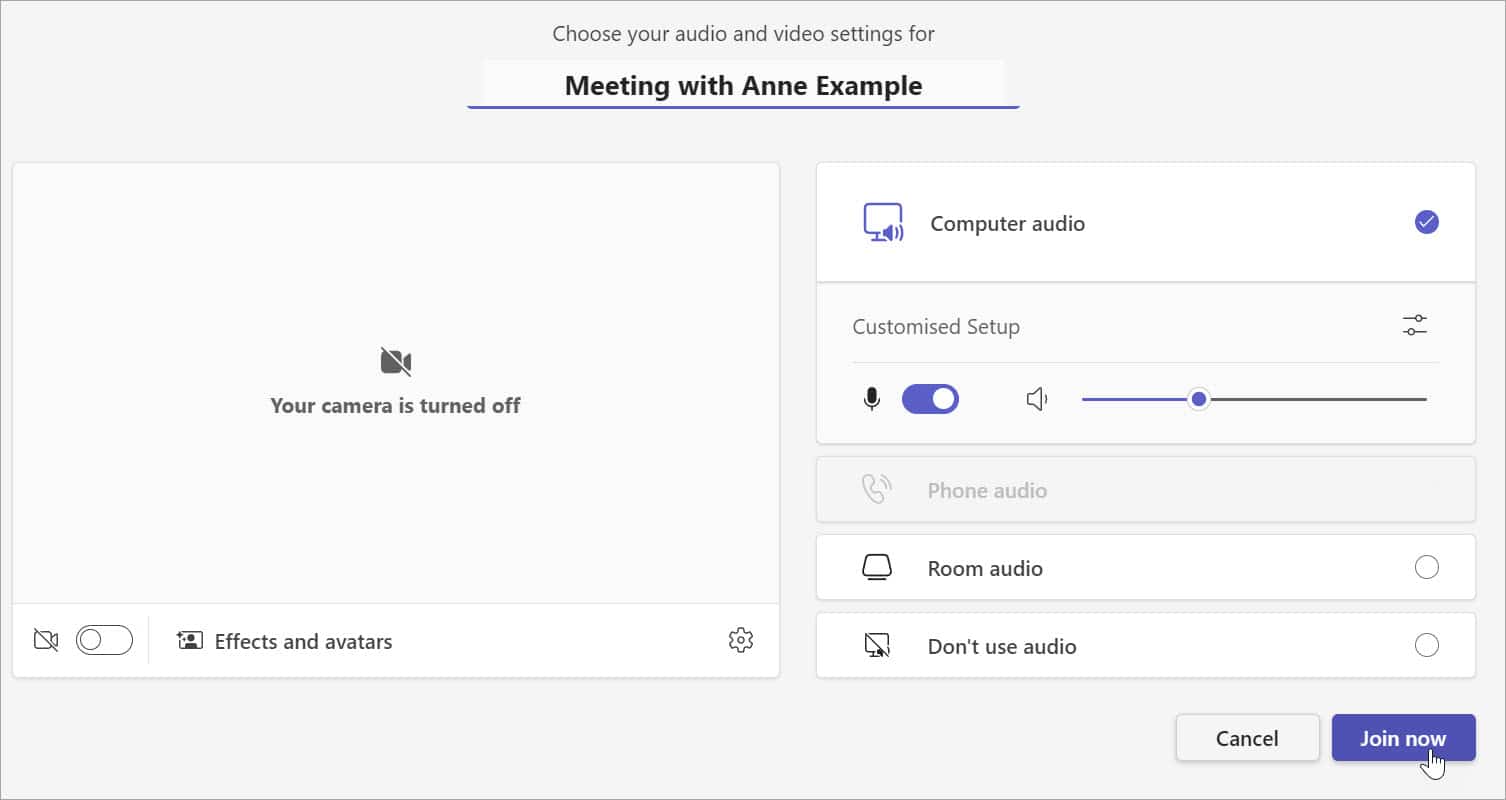
After clicking "Start meeting," click the “Open device settings” cog and adjust your Audio and Video settings before joining the meeting.
6. Join the Meeting
Once you've configured your settings (if needed), click the "Join Now" or similar button to enter the meeting. This will launch the meeting interface.
7. Send the meeting link to yourself or a colleague
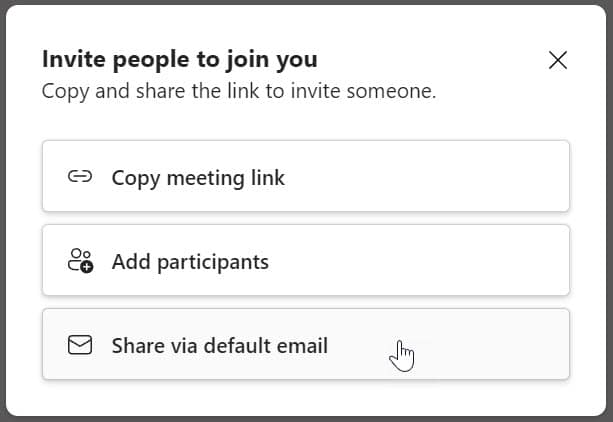
Teams will allow you to invite others to join your meeting. From the "Invite people to join you" options, click "Copy meeting link" or "Share via default email" and then send this link to a colleague or another email address you can access (other than the one linked to your Teams account).
8. Start testing
Close the “Invite people to join you” dialogue box to start your meeting. Ask your colleague to join your meeting, or from another computer or mobile phone, join yourself using the link. Start testing the various features in the Teams meeting interface, including video, audio, chat, and screen sharing.
Tip: if the computer you are using to test your audio and video is in the same room as the computer running the meeting, you may need to turn the microphone off to avoid feedback.
9. End the Meeting
When your testing is complete, click the "End Meeting" button to leave and close the session.
Following these steps, you can quickly and easily do a Teams test call in the free version of Microsoft Teams using a "Meet Now" meeting.
Microsoft Teams – 7 Tips for a Successful Teams Meeting
1. Perform Test Calls Regularly
- Regularly test your audio and video settings on Microsoft Teams
- Identify and address potential issues before they impact meetings.
- Make it a habit to perform test calls, especially if you frequently engage in virtual meetings.
2. Collaborate with IT support
If audio or video issues persist, IT support can provide technical expertise and diagnose software/hardware issues to optimise your Microsoft Teams environment for better performance.
3. Check Network Connectivity
- Before a test call, especially before important meetings, ensure your internet connection is robust. Unstable or slow connections can lead to disruptions in audio and video quality.
- If possible, use a wired connection to enhance stability and reduce the likelihood of dropouts.
4. Testing in Different Environments
To ensure a consistently high-quality experience during virtual meetings:
- test your audio and video performance in different environments.
- Make test calls in various locations and using different devices.
- Recognize potential differences in performance and adjust accordingly.
5. Being Mindful of Background Noise
- Background noise can significantly impact the clarity of your audio during meetings. Test your microphone in environments with varying noise levels to gauge its sensitivity and identify potential issues.
- If needed, consider using headphones or a dedicated microphone to minimise unwanted sound interference.
6. Keeping Software and Drivers Updated
- Ensure that your Microsoft Teams application and your device's audio and video drivers are current.
- Regularly check for updates and install them promptly to benefit from the latest improvements, bug fixes, and compatibility enhancements. An outdated software or driver may contribute to performance issues during meetings.
7. Check All Hardware Is Working
- Conduct a thorough assessment of your hardware to guarantee a smooth and uninterrupted experience.
- Check that all leads and cables are securely connected to your computer, power source, and external devices.
- Confirm the responsiveness of your keyboard and mouse, as they are integral to navigating the virtual meeting interface. Check for any signs of malfunction and replace batteries if necessary.
- Bluetooth Devices: If you rely on Bluetooth devices such as headsets or speakers, ensure they are correctly paired and connected. Address any pairing issues and test the audio output to prevent potential disruptions during the meeting.
To ensure successful Microsoft Teams calls and a positive virtual meeting experience, it's important to follow some best practices. These measures will help you navigate virtual collaboration with confidence and efficiency.
Conclusion
The Microsoft Teams Test Call is essential for a smooth online meeting experience. Regular testing, strategic scheduling, and collaboration with IT support ensure a reliable virtual connection. Proactive considerations, including network stability and hardware checks, empower users to make the most of Microsoft Teams, fostering efficient and hassle-free virtual collaboration.
Additional Resource
Troubleshooting Teams issues
For help troubleshooting Microsoft Teams issues, visit the Microsoft Teams Troubleshooting page on the Microsoft Support website.
Check Microsoft Teams issues today
To quickly check to see if there are any issues today, visit the Microsoft Service Health website.
Was this post helpful? Let us know in the Comments below

