Creating Flowcharts in PowerPoint is an excellent way to help portray ideas and processes.
PowerPoint offers features that allow you to quickly create a flowchart or a process flow diagram.
Using PowerPoint shapes and connecting lines (or arrows) you can quickly outline steps, the process flow, relationships, and ideas within the flow chart.

In this post, we will explore 3 super easy PowerPoint tips that will help you quickly create lines for flow charts.
- Lock Drawing Mode in PowerPoint
- Connect PowerPoint Shapes within the Flow Chart
- Use the PowerPoint Format Painter to copy formats
I love sharing these tips in my live online PowerPoint sessions. They never fail to make people smile. The comment, “if only I had known this yesterday” is heard many times.
1. Lock Drawing Mode in PowerPoint
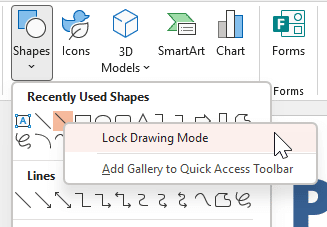
Lock Drawing Mode allows you to create multiple copies of a line shape without having to reselect the shape each time you need to insert another line.
This is super helpful when creating connecting lines within a PowerPoint flowchart.
To use Lock Drawing Mode, follow the steps below.
Step 1: Go to the Insert tab.
Step 2: From the Illustrations group select Shapes.

Step 3: Right-click the arrow or line shape you require.
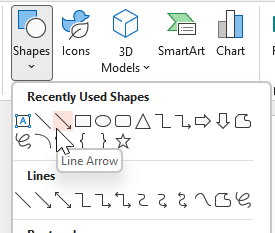
Step 4: Select Lock Drawing Mode.
You will now be able to continuously draw lines without having to go back to reselect the line or arrow shape each time you want to draw another line.
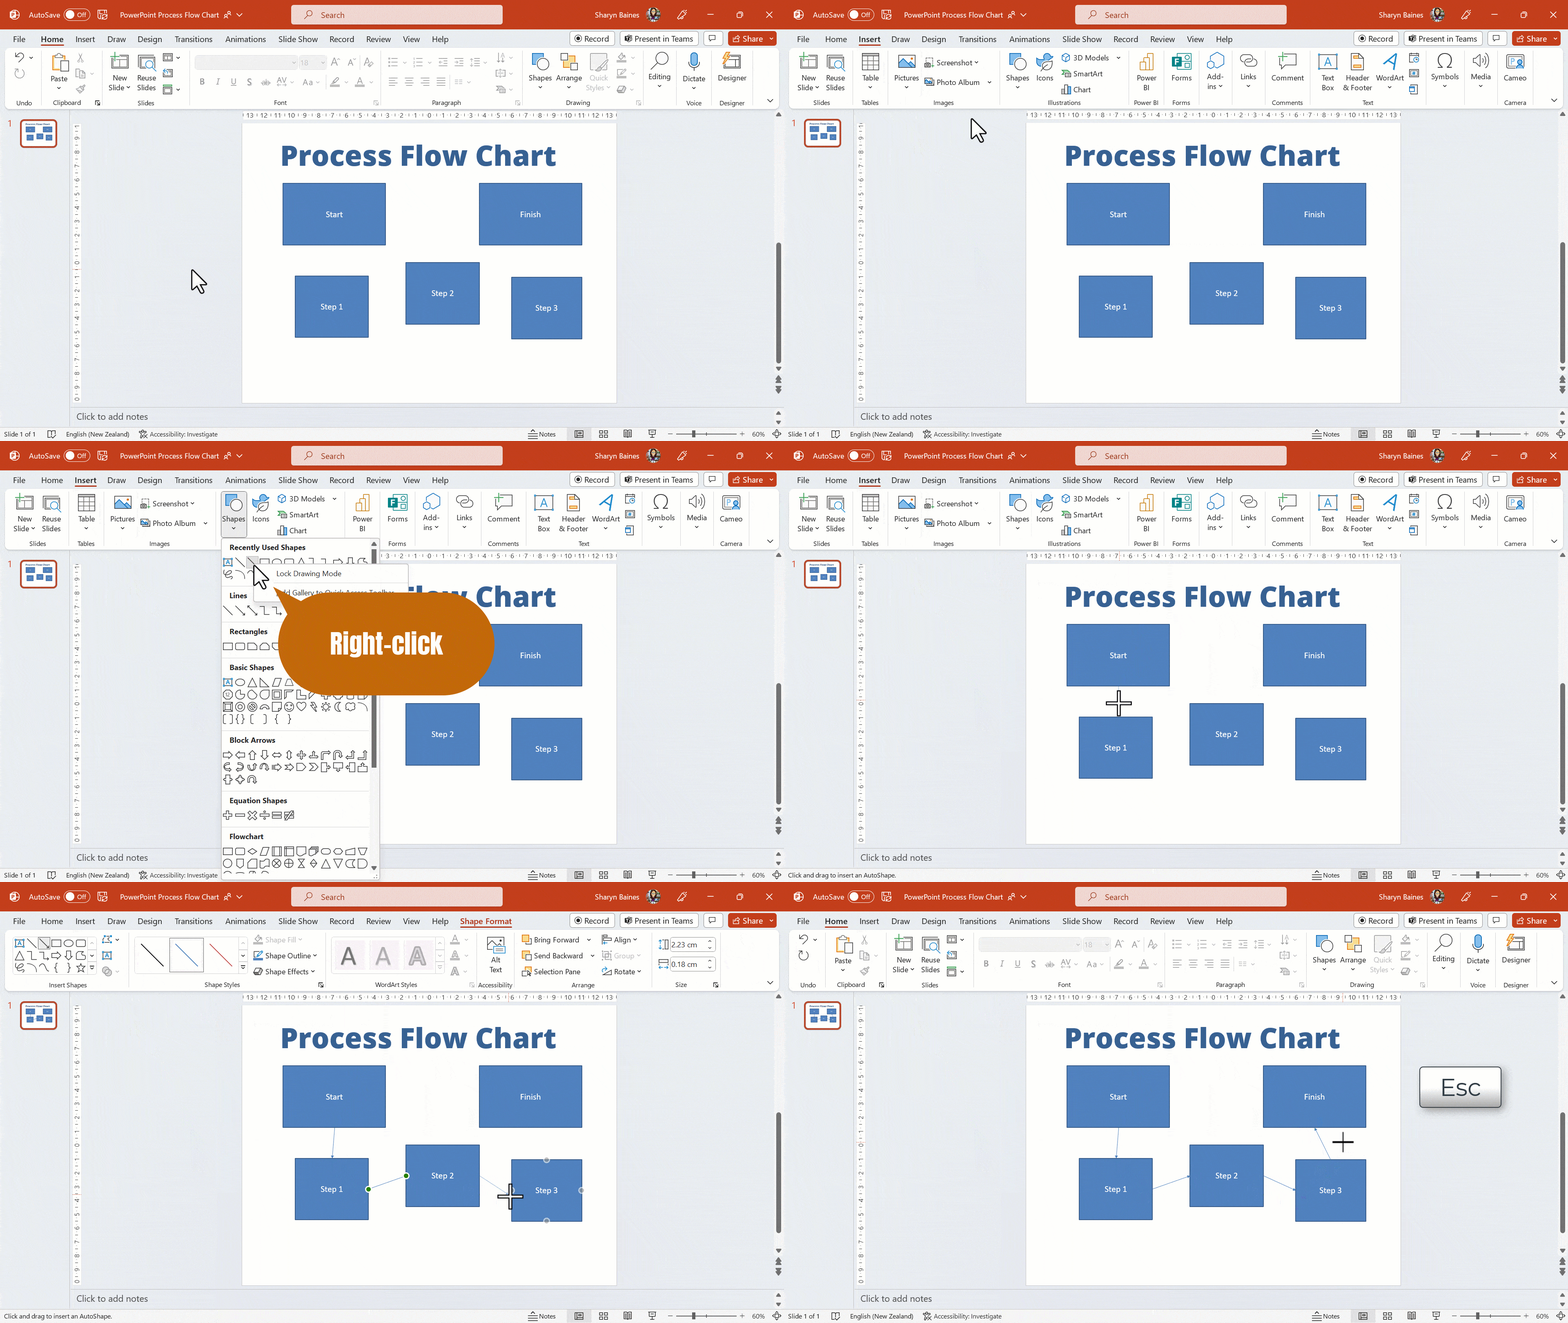
Step 4: Once you have finished drawing the required lines, press your Esc key to leave Drawing Mode.
2. Connect PowerPoint Shapes within the Flow chart
It can be very annoying when you need to move a shape within your flow chart and the line connected to the shape then becomes disconnected.
This can lead to a lot of wasted time trying to reconnect and realign elements within the flow chart.
Thankfully when you use the shape connectors to connect shapes within the flow chart.
A connector is a line that connects two shapes together. The wonderful thing about connectors is that if you move a shape the line stays attached to the shape. This saves you from the hassle of having to reconnect lines every time you move a shape.
To connect shapes within the PowerPoint flowchart follow the steps below.
Step 1: Go to the Insert tab.
Step 2: From the Illustrations group, select Shapes.
Step 3: Select a line or arrow shape. Hint: use Lock Drawing Mode if you are drawing more than one line.
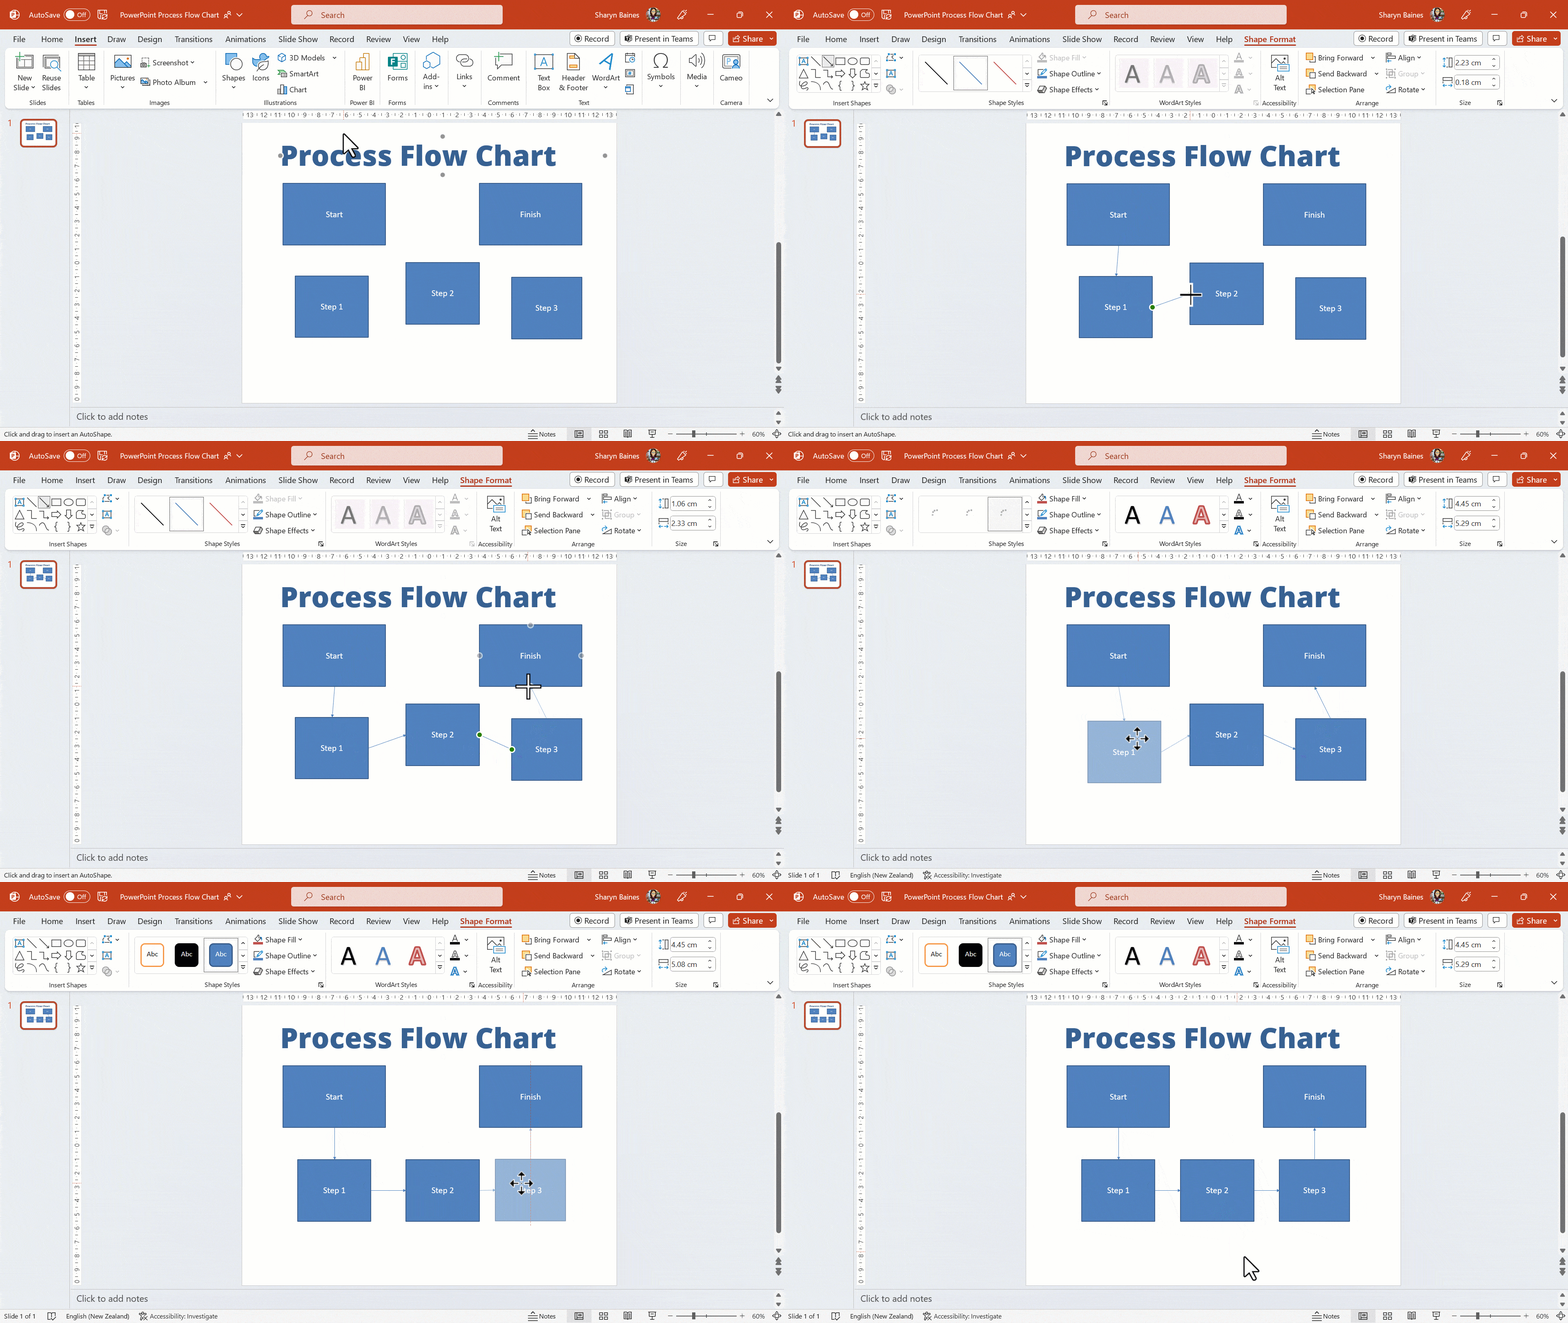
Step 4: Move the mouse pointer on side of a shape. You will notice the shape connector circles will be displayed. Connect the shapes by clicking and dragging a line from a connector circle on one shape to a connector circle on another shape.
Step 5: Now when you move an element within the chart, all the shapes will remain connected.
3. Use the PowerPoint Format Painter to copy formats
The Format Painter can be used to quickly copy formatting from one shape to multiple shapes. This formatting includes but is not limited to colour, font style and size.
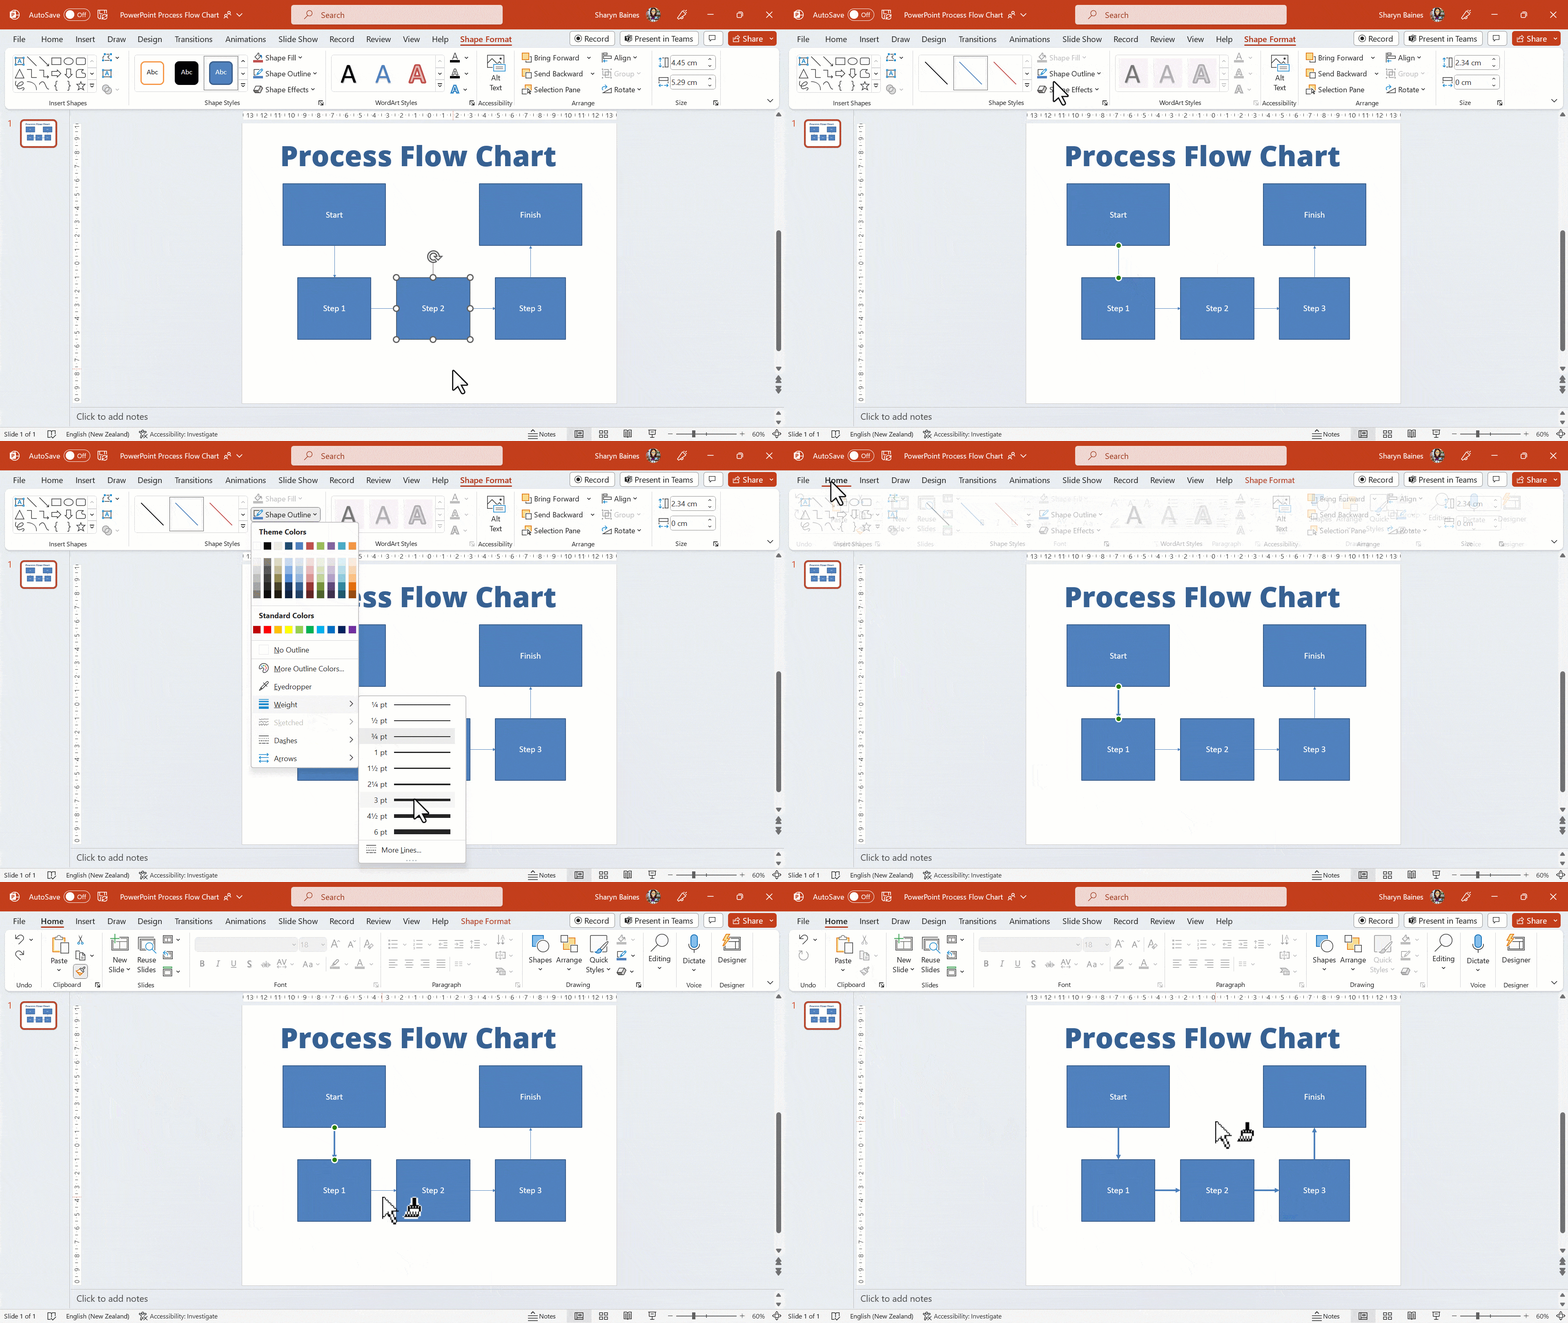
Use the Format Painter to quickly copy the format of a single line to all other lines in the flow chart.
This not only saves you time, it ensures that all lines in the chart are formatted the same way.
To use the Format painter, follow the steps below.
Step 1: Select any line shape.
Step 2: Click the Shape Format tab and then apply the formatting you want, e.g. change the weight of the line so that the line appears thicker.
Note: The Shape Format tab is only present when you have selected a shape.
Step 3: With the line shape still selected go to the Home tab.
Step 4: Double-click the Format Painter button.
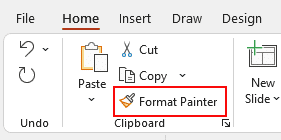
The mouse pointer will now be loaded with a small paint brush. This indicates the formats for this line have now been copied.
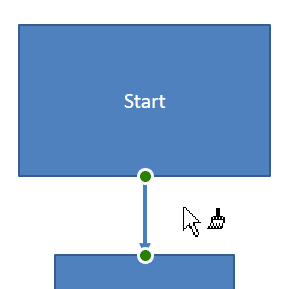
Step 5: Now move the mouse over another line.
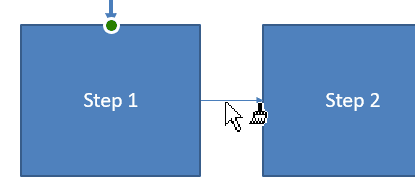
Step 6: Click the line to apply the copied format.
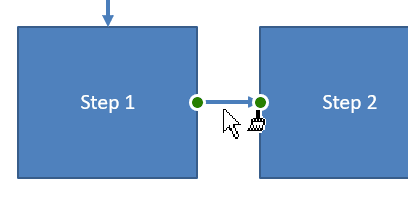
Step 7: Continue clicking every line you want to copy the format to and then press Esc to leave Format Painter mode.
To Sum Up
These 3 tips are super easy to use and will help save you a huge amount of time when creating and modifying Flowcharts in PowerPoint.
Was this post helpful? Please let us know in the Comments below.

Create Lines for Flow Charts in PowerPoint
Do you want to learn how to use PowerPoint Flow Charts to help portray ideas and processes? Follow this step-by-step guide on how to use PowerPoint shapes and connecting lines (or arrows).
Instructions
Lock Drawing Mode in PowerPoint
- Go to the Insert tab.
- From the Illustrations group select Shapes.
- Right-click the arrow or line shape you require.
- Select Lock Drawing Mode.
- Once you have finished drawing the required lines, press your Esc key to leave Drawing Mode.
Connect PowerPoint Shapes within the Flow chart
- Go to the Insert tab.
- From the Illustrations group, select Shapes.
- Select a line or arrow shape. Hint: use Lock Drawing Mode if you are drawing more than one line.
- Move the mouse pointer on side of a shape. You will notice the shape connector circles will be displayed. Connect the shapes by clicking and dragging a line from a connector circle on one shape to a connector circle on another shape.
- Now when you move an element within the chart, all the shapes will remain connected.
Use the PowerPoint Format Painter to copy formats
- Select any line shape.
- Click the Shape Format tab and then apply the formatting you want, e.g. change the weight of the line so that the line appears thicker.
- With the line shape still selected go to the Home tab.
- Double-click the Format Painter button. The mouse pointer will now be loaded with a small paint brush. This indicates the formats for this line have now been copied.
- Now move the mouse over another line.
- Click the line to apply the copied format.
- Continue clicking every line you want to copy the format to and then press Esc to leave Format Painter mode.
Notes
Lock Drawing Mode allows you to create multiple copies of a line shape without having to reselect the shape each time you need to insert another line.
A connector is a line that connects two shapes together. The wonderful thing about connectors is that if you move a shape the line stays attached to the shape. This saves you from the hassle of having to reconnect lines every time you move a shape.
The Format Painter can be used to quickly copy formatting from one shape to multiple shapes. This formatting includes but is not limited to colour, font style and size.
Note: The Shape Format tab is only present when you have selected a shape.

