Looking to password protect your Excel sheets?
It’s a smart move to prevent accidental edits or unwanted tweaks to your formulas and layout. In this guide, I’ll walk you through the easy steps to apply a password, ensuring your Excel work remains just as you intended.
No more worries about someone messing up your masterpieces! And when you're ready to remove protection, simply follow the steps outlined in my blog post titled ‘3 Quick Ways to Unprotect an Excel Sheet and Workbook (Even Without a Password)’.
Password Protect in Excel - 3 Different Levels of Protection
This guide explores securing your data by applying password protection on selected cells, the entire worksheet, or the full workbook, minimising the risk of undesired alterations.
- Password protect only specific cells and ranges in a worksheet to protect them from being changed.
- Password protect an entire workbook to prevent changes to the workbook structure, e.g. worksheets from being unhidden, moved, deleted, copied or renamed.
- Password protect an Excel file so that a password is required to open or modify the file.
But first, let’s clarify some terms.
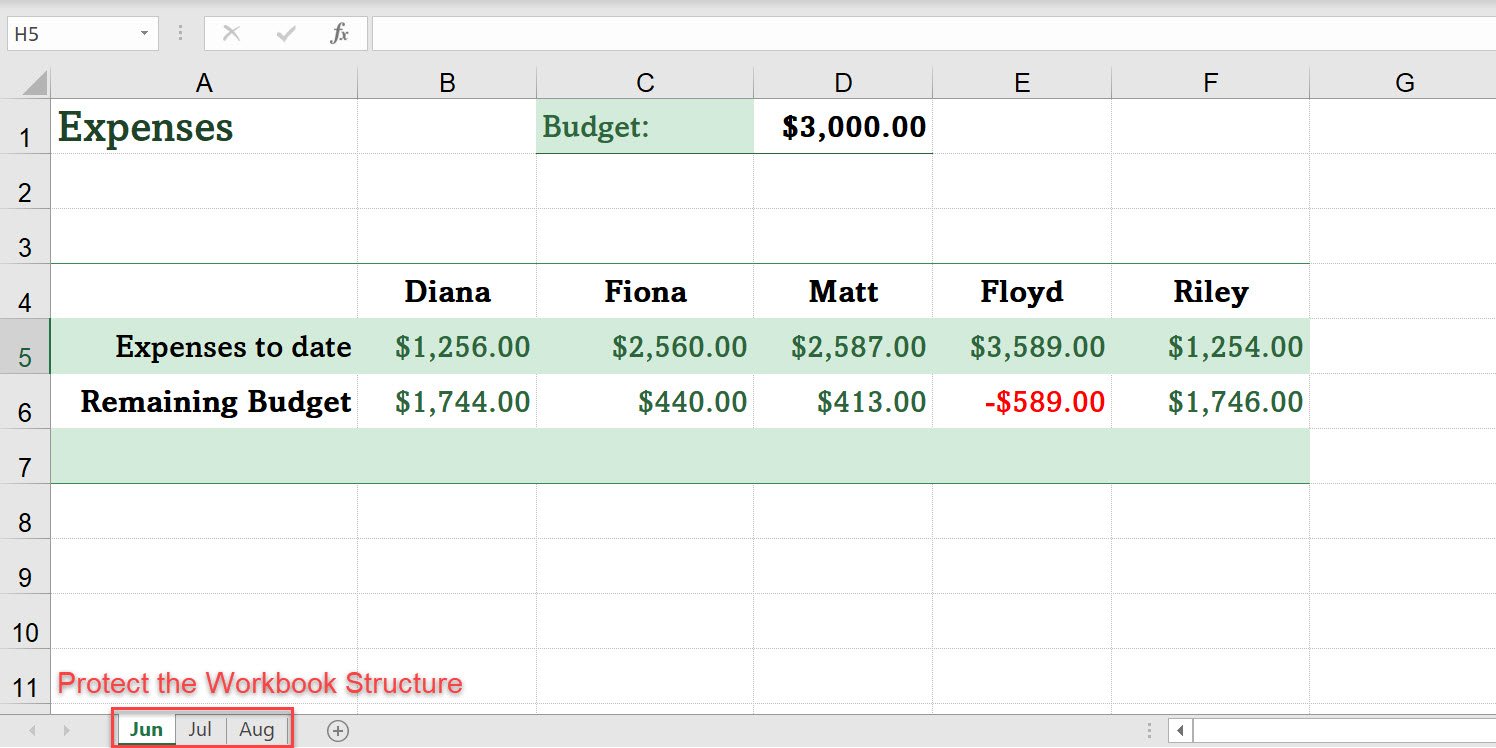
In Excel, a ‘worksheet’ refers to a single sheet tab, while a ‘workbook’ is the entire collection of worksheets. In the example below 'Jun', 'Jul' and 'Aug' are individual worksheets. The workbook is the file containing the worksheets. You might also hear a workbook called a spreadsheet file or an Excel file.
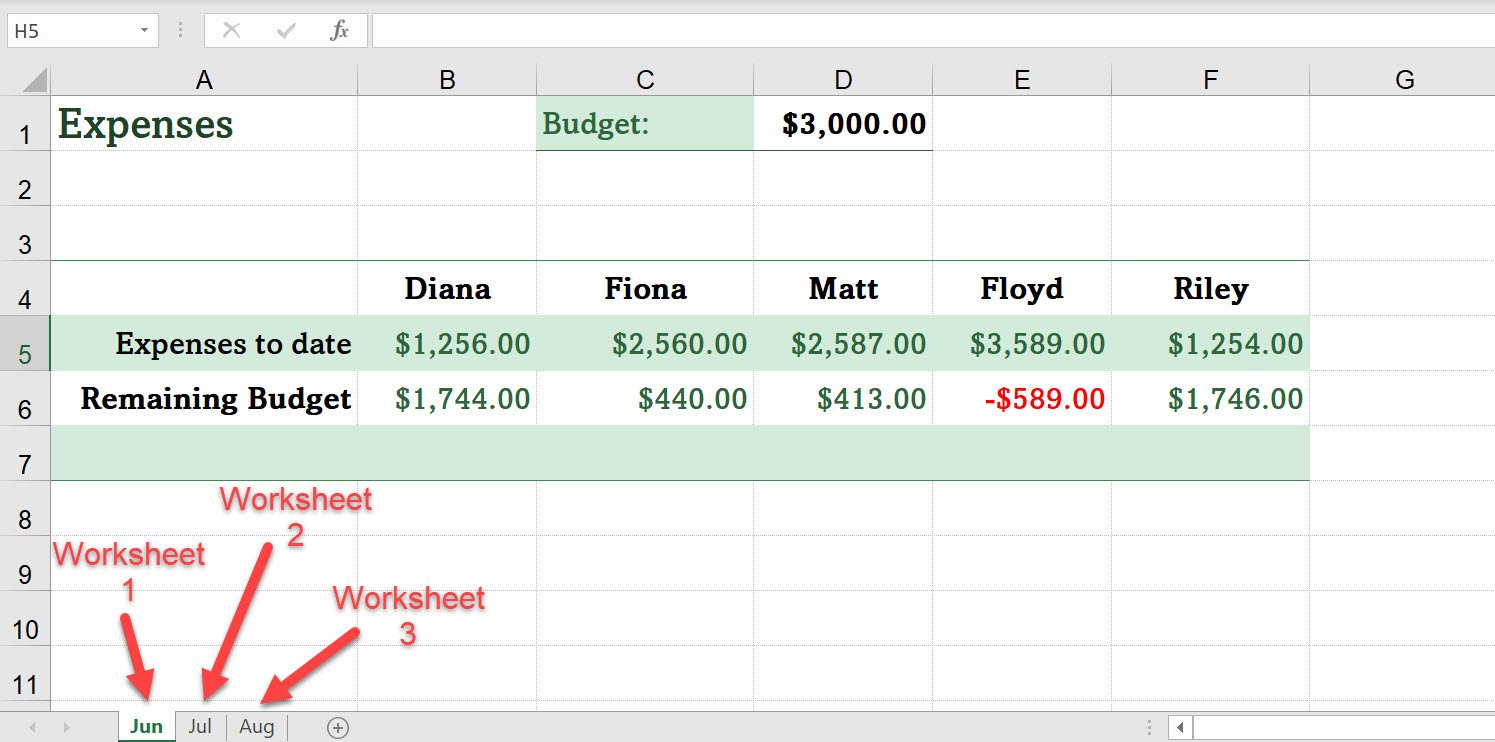
In the following sections, I’ll cover instructions for password protecting both Excel worksheets (sheets) and workbooks (files).
How to password protect an Excel sheet
Protecting specific cells in an Excel worksheet is straightforward. Here’s how to do it:
- Unlock Cells: Before anything else, decide which cells you want to remain editable. These cells must be ‘unlocked’ before activating the sheet protection.
- Protect the Worksheet: Once you’ve unlocked the desired cells, you can proceed to protect the worksheet. This step ensures that all other cells are locked, preventing changes to your critical data and formulas.
Keep in mind that if you directly password protect the sheet without unlocking specific cells first, all cells will become locked.
This means you won’t be able to edit them.
Unlocking cells is a crucial step to ensure that only the cells you want to be editable remain editable after protection is applied. Since it’s rare to need every cell locked, take the time to unlock those you need access to before applying protection.
You can effectively password protect your Excel sheet by following these two simple steps—unlocking cells and then protecting the worksheet.
Important Consideration: Before you apply protection to your Excel worksheet or workbook, be aware that it’s not foolproof. Skilled individuals may still access protected data if they are determined. To better understand these limitations, I recommend reading my related blog: Don't be fooled - Excel Worksheet Protection isn't bullet-proof.
How to Unlock cells in Excel
1. Select the Editable Cells: First, select the cells you want to keep editable after enabling protection. For instance, if you want to keep cells B5 to F5 editable, select them.
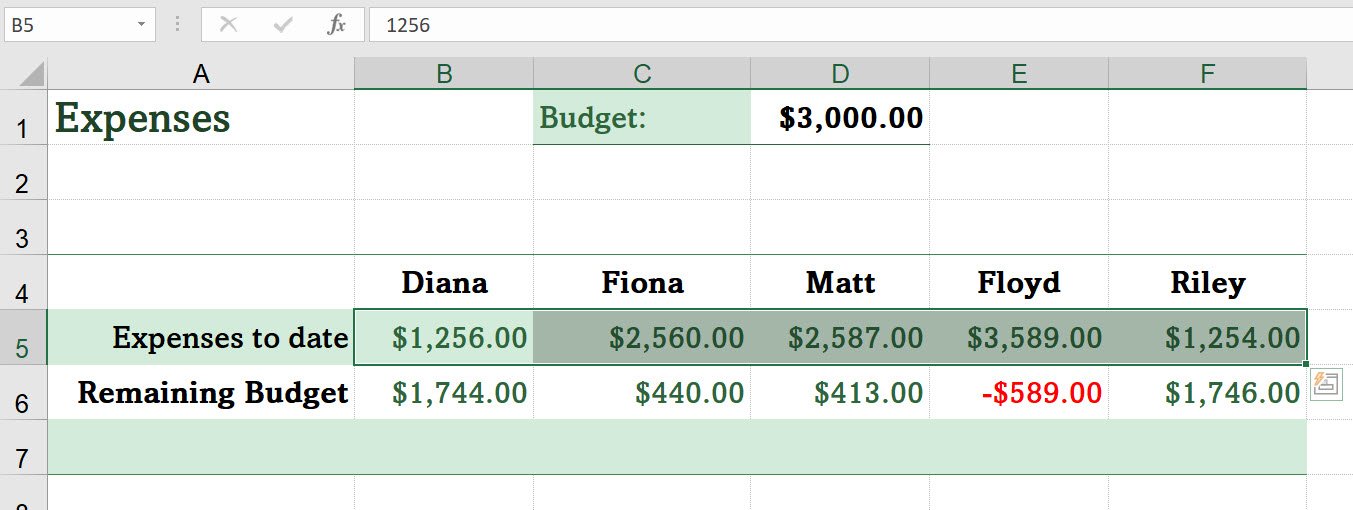
2. Access Format Options: Go to the ‘Home’ tab, find the ‘Cells’ group, and click on ‘Format’.

3. Unlock the Selected Cells: Look for the ‘Lock Cell’ option, usually near the bottom of the menu. If there’s a box around the lock icon, it means the cells are currently locked. Click on ‘Lock Cell’ to remove the locked status from your selected cells.
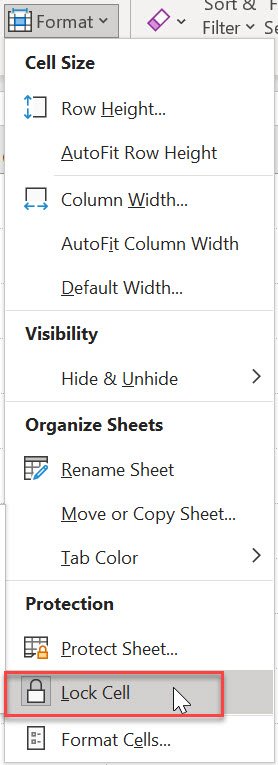
Your selected cells will now be unlocked and will stay editable even when you protect the worksheet.
How to protect a worksheet in Excel
Securing your Excel sheet with a password is a smart way to protect your data from unwanted changes. Here’s how you can easily set up password protection:
1. Start Protection: Open the ‘Protect Sheet’ dialog box:
- From the ‘Home’ tab, click ‘Format’ in the ‘Cells’ group and select ‘Protect Sheet’.
- Use the ‘Review’ tab and choose ‘Protect Sheet’ from the ‘Protect’ group.
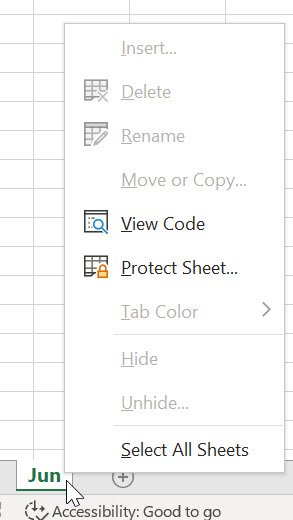
- Or right-click the sheet tab and pick ‘Protect Sheet’.
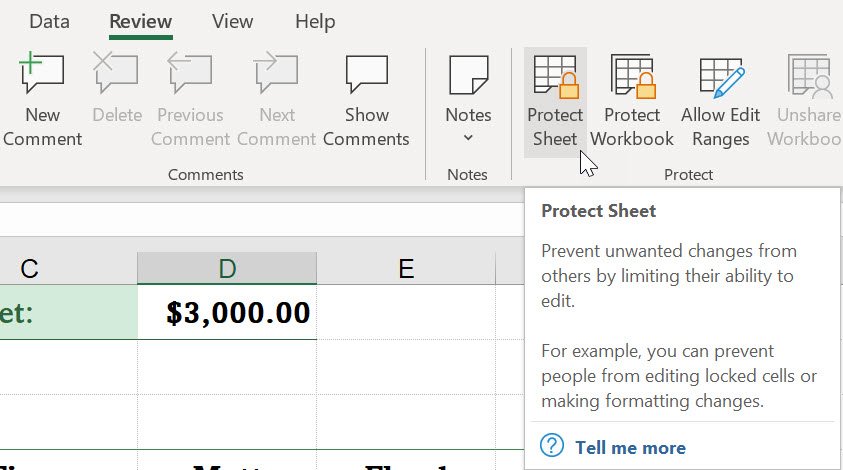
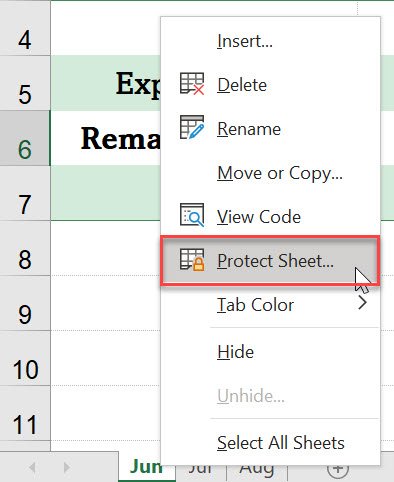
2. Set a Password: Enter a password into the 'Password to unprotect sheet' box.
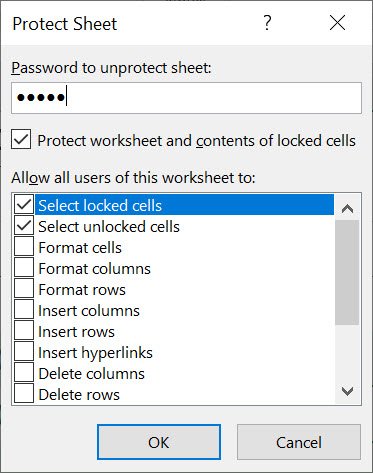
3. Customise Permissions: In the 'Allow all users of this worksheet to' option box select suitable options for your worksheet. For example, if you would like users to be able to insert new rows, place a check on the Insert rows option.
Pro Tip: it is a good idea to remove the check from the Select locked cells option. This removes the ability for users to click on any cell other than unlocked cells.
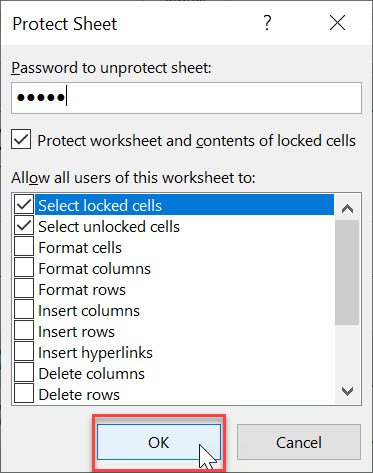
4. Activate Protection: Click ‘OK’ to set the protection.
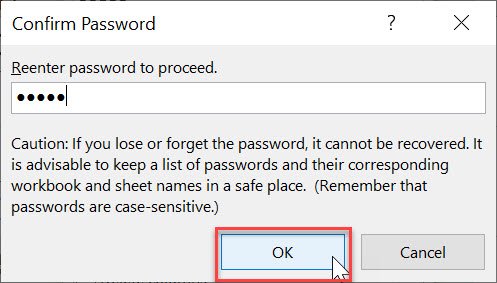
5. Confirm Password: Excel will ask for confirmation of your password. Re-enter it to verify and then click OK.
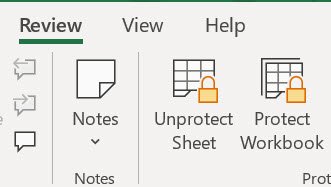
6. Finalise Protection: After confirmation, the ‘Protect Sheet’ button on the ‘Review’ tab changes to ‘Unprotect Sheet’, indicating that your sheet is now secure and only the cells that you selected to be unlocked will be able to be changed.
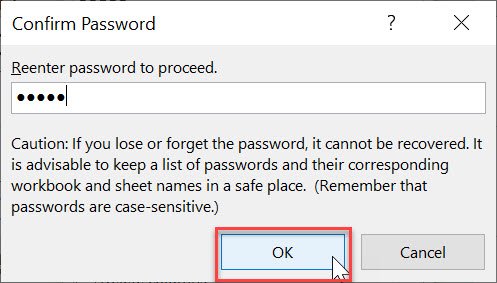
Note: Excel offers a caution not to forget your password, as the password cannot be recovered if forgotten. Please note that passwords are case sensitive; so, if you typed the password in UPPERCASE you will need to always type it in UPPERCASE to unprotect the file.
How to Password Protect an Excel Workbook
Use the Protect Workbook option when you do not want other users to be able to change your workbook structure.
Once a workbook is protected it prohibits others from viewing hidden worksheets, adding, moving, deleting, hiding, and renaming worksheets.
In the example below, the Jun, Jul and Aug worksheets have been arranged in order. If we didn’t want anyone moving, deleting, or renaming these sheets, we can use the Protect Workbook tool.
To apply workbook protection, follow the steps below.
1. Prepare Your Workbook: Adjust your workbook by hiding sheets and organising the sheet tabs. Once you’re happy with the layout and structure, save your changes to ensure your workbook is set up exactly how you want it before you proceed with protection.
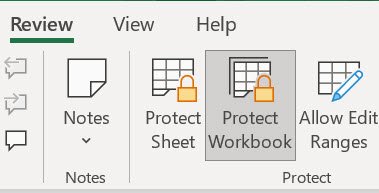
2. Turn on Workbook Protection: Go to the ‘Review’ tab, find the ‘Changes’ group, and click ‘Protect Workbook’. This will open up the dialog box for protection settings.
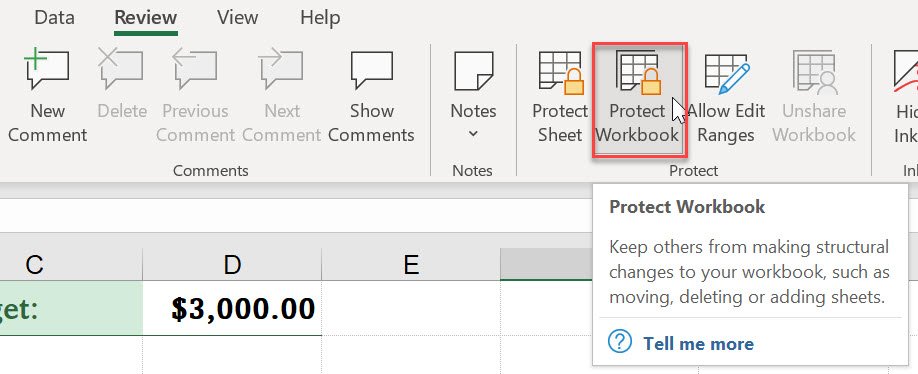
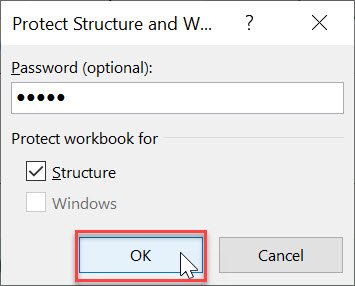
The Protect Workbook dialog box will be displayed.
3. Choose Protection Type:
- Select ‘Structure’ if you want to prevent any alterations to the workbook’s structure, like adding or deleting worksheets.
- The ‘Windows’ option is available only in Excel 2007, Excel 2010, Excel for Mac 2011, and Excel 2016 for Mac. Select the Windows option if you want to prevent users from moving, resizing, or closing the workbook window, or hide/unhide windows.
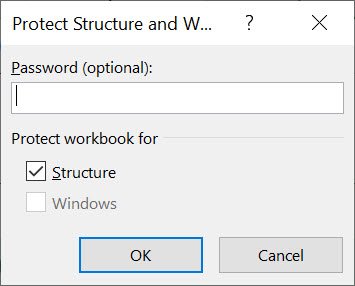
4. Set a Password: Enter a password to protect the workbook.
5. Enable Protection: Click ‘OK’ to apply your settings.
6. Confirm Your Password: Confirm you password by entering it again and then click 'OK'.
7. Check Protection is on: Once done, the ‘Protect Workbook’ button will be highlighted, indicating active protection.
With these steps, your workbook’s structure and window arrangements are safeguarded against unwanted changes. Remember that once protection is active, functions like deleting or moving worksheets will be disabled on the Ribbon and shortcut menus.
Password Protect Excel File: Lock the Workbook for Open/Modify Access
An excellent way to protect a workbook in Excel is by changing the settings so that the file can only be opened or modified once a password has been entered.
To do this follow the steps below.
1. Initiate 'Save As': Click the File tab and then click Save As to open the Save as dialogue box.
Note: The fastest way to open the Save As dialog box is to press Function key F12.
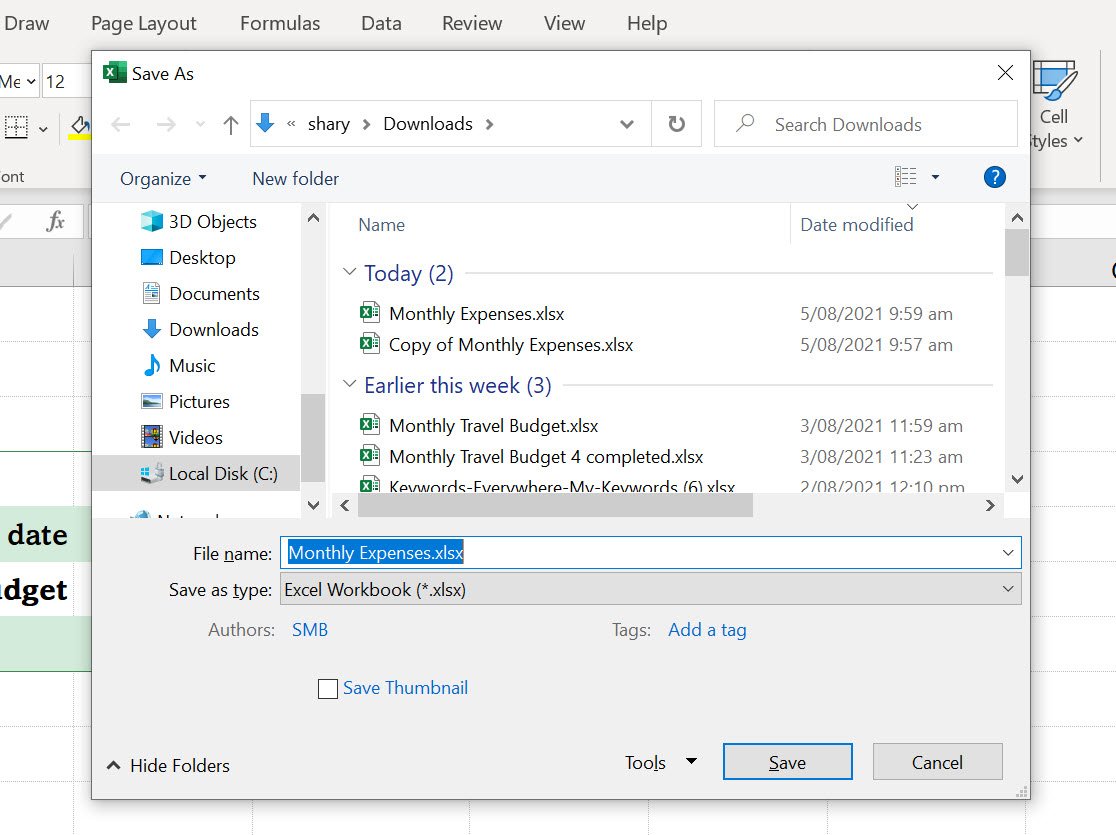
2. Access General Options: In the ‘Save As’ dialogue box, click ‘Tools’, then select ‘General Options’.
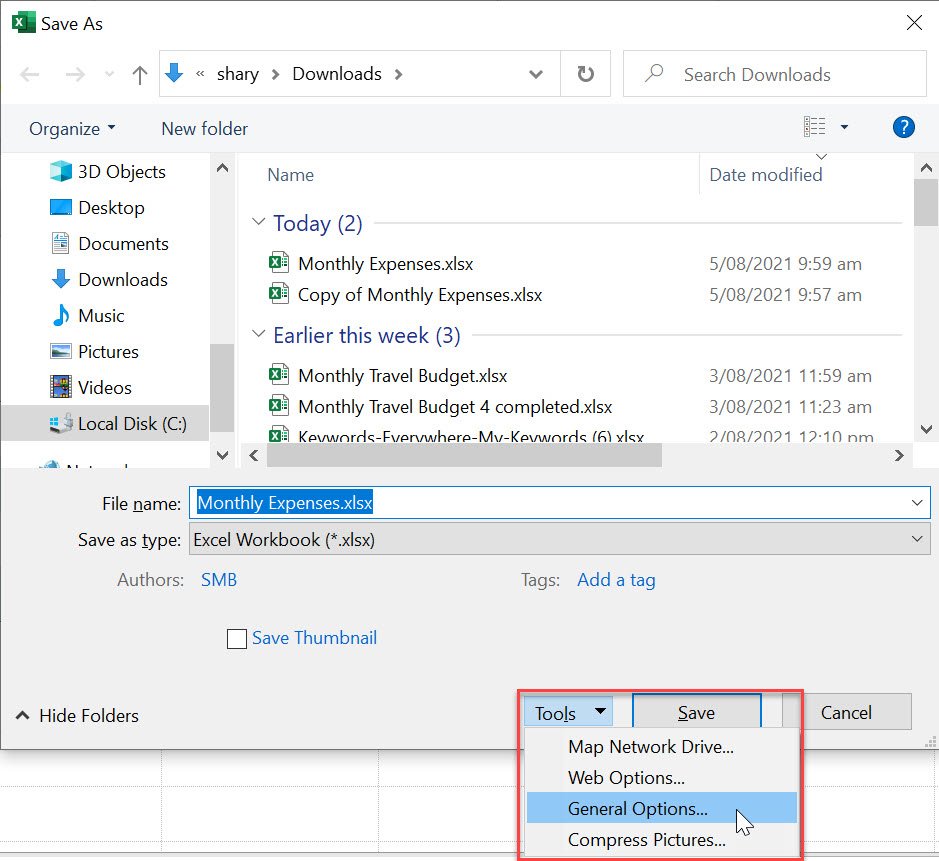
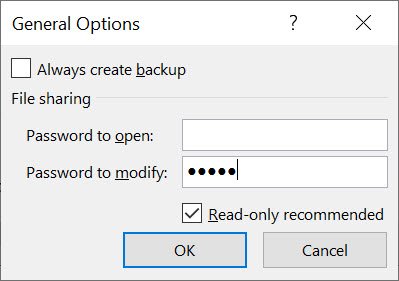
The General Options dialogue box will open.
3. Set Passwords: Enter a password into the Password to open and/or Password to modify boxes. Once these are in place the file cannot be opened or modified without the password being entered first.
- Password to open – this option ensures only users with the password will be able to open the file.
- Password to modify - in the example below I am leaving the Password to open box empty and using the Password to modify option. This means users will be given the option to open the file as a Read-only file only. However, they will not be able to modify the actual file without entering the Password to Modify password first.
- Read-only recommended check this box to add an additional level of protection where you can ask the user to open the file as read-only. Be aware that they can over-ride this and open the original file if they have the password.
Important Note: these steps encrypt your file. If your password is forgotten, you will not be able to edit your file so please remember to save it somewhere safe.
4. Confirm Passwords: After clicking ‘OK’, you’ll be prompted to re-enter your password for verification.
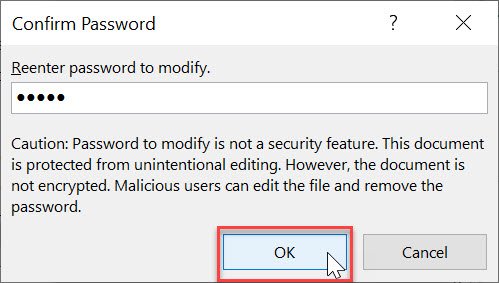
5. Save Your File: Click ‘Save’ to apply the password protection.
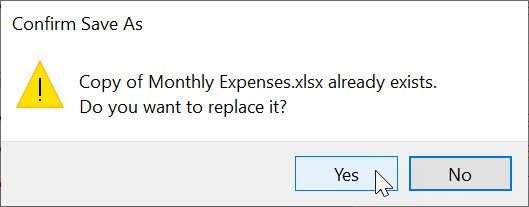
6. Overwrite Confirmation: If prompted, choose ‘Yes’ to overwrite the existing file or ‘No’ to save as a new file if you prefer.
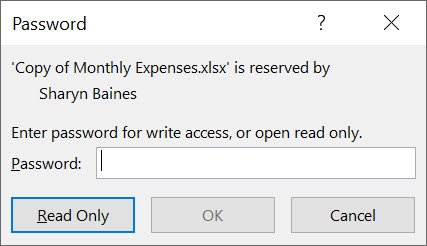
When someone tries to open or modify the file now, they will have to enter the correct password.
How Secure is a Password Protected Excel File
Putting a password on your Excel files is like putting a lock on a door—it helps keep your data safe from changes you don’t want. But just like a lock can be picked, passwords in Excel aren’t unbreakable. There are ways to get around them that some people might know.
So, think of a password as a way to keep honest people honest. It’s there to stop mistakes, not to stop a determined hacker.
Microsoft says that if you’ve got really important stuff in your Excel file, don’t just rely on a password. Here’s an excerpt from Microsoft’s support page on Protection and security in Excel.
“You should not assume that just because you protect a workbook or worksheet with a password that it is secure - you should always think twice before distributing Excel workbooks that could contain sensitive personal information like credit card numbers, Social Security Number, employee identification, to name a few.”
Conclusion
In short, use a password to keep things tidy and avoid the hassle of fixing things that others might mess up. Use it wisely, alongside other security measures, and keep your passwords safe to ensure your data remains secure.
- For steps on how to remove protection when you don't have a password, simply follow the steps outlined in my blog post titled ‘3 Quick Ways to Unprotect an Excel Sheet and Workbook (Even Without a Password).
- Dive deeper into understanding why in my blog titled 'Don’t be fooled – Excel Worksheet Protection isn’t bullet-proof protecting isn’t bullet-proof'.
Was this blog helpful? Let me know in the Comments below.
Was this blog helpful? I'm here to empower your journey with Excel, aiming to make your daily tasks more efficient and boost your potential.
Share your thoughts in the Comments below - your insights not only enrich others, they also help me tailor future content to your needs.
And if you're looking to take a step further, join our exclusive 'Insider Group'. As a member, you'll receive Weekly Super-Tips, and early access to in-depth tutorials. Sign up Today!"
Happy Excel-ling!!


Great article! One glitch though: the warning “Note: these steps encrypt your file” applies to the password to OPEN only. Protection features in Excel are like a fence around your house: it keeps most people out, except a determined burglar. Or like you wrote: not watertight! It would be nice to add some information on sharing a workbook.
Hi Richard. Fantastic! Thank you so much for your comment. I’ll revisit this post and make it more ‘watertight’! 😊 What specifically would you like to see added re sharing? I’d be grateful for any ideas that you feel would be helpful to our readers. Many thanks! Sharyn