There are times when you want to return a match for a VLOOKUP based on multiple criteria.
For example, we may have customers who have multiple branches. However, each branch is recorded under the same customer number.
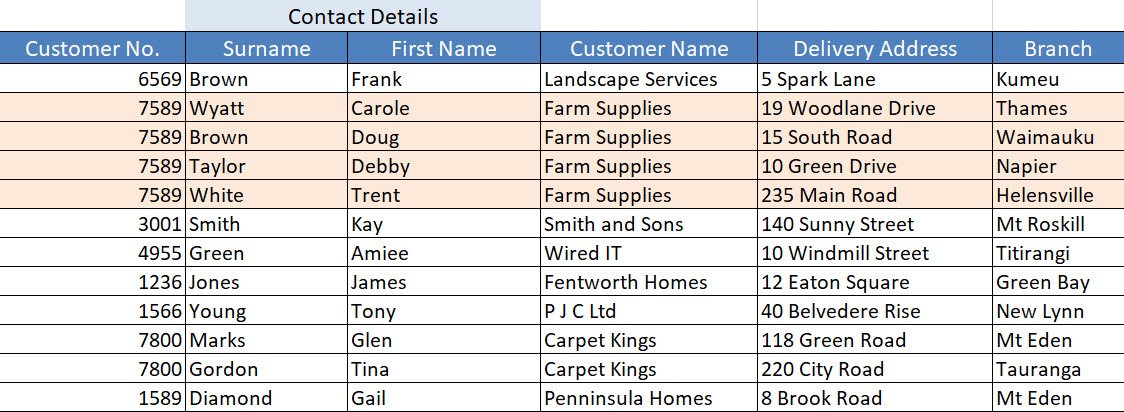
So, how do we look up info for a specific branch if all the branches are using the same customer number? In other words, how do we do a VLOOKUP using multiple lookup values.
If you have already attempted to create a VLOOKUP formula using multiple lookup values, you will already know that this function is built to lookup one value only.
However, it can easily be done in just two steps.
Step 1 is to combine the columns that hold the individual lookup values. This will then allow us to use the combined data as the one lookup column.
Step 2 is to create a VLOOKUP formula that will look up the column holding the combined data.
In this blog, I will cover two different examples, covering the steps on how to create a VLOOKUP using multiple criteria.
I’ll also include an optional Step 3 on how to trap and handle any #N/A errors that may be returned with VLOOKUP.
Example 1
Step #1 Combine two columns in Excel to create a single lookup column
As we have already established, one of the limitations of VLOOKUP is that it only looks for one lookup value in a Table Array, which means you cannot use VLOOKUP alone to return a match for multiple criteria.
Thankfully, we can use the CONCATENATE, CONCAT or string functions to combine two or more values to become the one lookup value.
In the example below you will see that Farm Supplies has the customer number 7589. Each Farm Supplies branch is recorded under the same customer number.

We can easily use the VLOOKUP function to find the first occurrence of each customer number, but we can’t use it to locate information for the customer AND a specific branch.
Therefore, to find a match based on the ‘Customer No.’ AND the ‘Branch’ we will insert a new column into our data table.
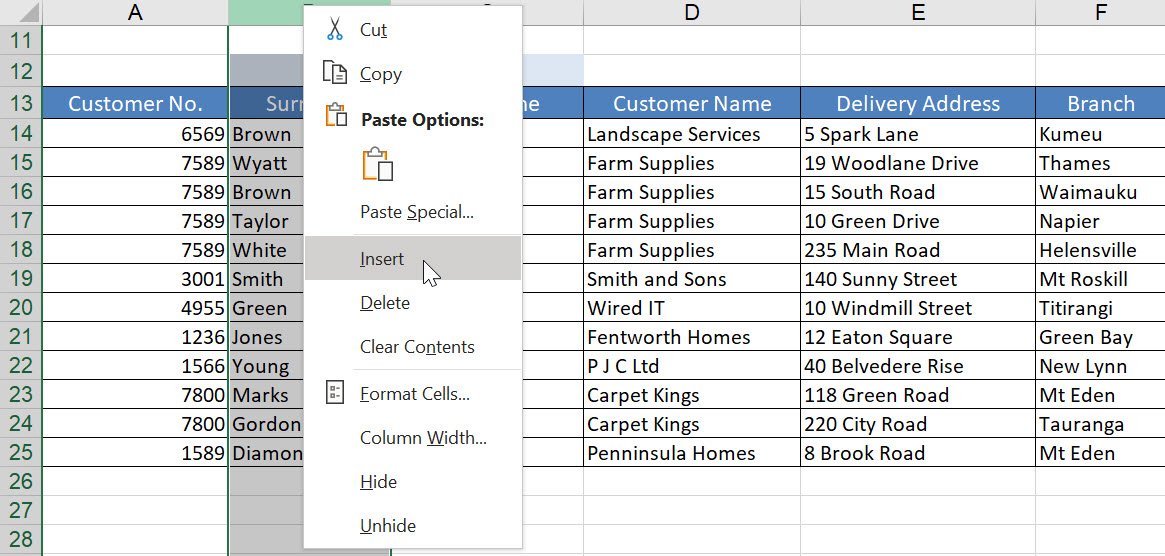
In the new column we will now combine the customer number and branch name into one cell. This will then become our lookup value.
We can combine the content of the two cells using the following formulas:
=CONCAT(A14,G14) – the CONCAT function pulls two values together to be used as the Lookup value.
=CONCATENATE(A14,G14) – the CONCATENATE function pulls two values together to be used as the Lookup value. This is an older function, but it’s still functional within Excel. Use CONCAT if you are using a newer version of Excel.
=A14&G14 - a string formula. Using the & symbol you can pull cells together into one text string.
These formulas offer the ability to combine data held in separate cells into the same cell. Each single cell reference can be pulled together into a single string.
In the example below the CONCAT function is used in cell B14 to combine the content from A14 and G14. The formula is =CONCAT(A14,G14). This creates the unique value of CustomerNoBranch. The formula has then been copied into cells B15 to B25.
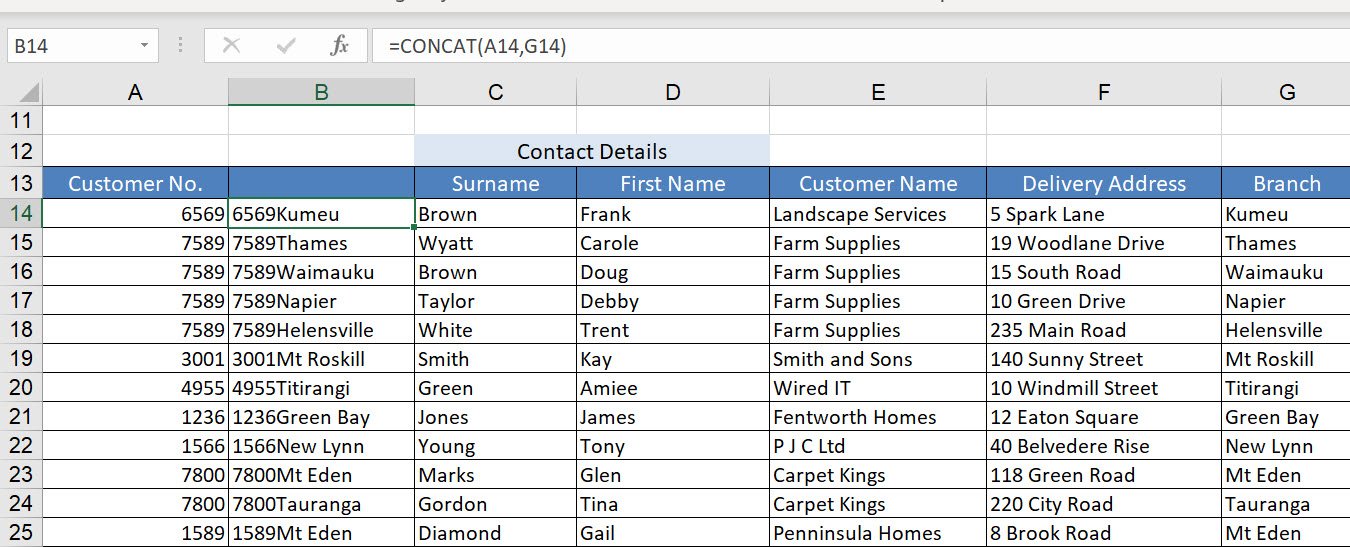
Now that we have the customer AND branch information combined into one column, we can now use this column as the first column in our Table_array range within the VLOOKUP formula.
Step #2 Combine two cells in Excel to create a Lookup Value
Now we need to combine the Customer No and Branch information to create the Lookup_value argument in the VLOOKUP formula.
In the example below, the Customer No has been entered into cell E4. A VLOOKUP formula is then using the Customer No. to return the Customer Name into cell E5. The Branch name in cell E6 has been manually entered.
We will now create a VLOOKUP in cell E9 that will return the contact details for the customer, based on the Customer No entered into cell E4, and the Branch name entered into cell E6. Therefore, creating a VLOOKUP based on multiple criteria.
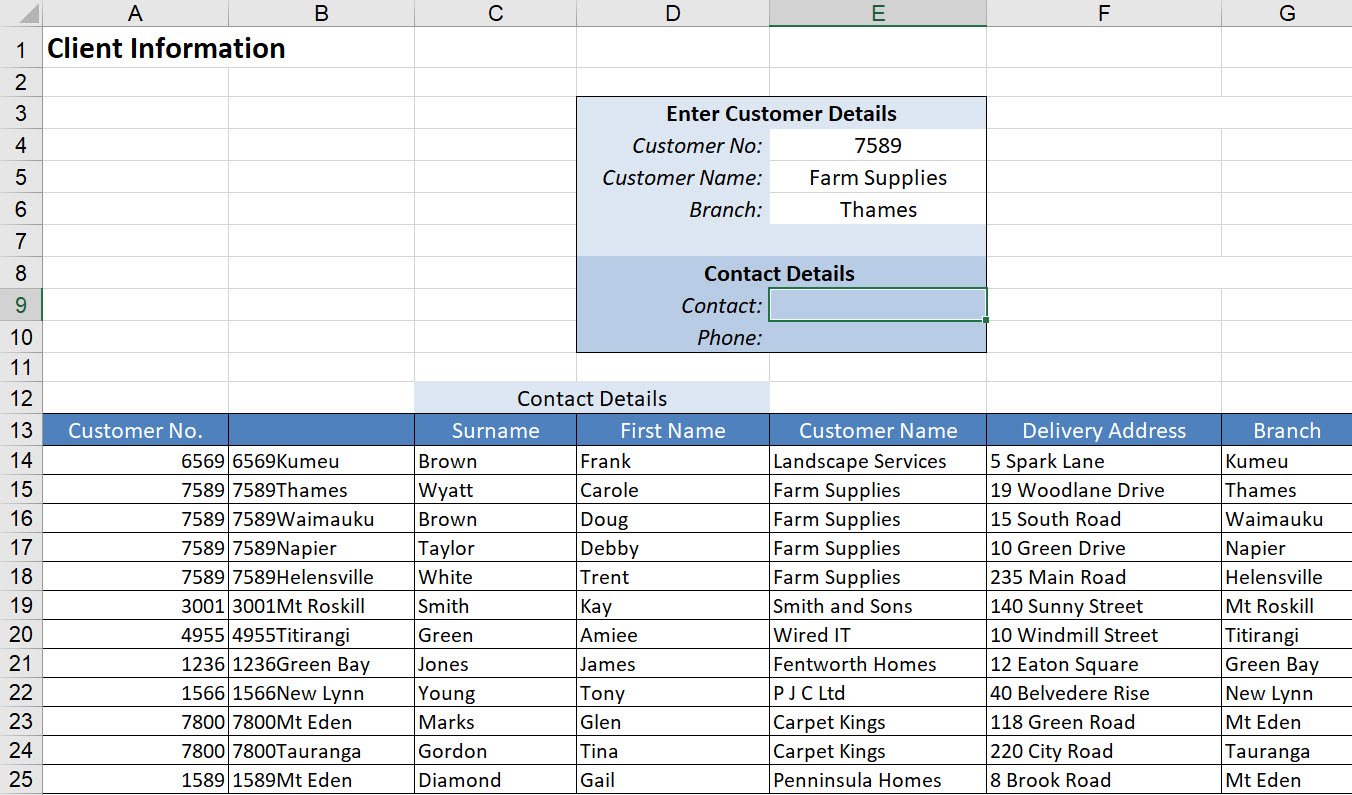
In the example below the CONCAT formula is used to create the Lookup_value argument within the VLOOKUP formula.
By nesting the CONCAT function inside of the VLOOKUP formula we can use the ‘Customer No’ in cell E4 and the ‘Branch’ in cell E5 as the Lookup value.
=VLOOKUP(CONCAT(E4,E6),B14:H25,3,FALSE)
Note: you can also use CONCATENATE or a string formula to combine cells to create the Lookup value, e.g. =VLOOKUP(CONCATENATE (E4,E6),B14:H25,3,FALSE) or =VLOOKUP(E4&E6,B14:H25,3,FALSE)
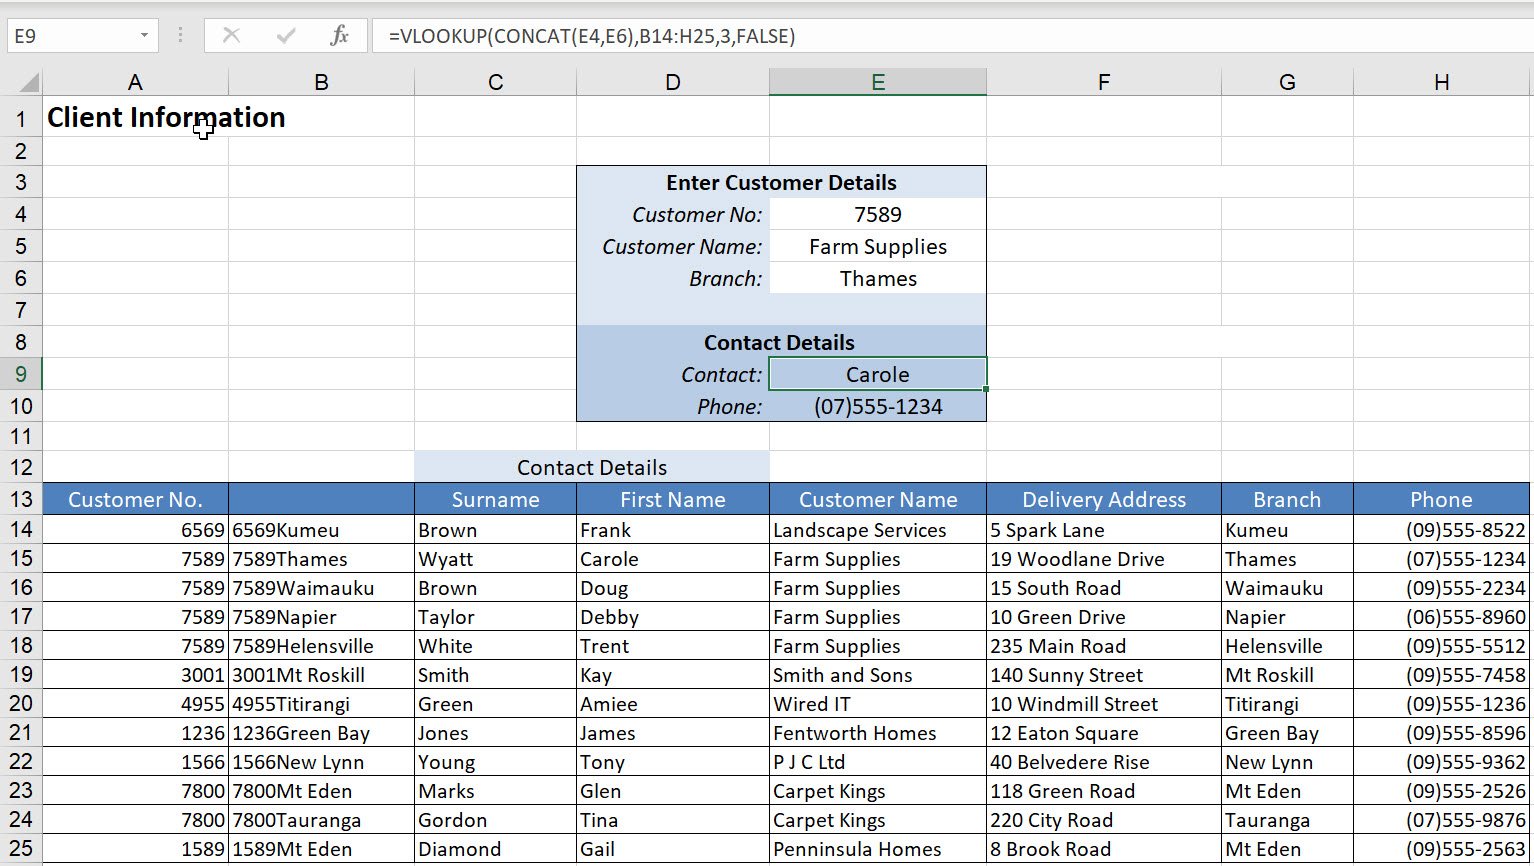
If at any time the data in cells E4 or E6 changes the result will be updated.
Once you have created your VLOOKUP using multiple criteria, you might like to Hide your lookup column.
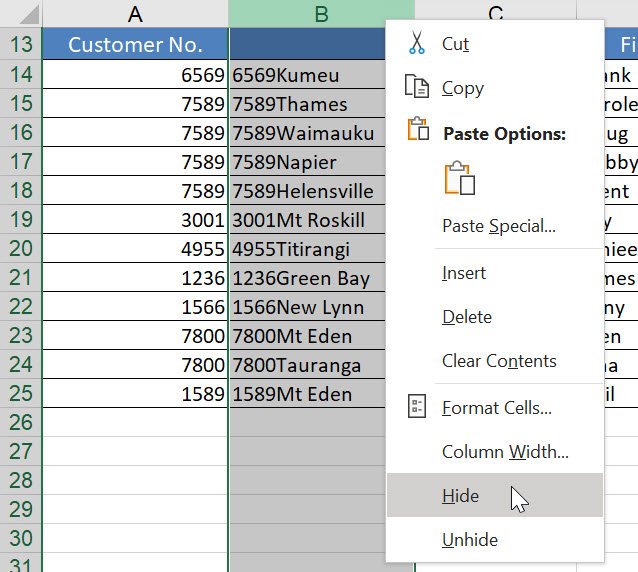
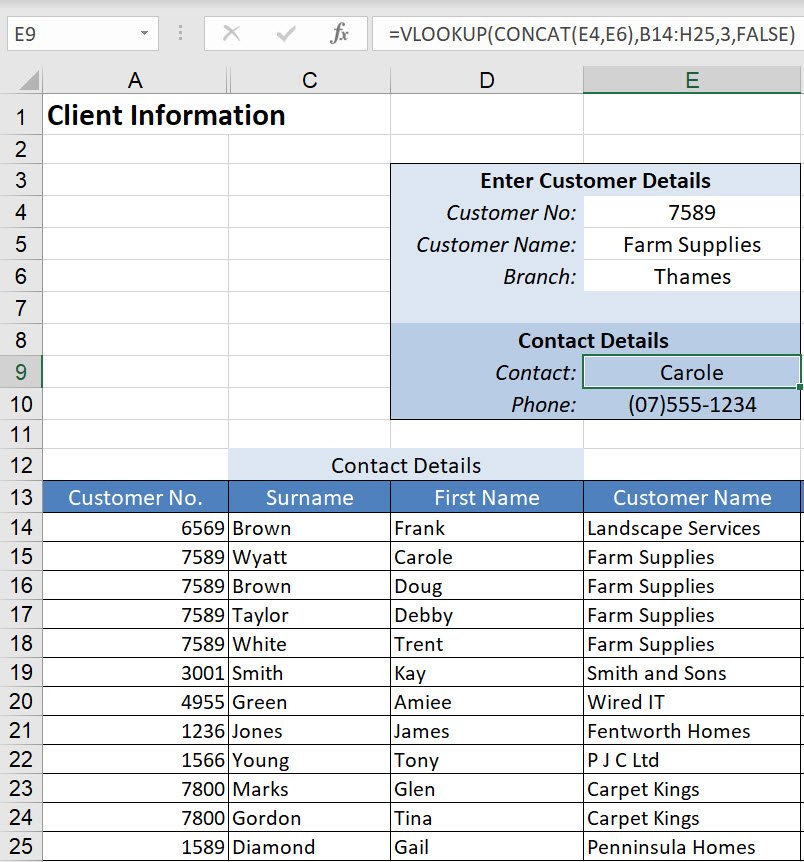
Your column will no longer be displayed. However, your VLOOKUP will still be finding and returning the information you require.
Step #3 Hide a VLOOKUP #N/A Error
The example I have given you above is reliant on the user entering both the customer number and branch name correctly.
If the data is entered incorrectly into either cell the #N/A (Not Available) error will be displayed.
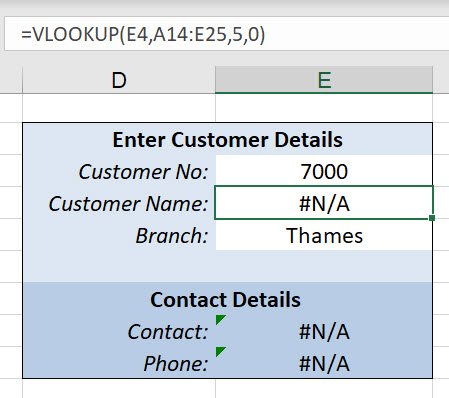
To avoid this error being displayed, we can wrap a logical error catching function around the VLOOKUP formula.
Using these functions allows us to replace the #N/A errors with an empty cell or a value. In the following examples, if the lookup value can’t be found the text “not found’ will be displayed instead.
Using the IFNA function
The IFNA function returns the value you specify if a formula returns the #N/A error value; otherwise it returns the result of the formula.
Note: this function isn’t available in Excel 2010 or Excel 2007. Please refer to the notes below on the IFERROR function.
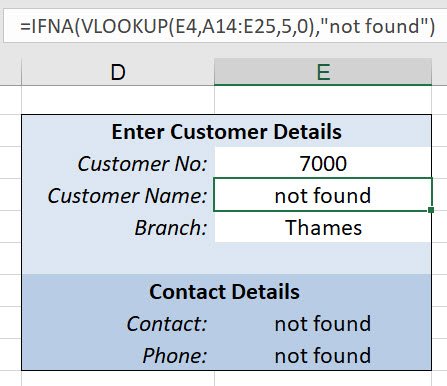
In the example below, the #N/A error has been caught using the IFNA function and replaced by the words “not found”.
=IFNA(VLOOKUP(E4,A14:E25,5,0),"not found")
Using the IFERROR function
You can use the IFERROR function to trap and handle errors in a formula. IFERROR returns a value you specify if a formula evaluates to an error; otherwise, it returns the result of the formula.
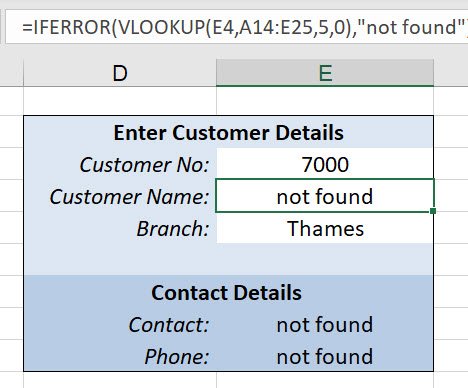
In the example below, the #N/A error has been caught using the IFERROR function and replaced by the words “not found”.
=IFERROR(VLOOKUP(E4,A14:E25,5,0),"not found")
Note: for both the IFNA and the IFERROR functions, if you wanted to return an empty cell use “” (double quote marks) as the value to be returned part of the argument.
Example 2
VLOOKUP using multiple lookup values
In the example below we are trying to reconcile two different lists of payments using the client’s Purchase Order number. Unfortunately, we have several invoices that have been raised from one Purchase Order number.
This isn’t ideal as the VLOOKUP function will stop on the first occurrence of the PO number only.
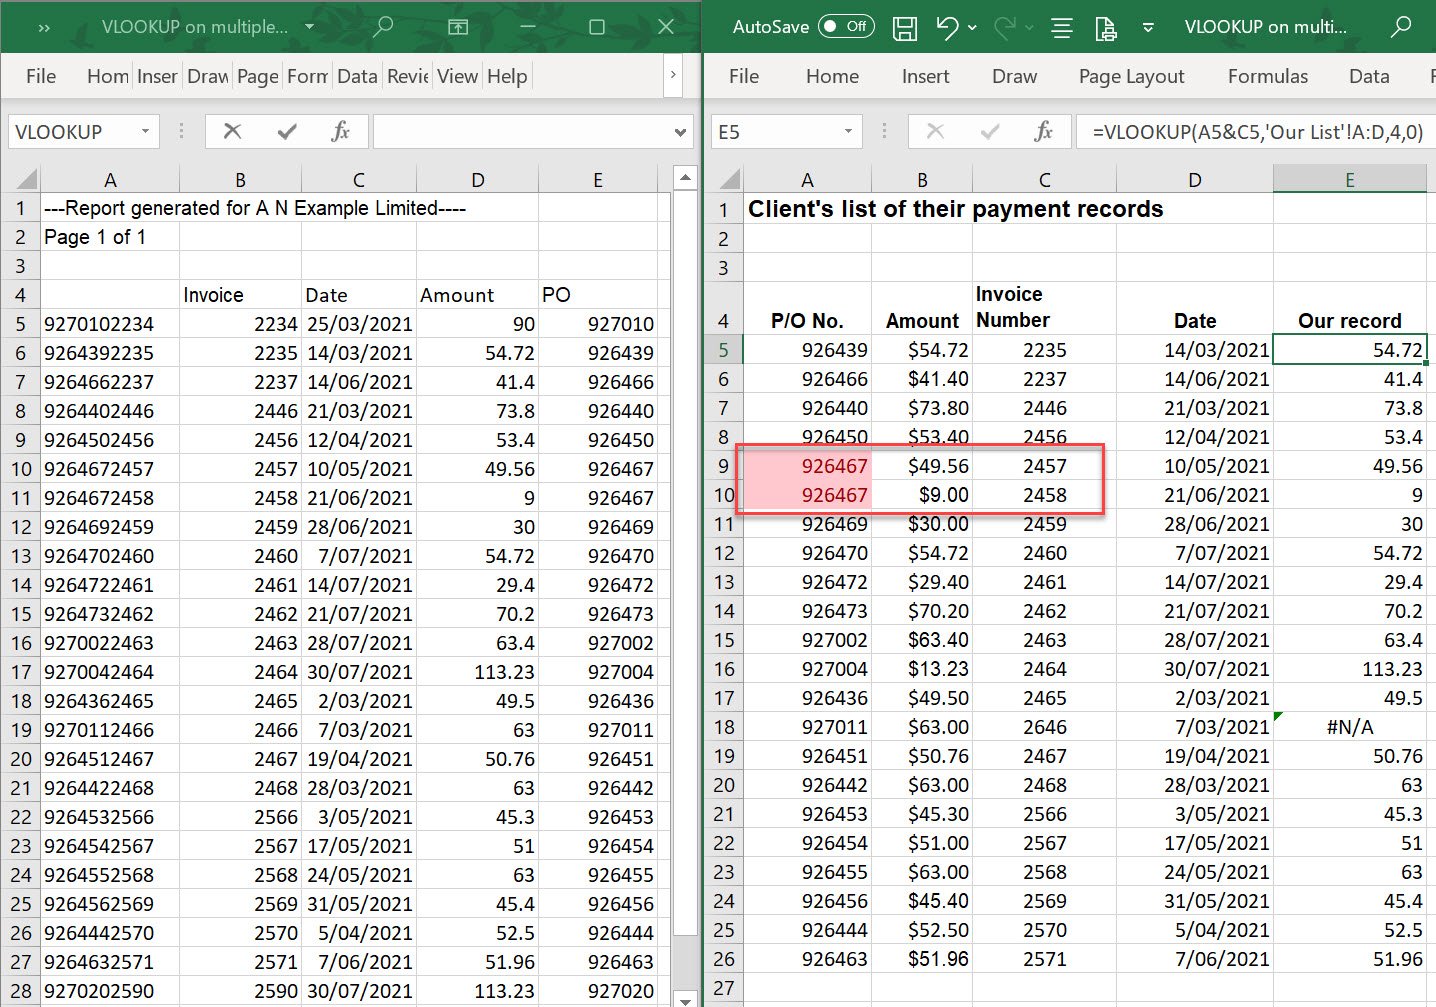
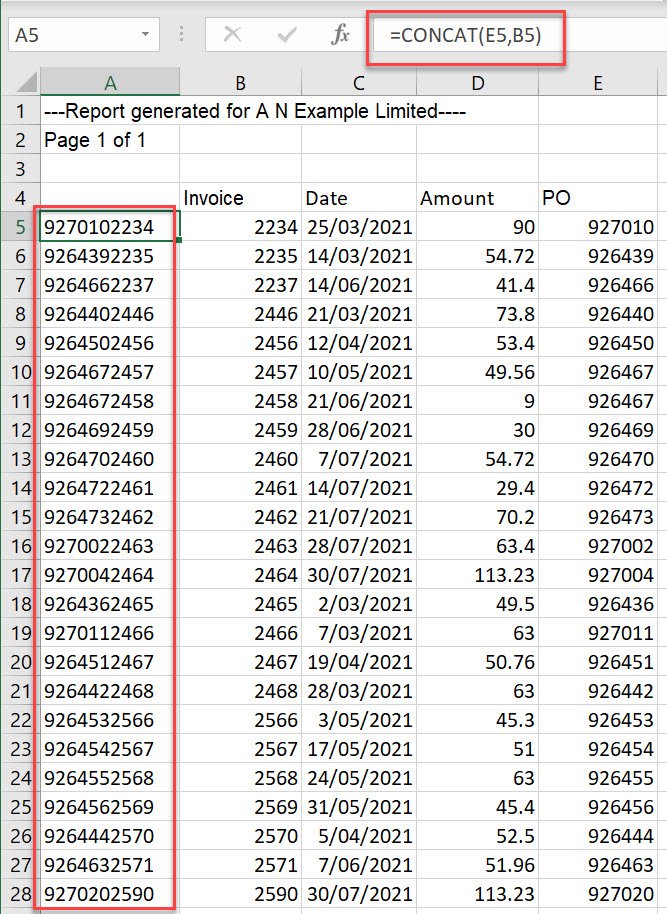
To ensure we pull through the correct information for each purchase order we can insert a new column into the data range we will be looking up and combine the PO number and the Invoice number to create a unique lookup value.
In the example below cells E5 and B5 have been combined using the CONCAT function and then copied into cells A6 to A28.
In the client’s worksheet on the right, the 'Our record' column is using a VLOOKUP formula =VLOOKUP(A5&C5,'Our List'!A:D,4,0)
You will see that the function’s Lookup_value argument is the string formula A5&C5.
Combining the values in A5 and C5 creates a unique value which is then used to lookup the first column of the Table_array range, held on the worksheet on the left.
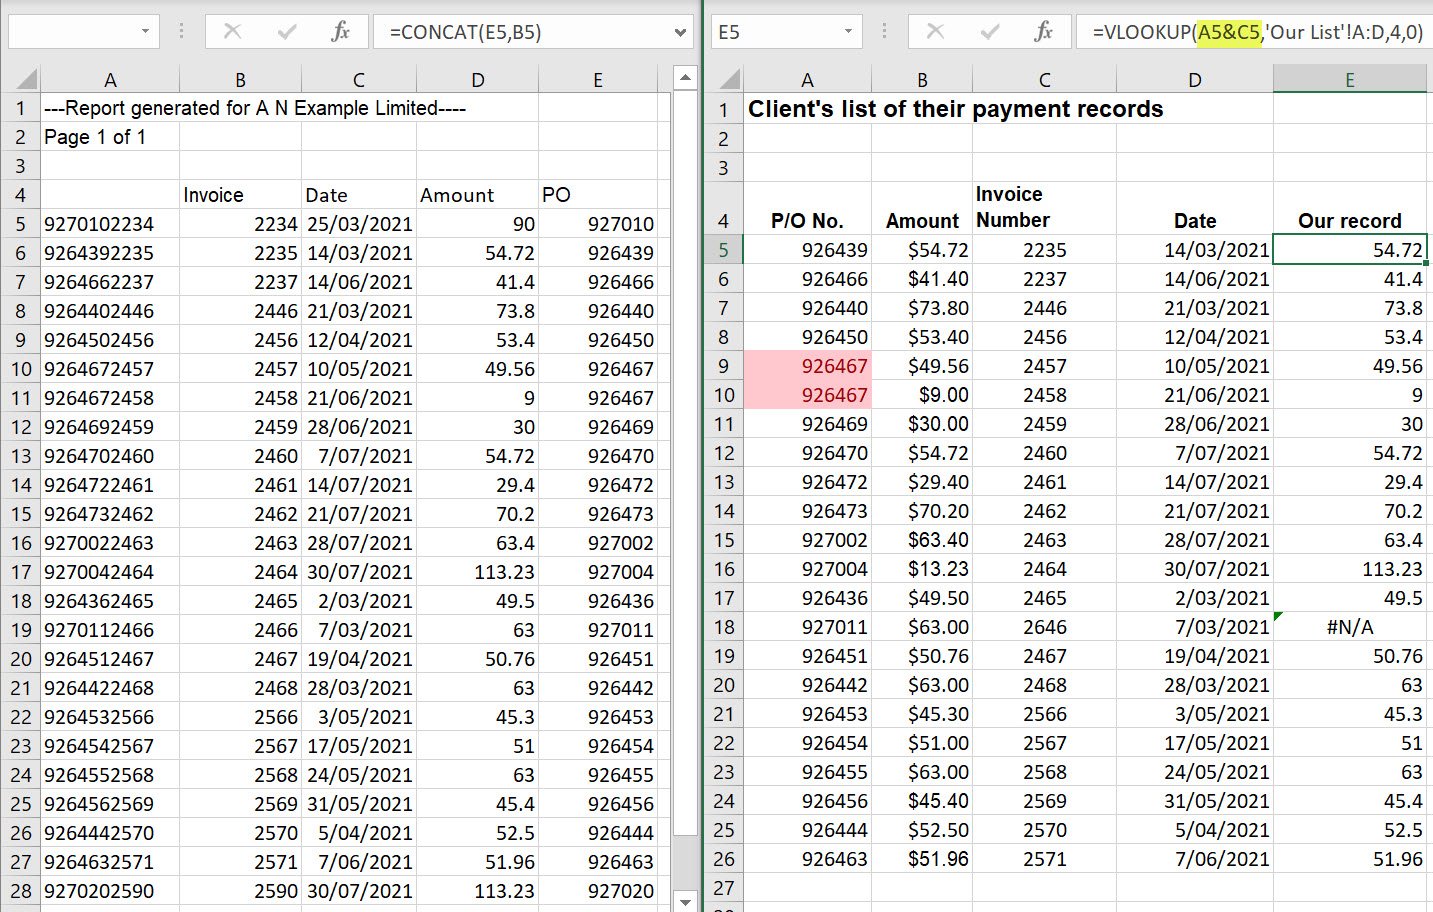
The VLOOKUP formula is then copied into cells E5 to E26.
Purchase order number 927011 on row 18 isn’t found and the #N/A error is returned instead.
We could leave the #N/A as it is, or to replace it with the text “no match” we can wrap an error trapping function around the formula.
In the example below the IFNA function is being used to trap the error and return the words “no match” instead of the #N/A error.
=IFNA(VLOOKUP(A5&C5,'Our List'!A:D,4,0),"no match")

We cover look up functions in our Excel Stage 3 course. If you are dealing with large data lists this course is for you.
Was this blog helpful? Let us know in the Comments below.

