Microsoft is now rolling out the Windows 11 free upgrade. Some users will get notified of this update as soon as it becomes available to their PC.
It is important to note that Windows 11 sends the update to different PCs at different times with newer PC’s getting the update earlier. So, for some users that may mean waiting a few months until the notification comes through.
However, there are options for users who don’t want to wait for this notification and want to install it straight away.
In this post, I will be explaining how to download and install Windows 11 when you have been notified of the upgrade, and how to upgrade if you haven’t been notified but want to install now.
How to install Windows 11
- Check your PC for compatibility before installing Windows 11
- Updating Windows 10 to 11 if you have been notified by Microsoft
- Installing Windows 11 using the Windows Installation Assistant
- How to fix a black screen after Windows 11 update (personalising your Desktop)
Check your PC for compatibility before installing Windows 11
Before installing Windows 11 it’s a good idea to check your PC for compatibility.
The first thing you will have to do is check that your PC has all the Windows 11 requirements it needs to be compatible for download.
The Microsoft page Find Windows 11 specs, features and computer requirements has an overview of the minimum system requirements needed for your PC to run Windows 11.
If your PC is compatible, Microsoft will likely notify you when your PC is ready for its upgrade. If you don’t want to wait and understand the risks of installing Windows 11 without a notification, you can use the Windows Assistant to upgrade.
If you have already been notified and want a step-by-step guide on how to install Windows 11 follow the steps in How to update Windows 10 to 11 if you have been notified by Microsoft.
How to update Windows 10 to 11 if you have been notified by Microsoft
Please note that the upgrade can take some time depending on the speed of your internet and your computer. My download and update took approximately 2 hours on a relatively fast internet connection.
I wouldn’t recommend upgrading on a busy day when you will need access to your computer. It would be better to upgrade at a time when being without access to your computer wouldn’t have a negative impact.
If you currently have Windows 10, your desktop should look like the example below.
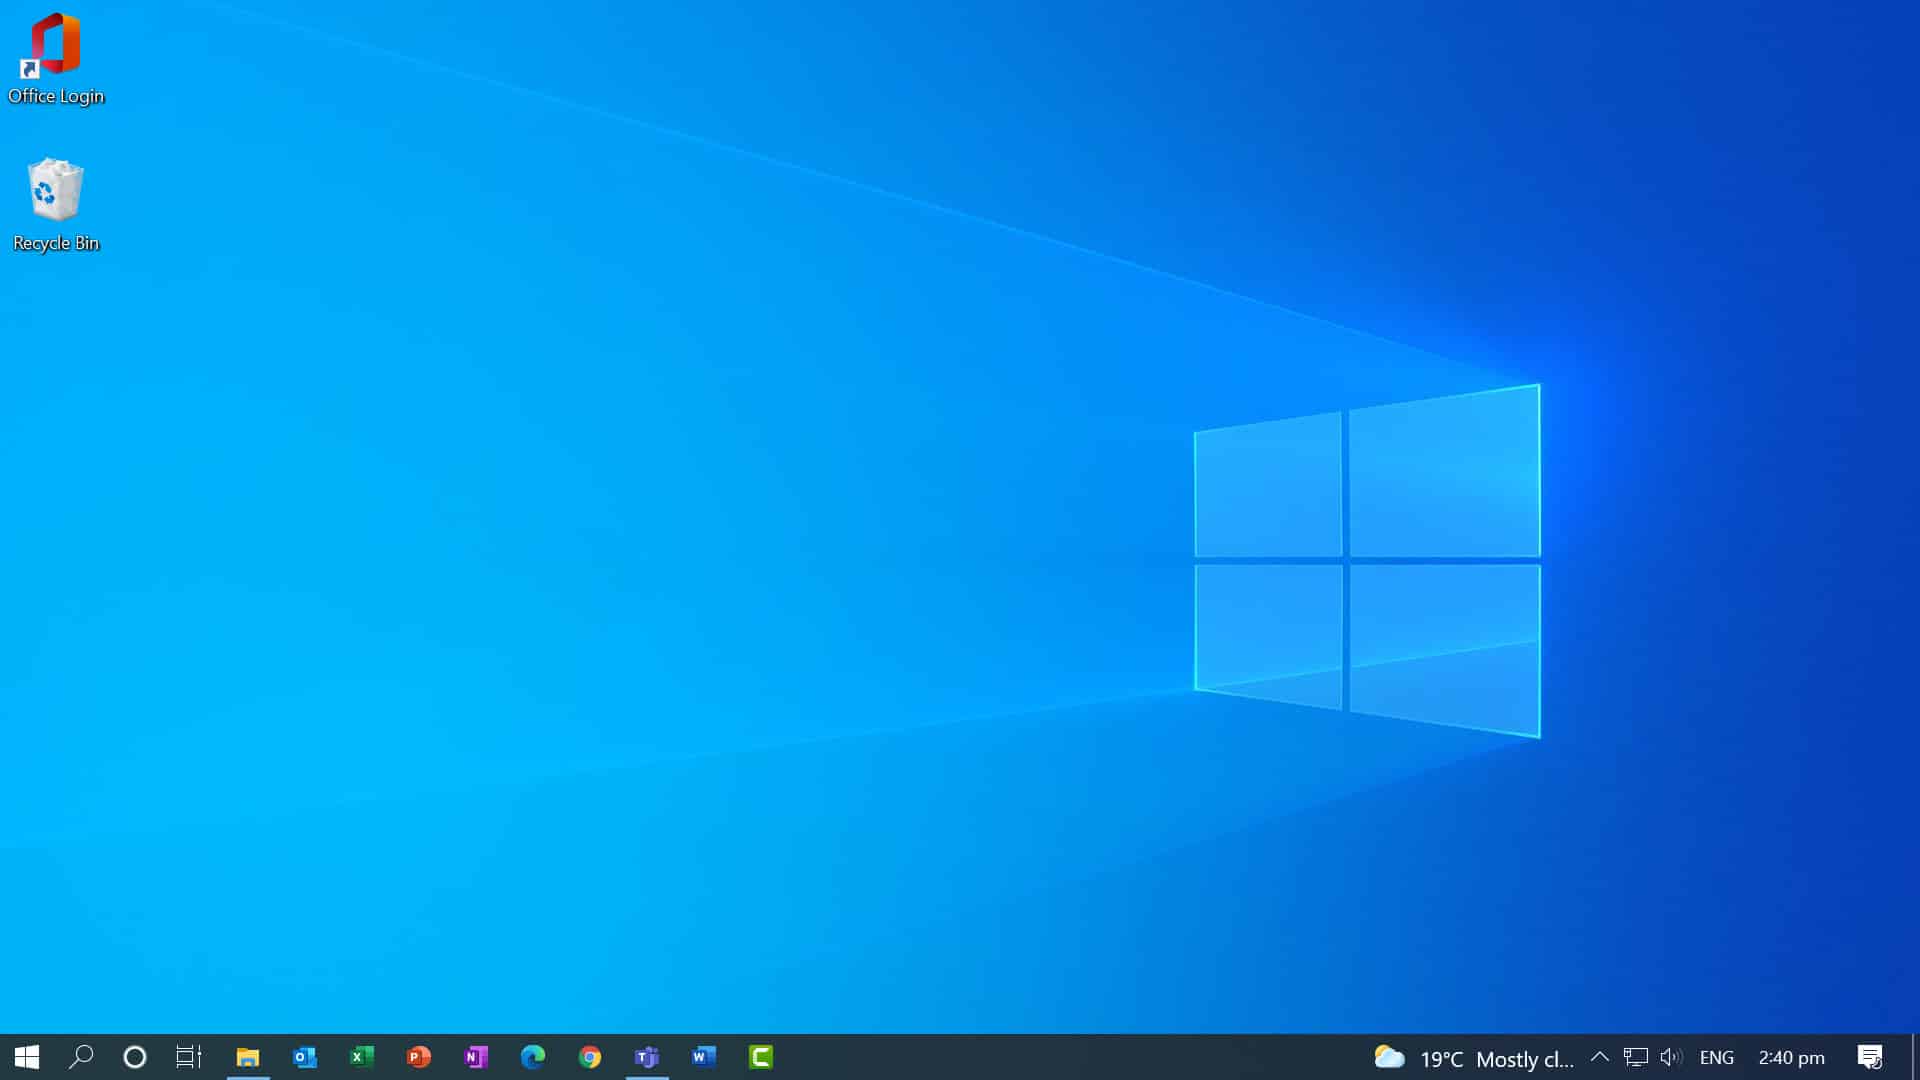
A closer look at your Task Bar should look like this.

To upgrade to Windows 11 follow these steps:
Step 1: If you want to upgrade to Windows 11, you will first need to check for updates. There are a few different ways to see if your PC is ready for an update. In our example, I will take you through two easy ways to get there.
- Option #1: On the side of the task bar, if you haven’t already installed Windows 11 and your PC is ready for it, there should be an update button alerting you that an Upgrade to Windows 11 is ready for your PC. This will be shown as a little blue circle as shown in the image below.
- Option #2: You can also check for updates by typing 'check for updates' in the search bar on your task bar.
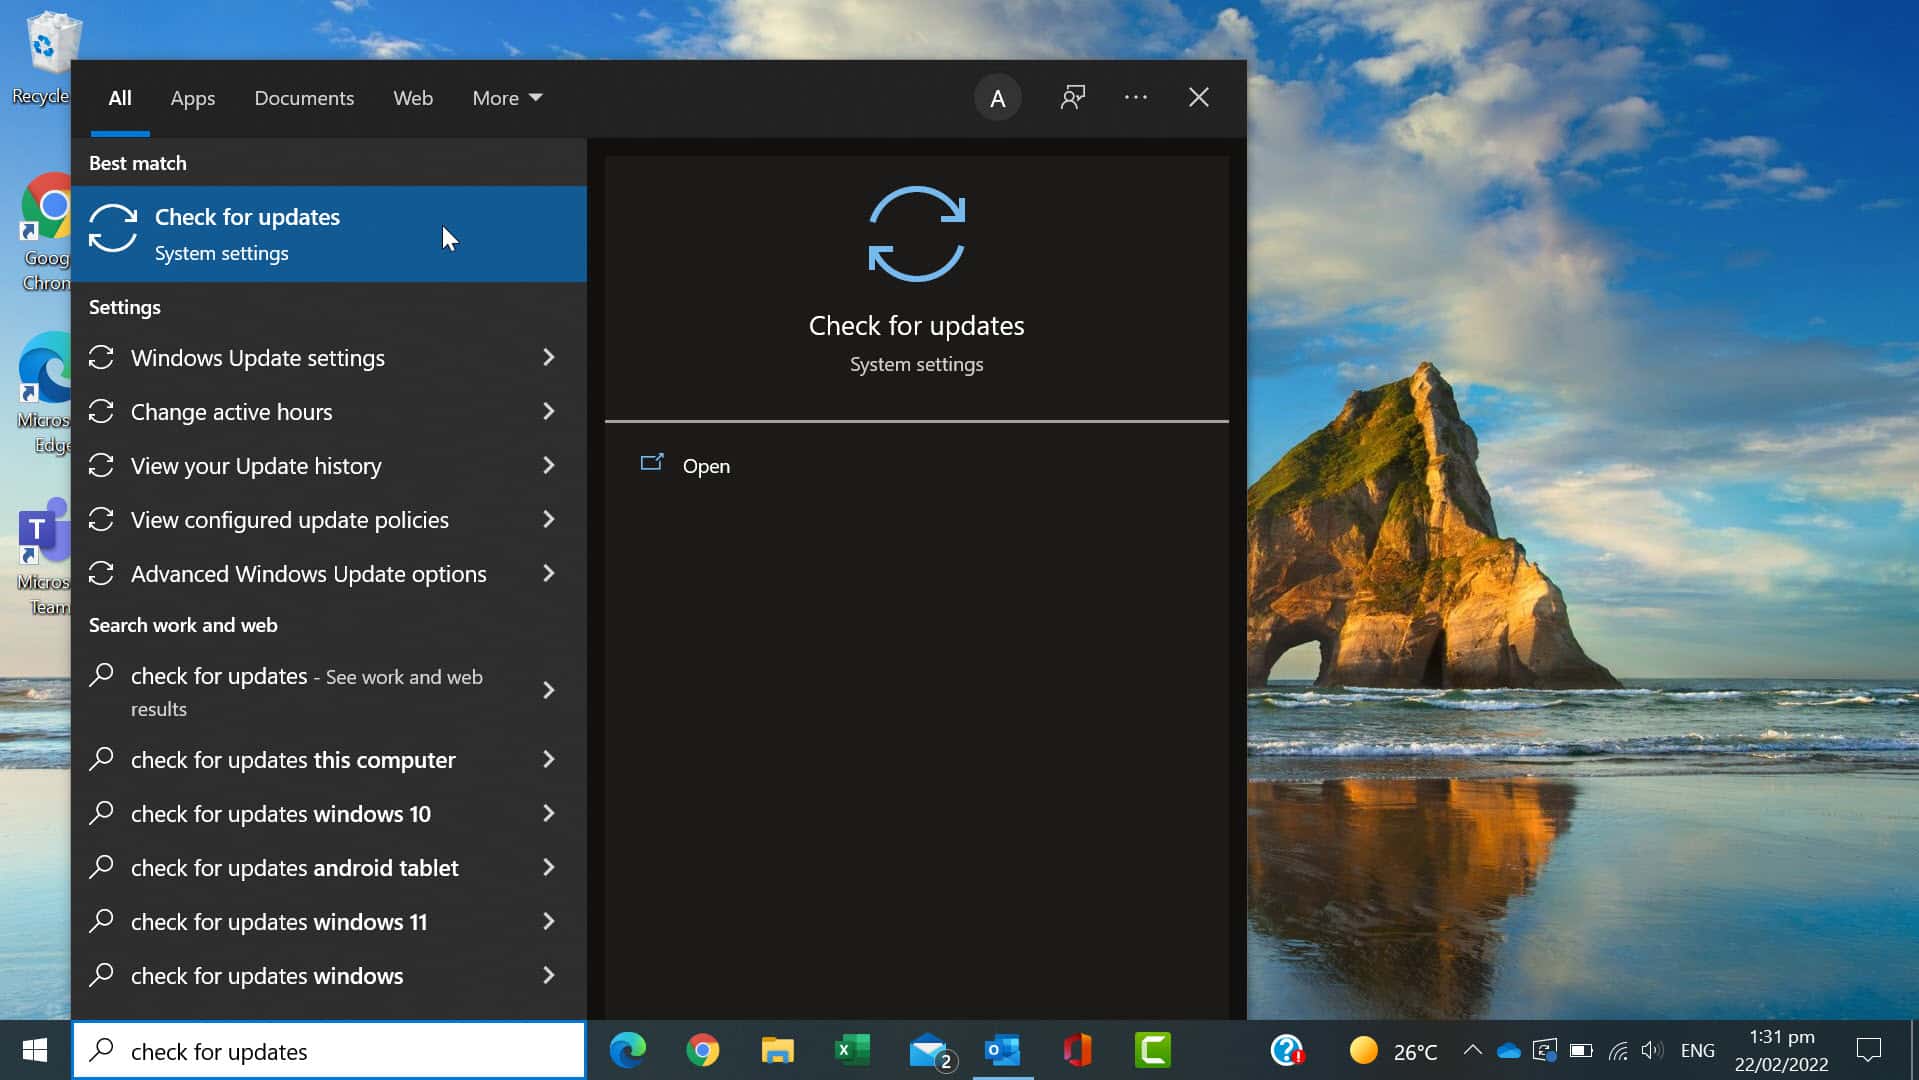
Clicking on either option will take you to the Windows Update area.
If your PC is ready for Windows 11 you will see the message Upgrade to Windows 11 is ready – and its free! as shown in the image below.
Step 2: To upgrade to Windows 11 click the Download and install button.
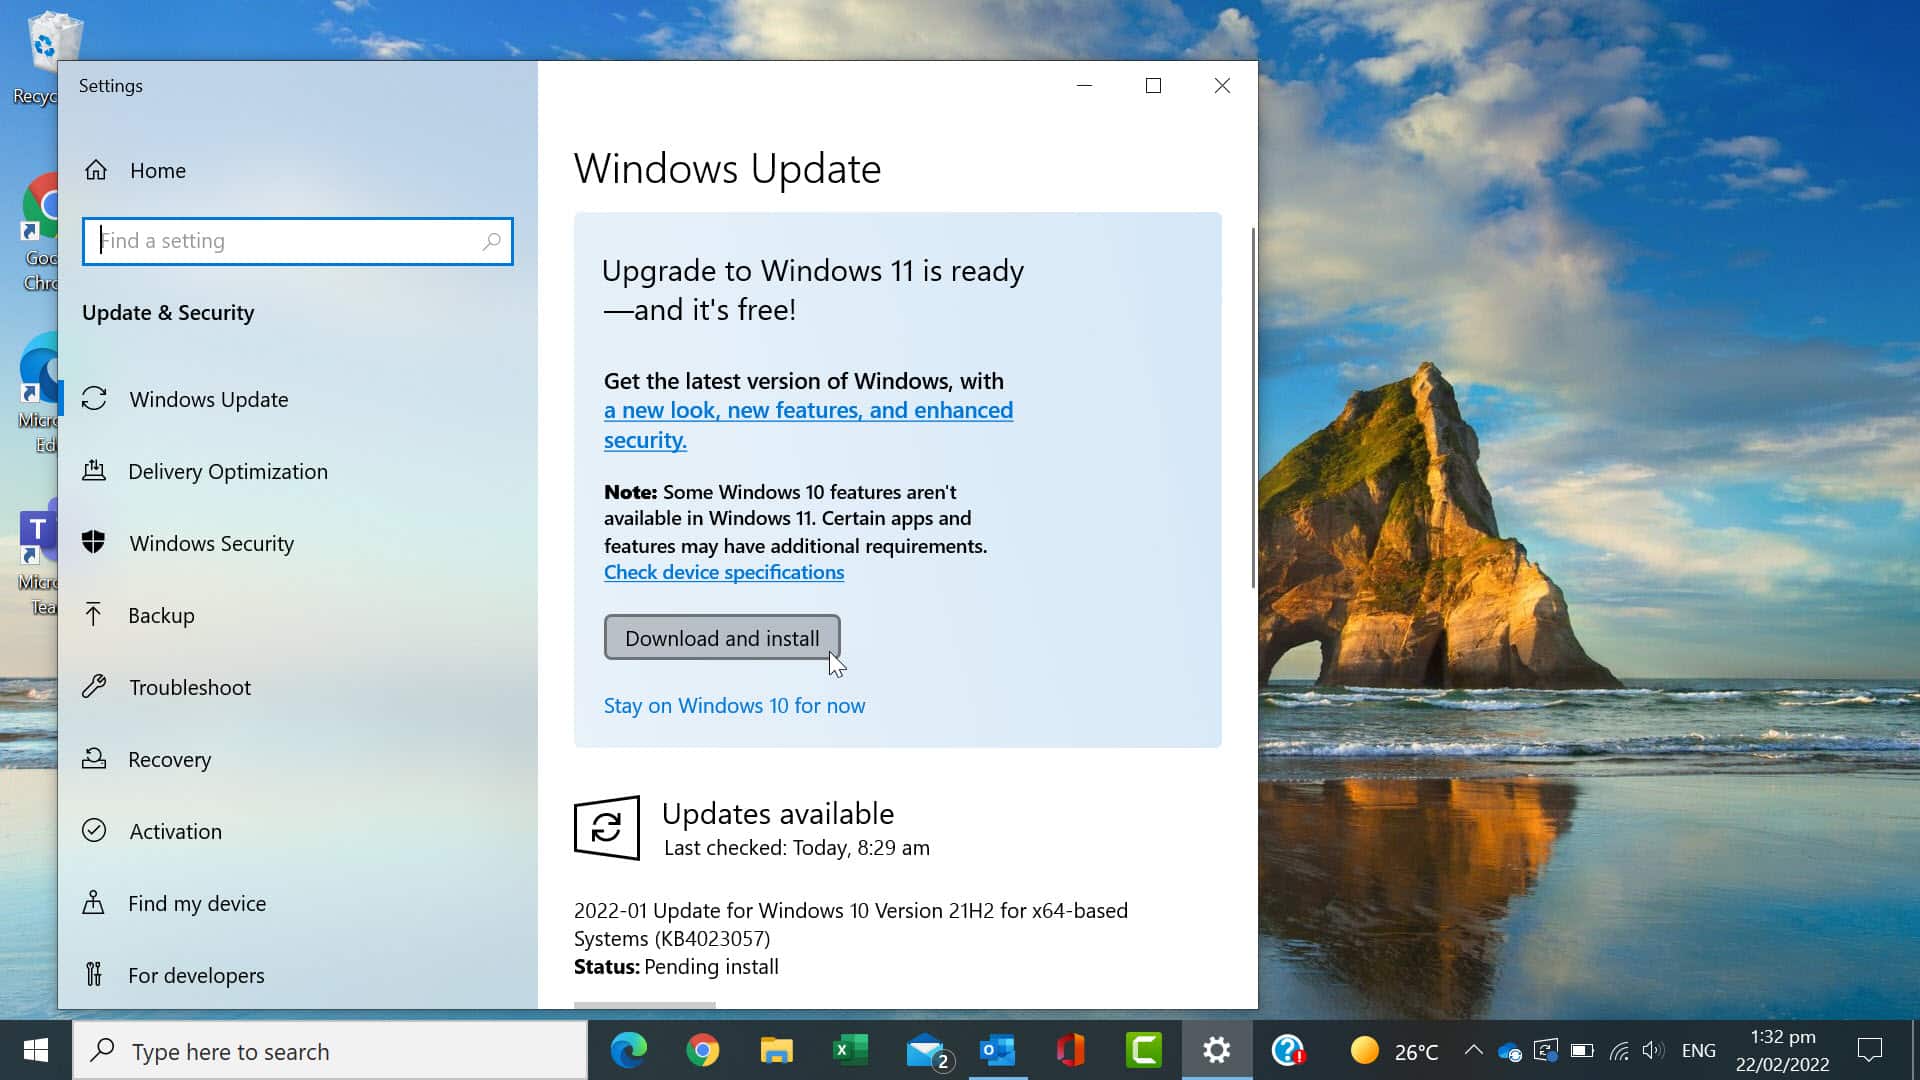
The Software License Terms for Windows 11 will be displayed.
Step 3: If you are happy with all the terms click Accept and install.
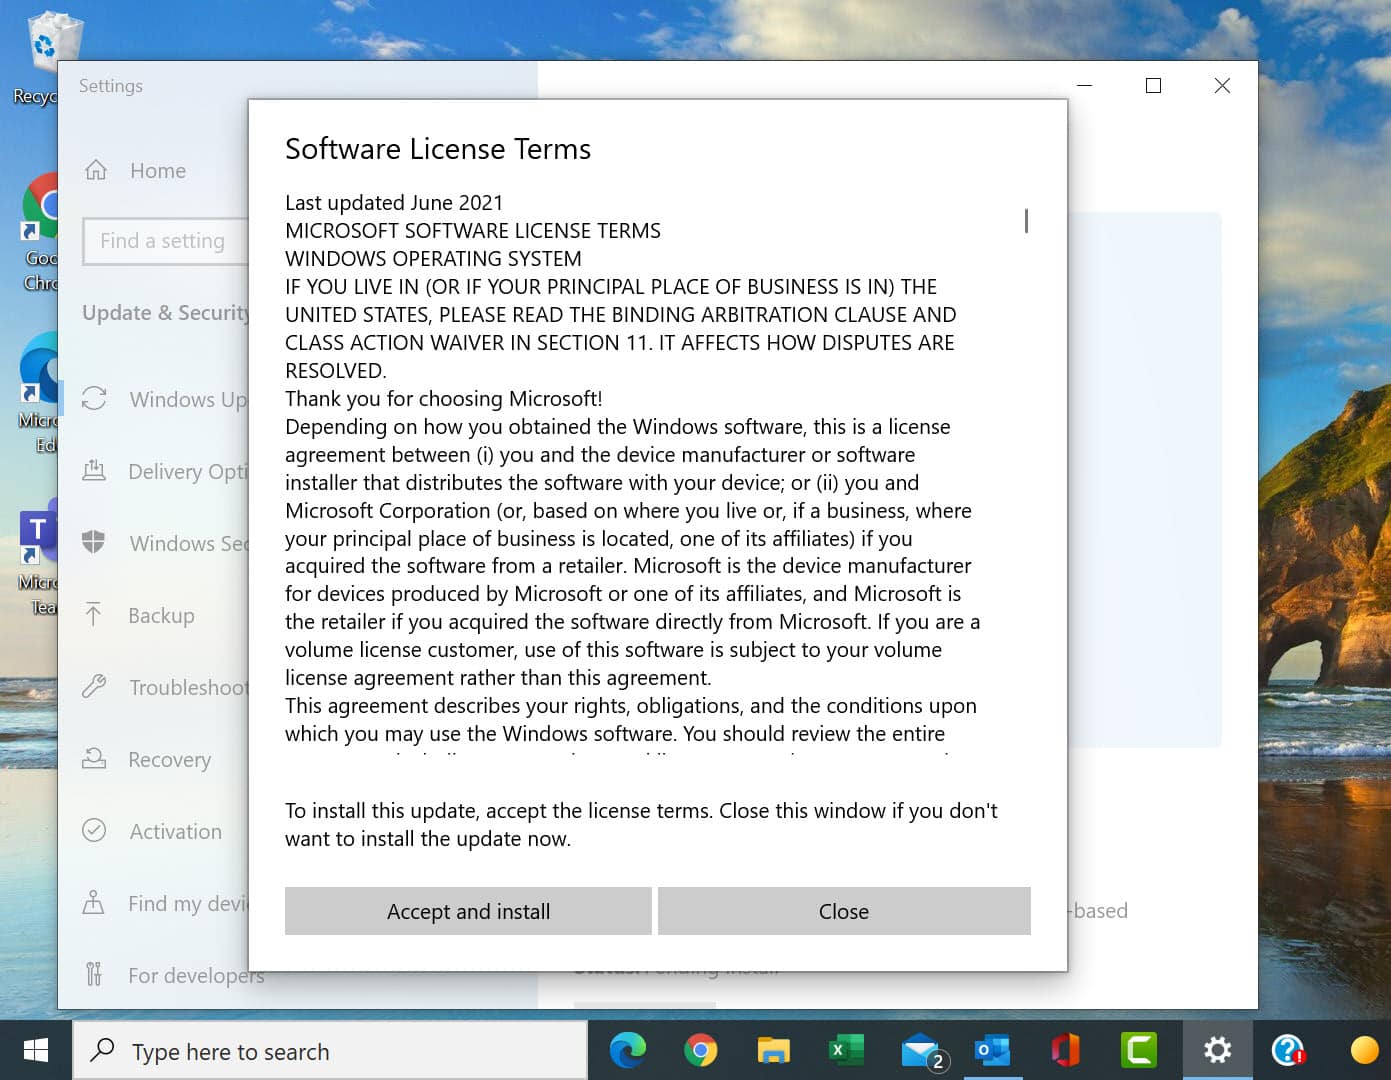
Note: If you do not select Accept and install Windows 11 will not download and install.
Once you have agreed to the terms Windows 11 should start downloading.
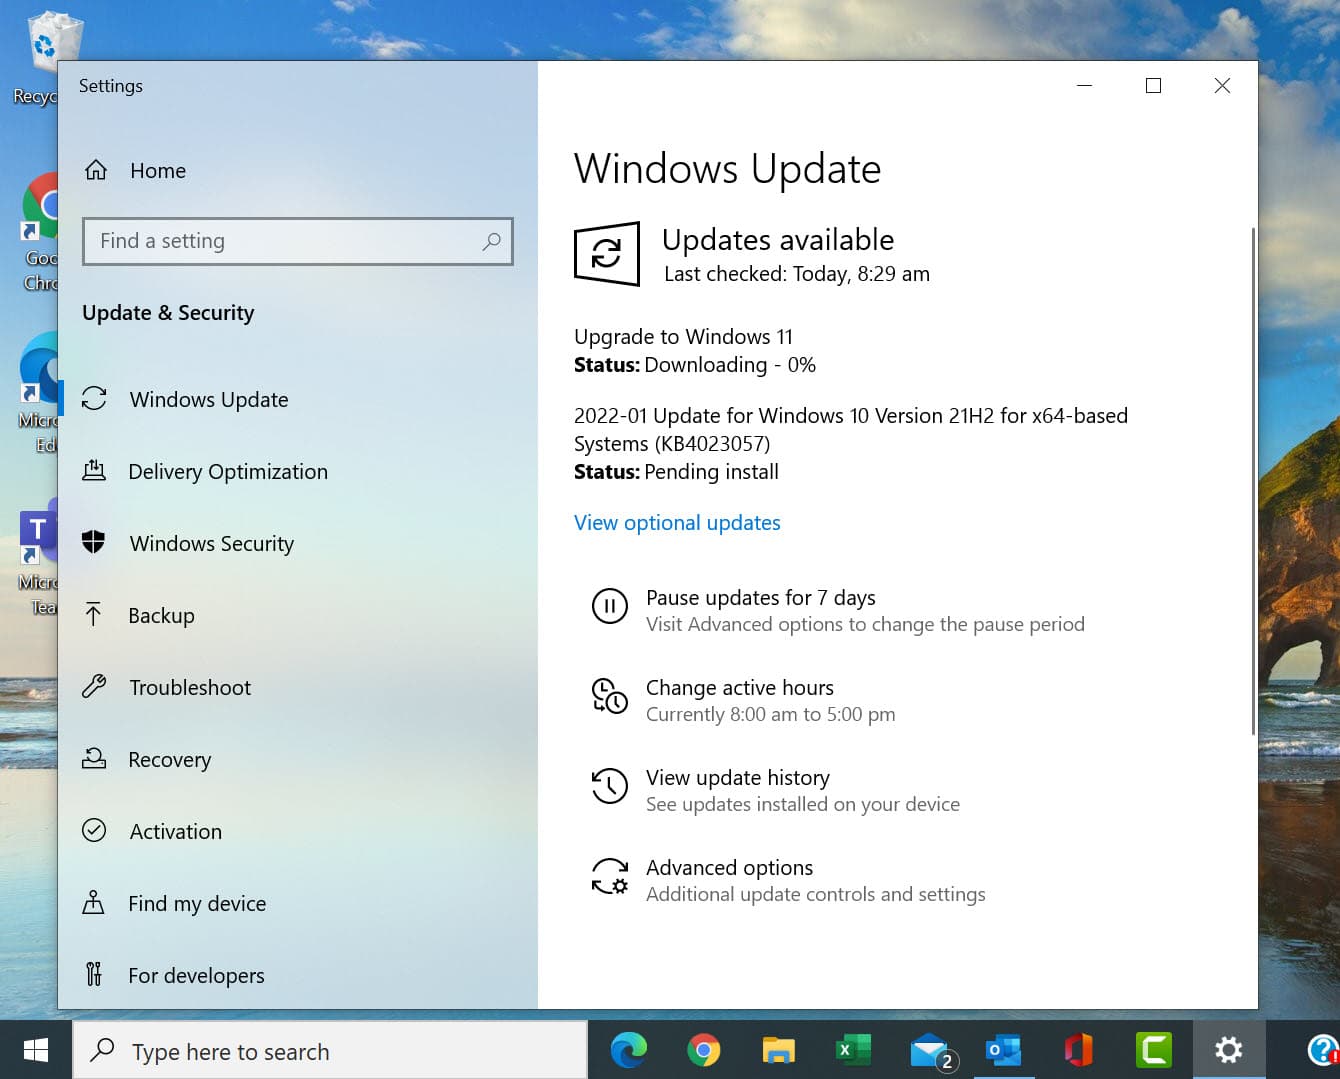
Once Windows 11 has downloaded, it will then need to install onto your PC. Note: this may take some time.
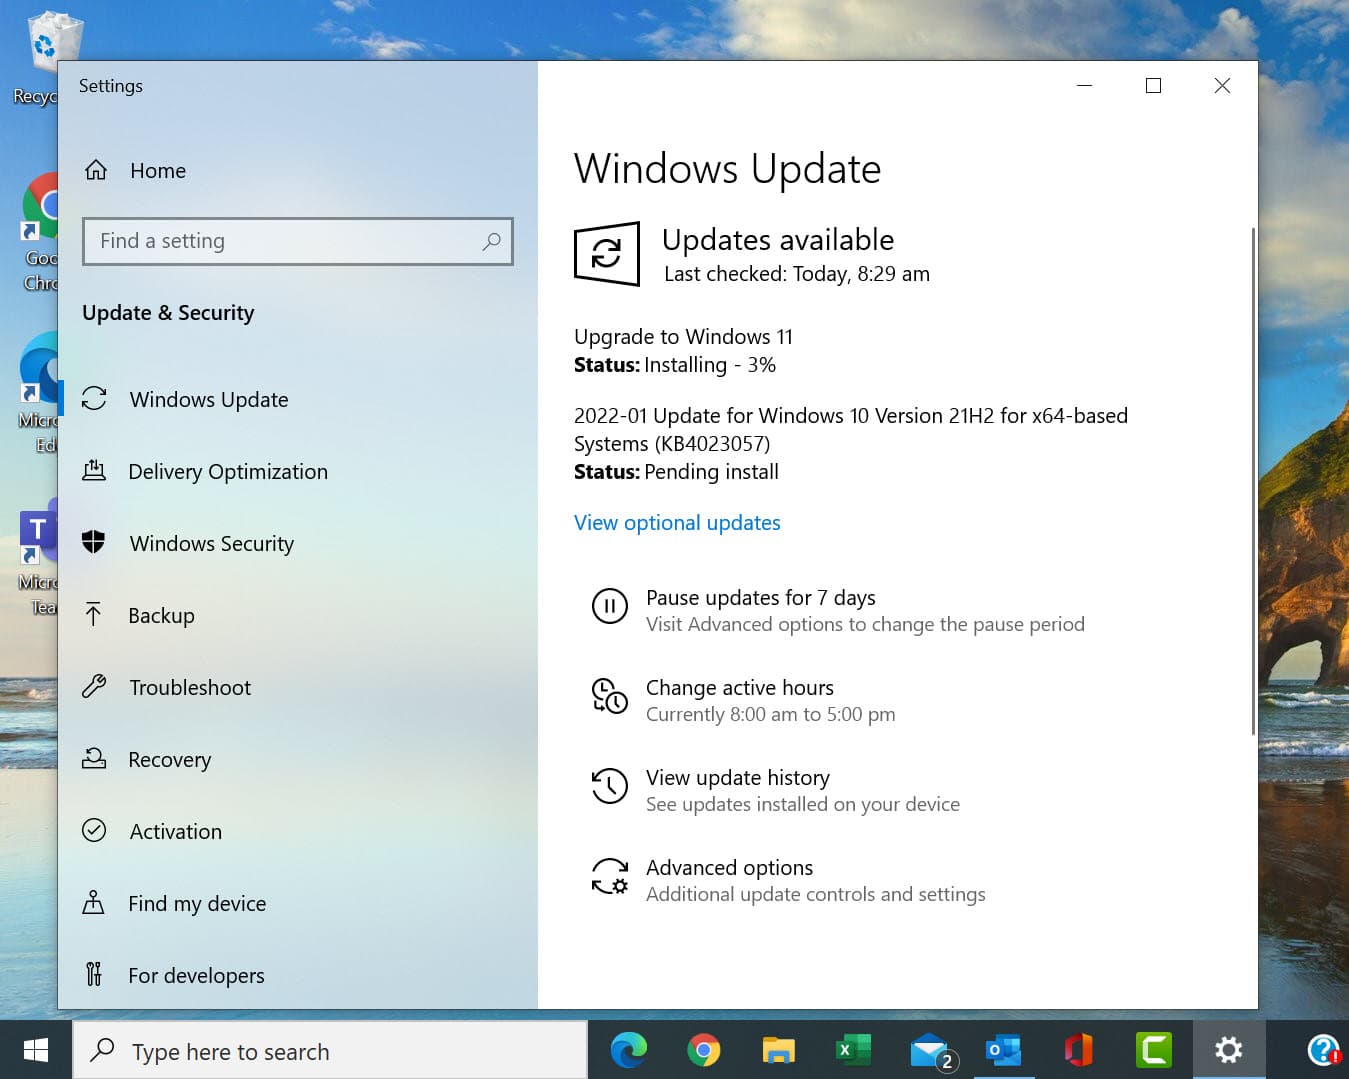
Once Windows 11 has installed, you will be notified that a restart is required.
Step 4: Select Restart now to restart your PC and install Windows 11.
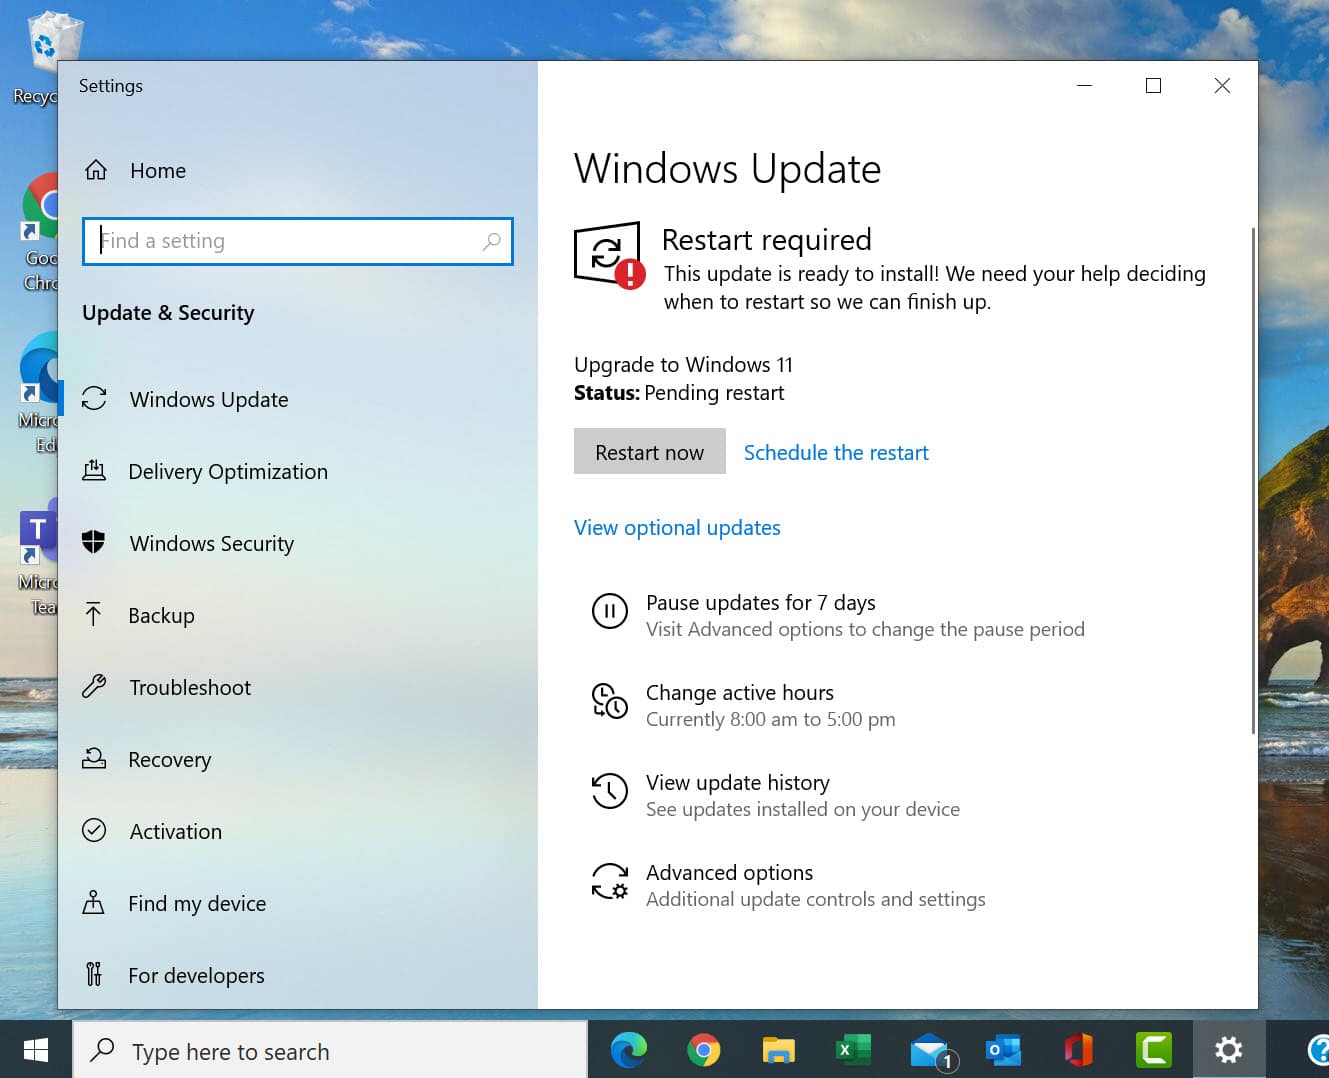
Note: If you do not restart your PC at this step, Windows 11 will not be installed.
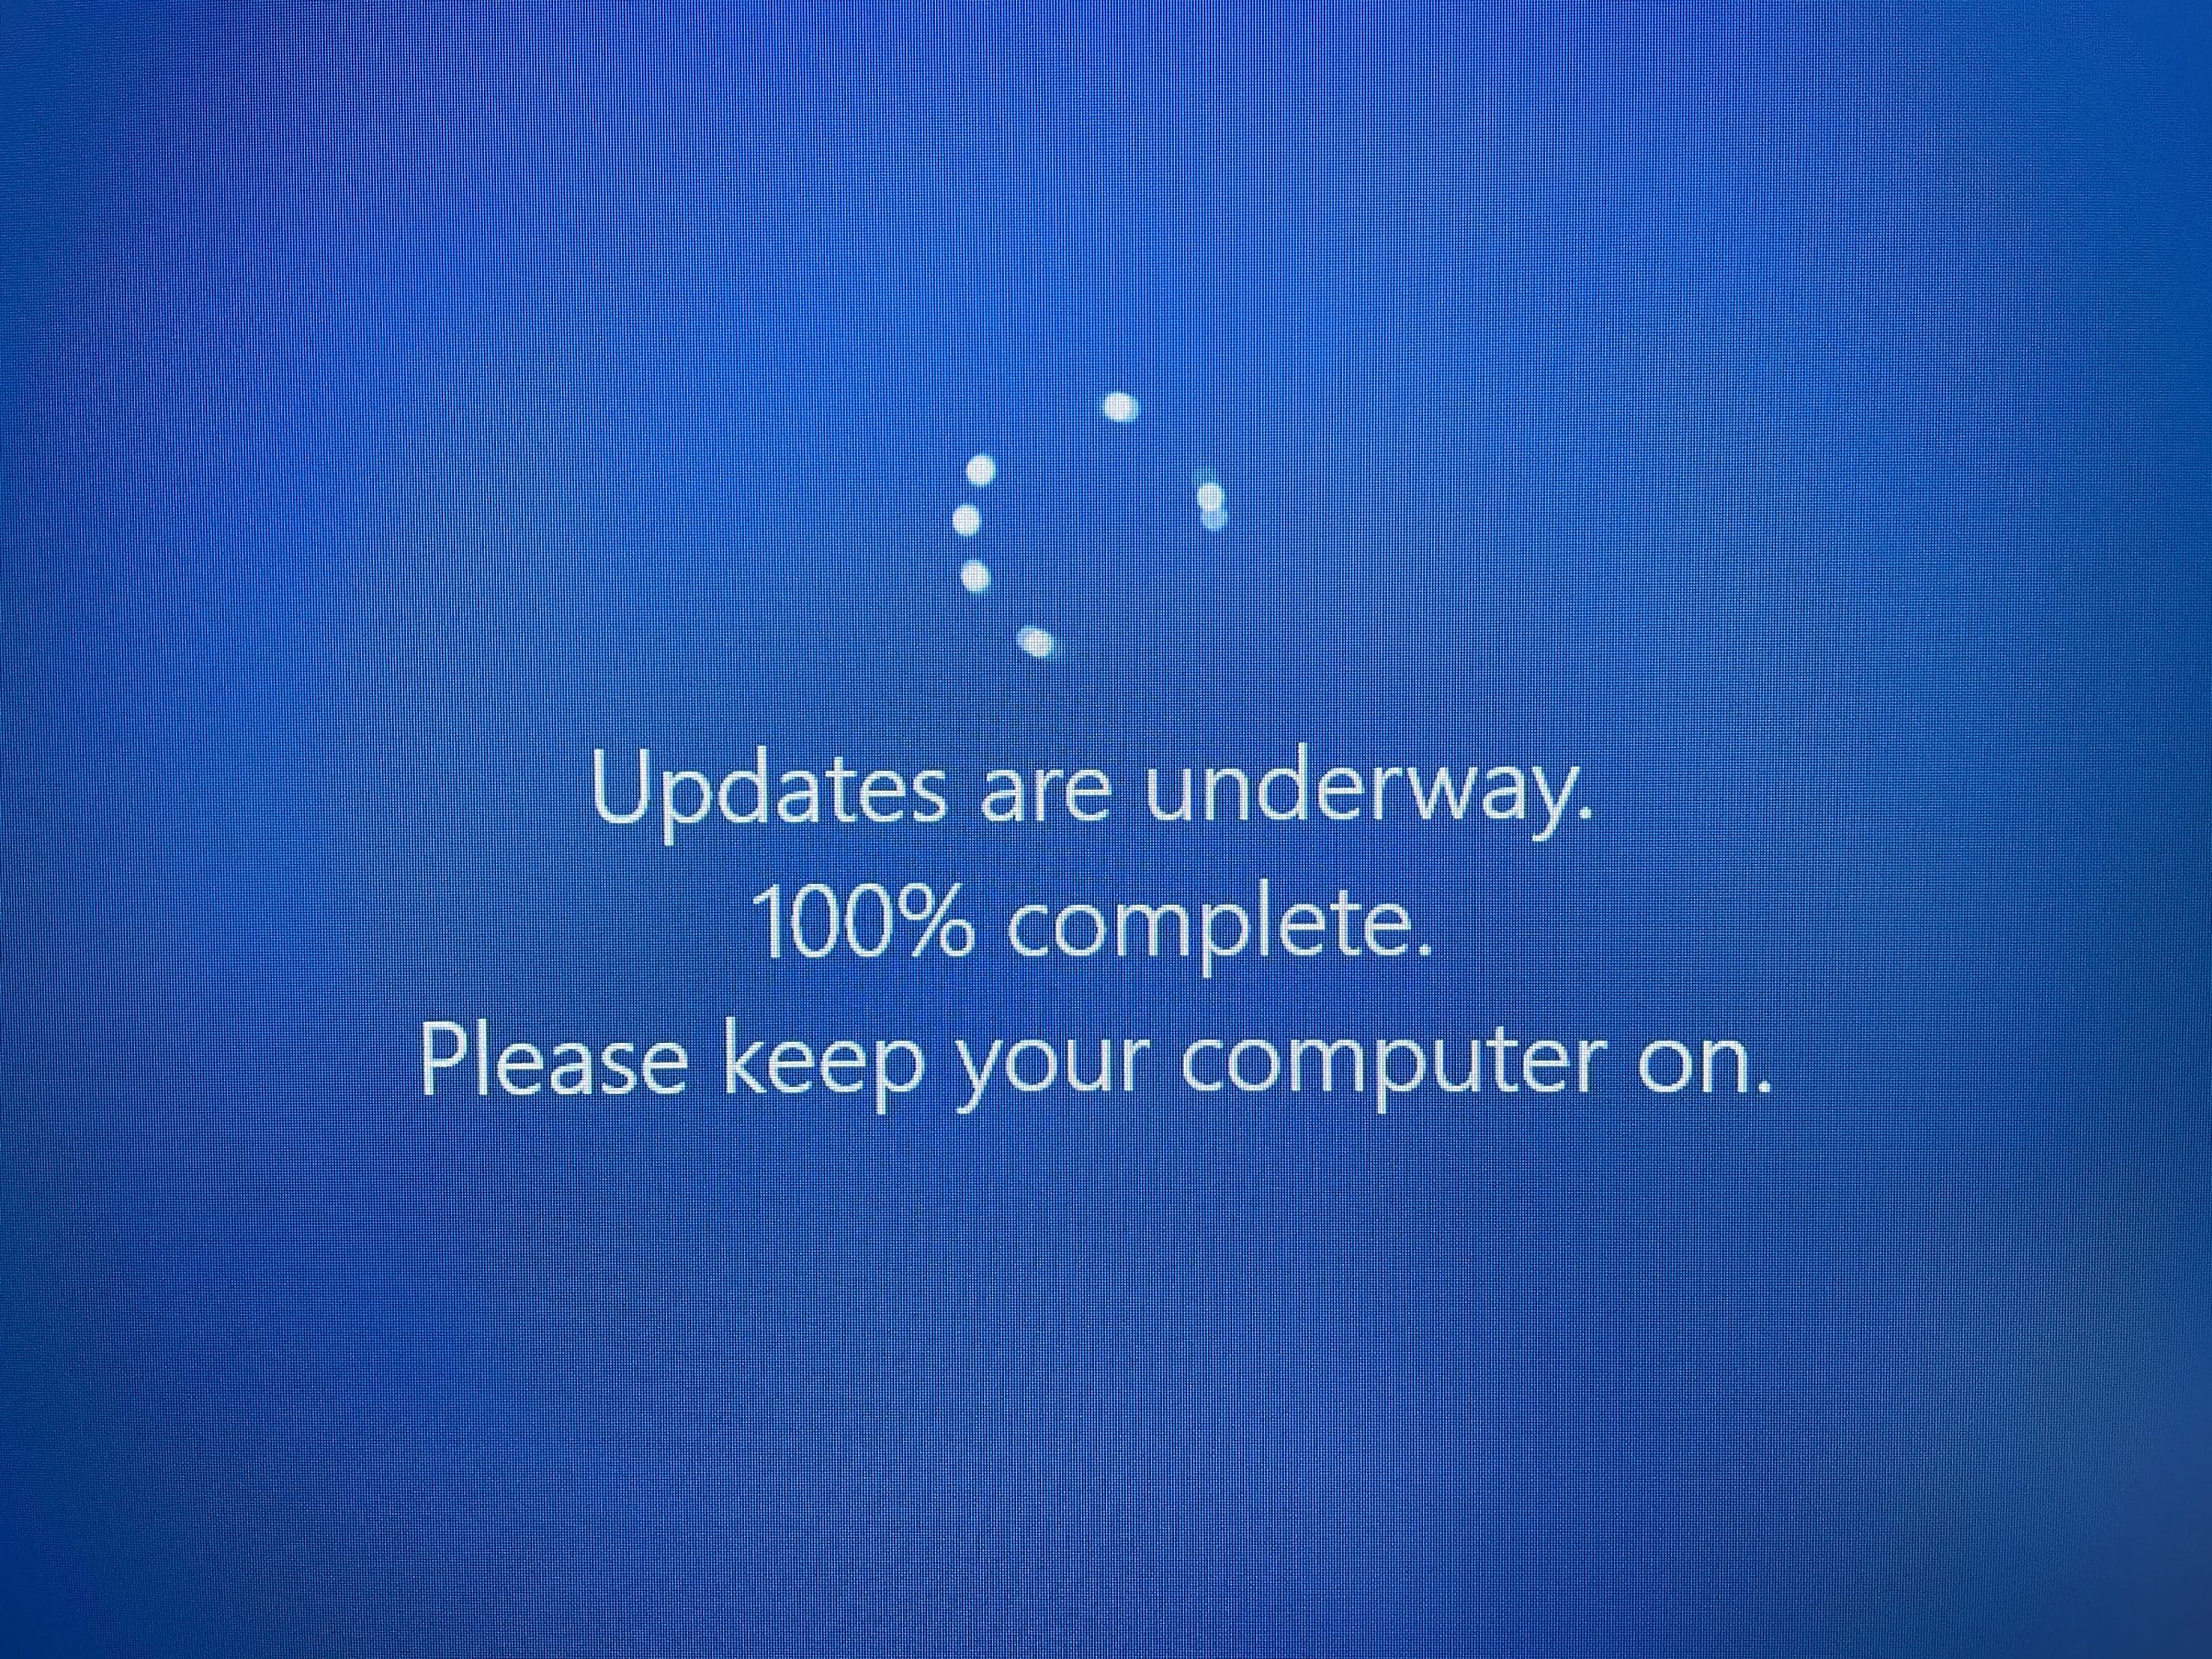
Windows 11 should now be installed. At this point you may see several messages displayed on your screen informing you of the installation progress.
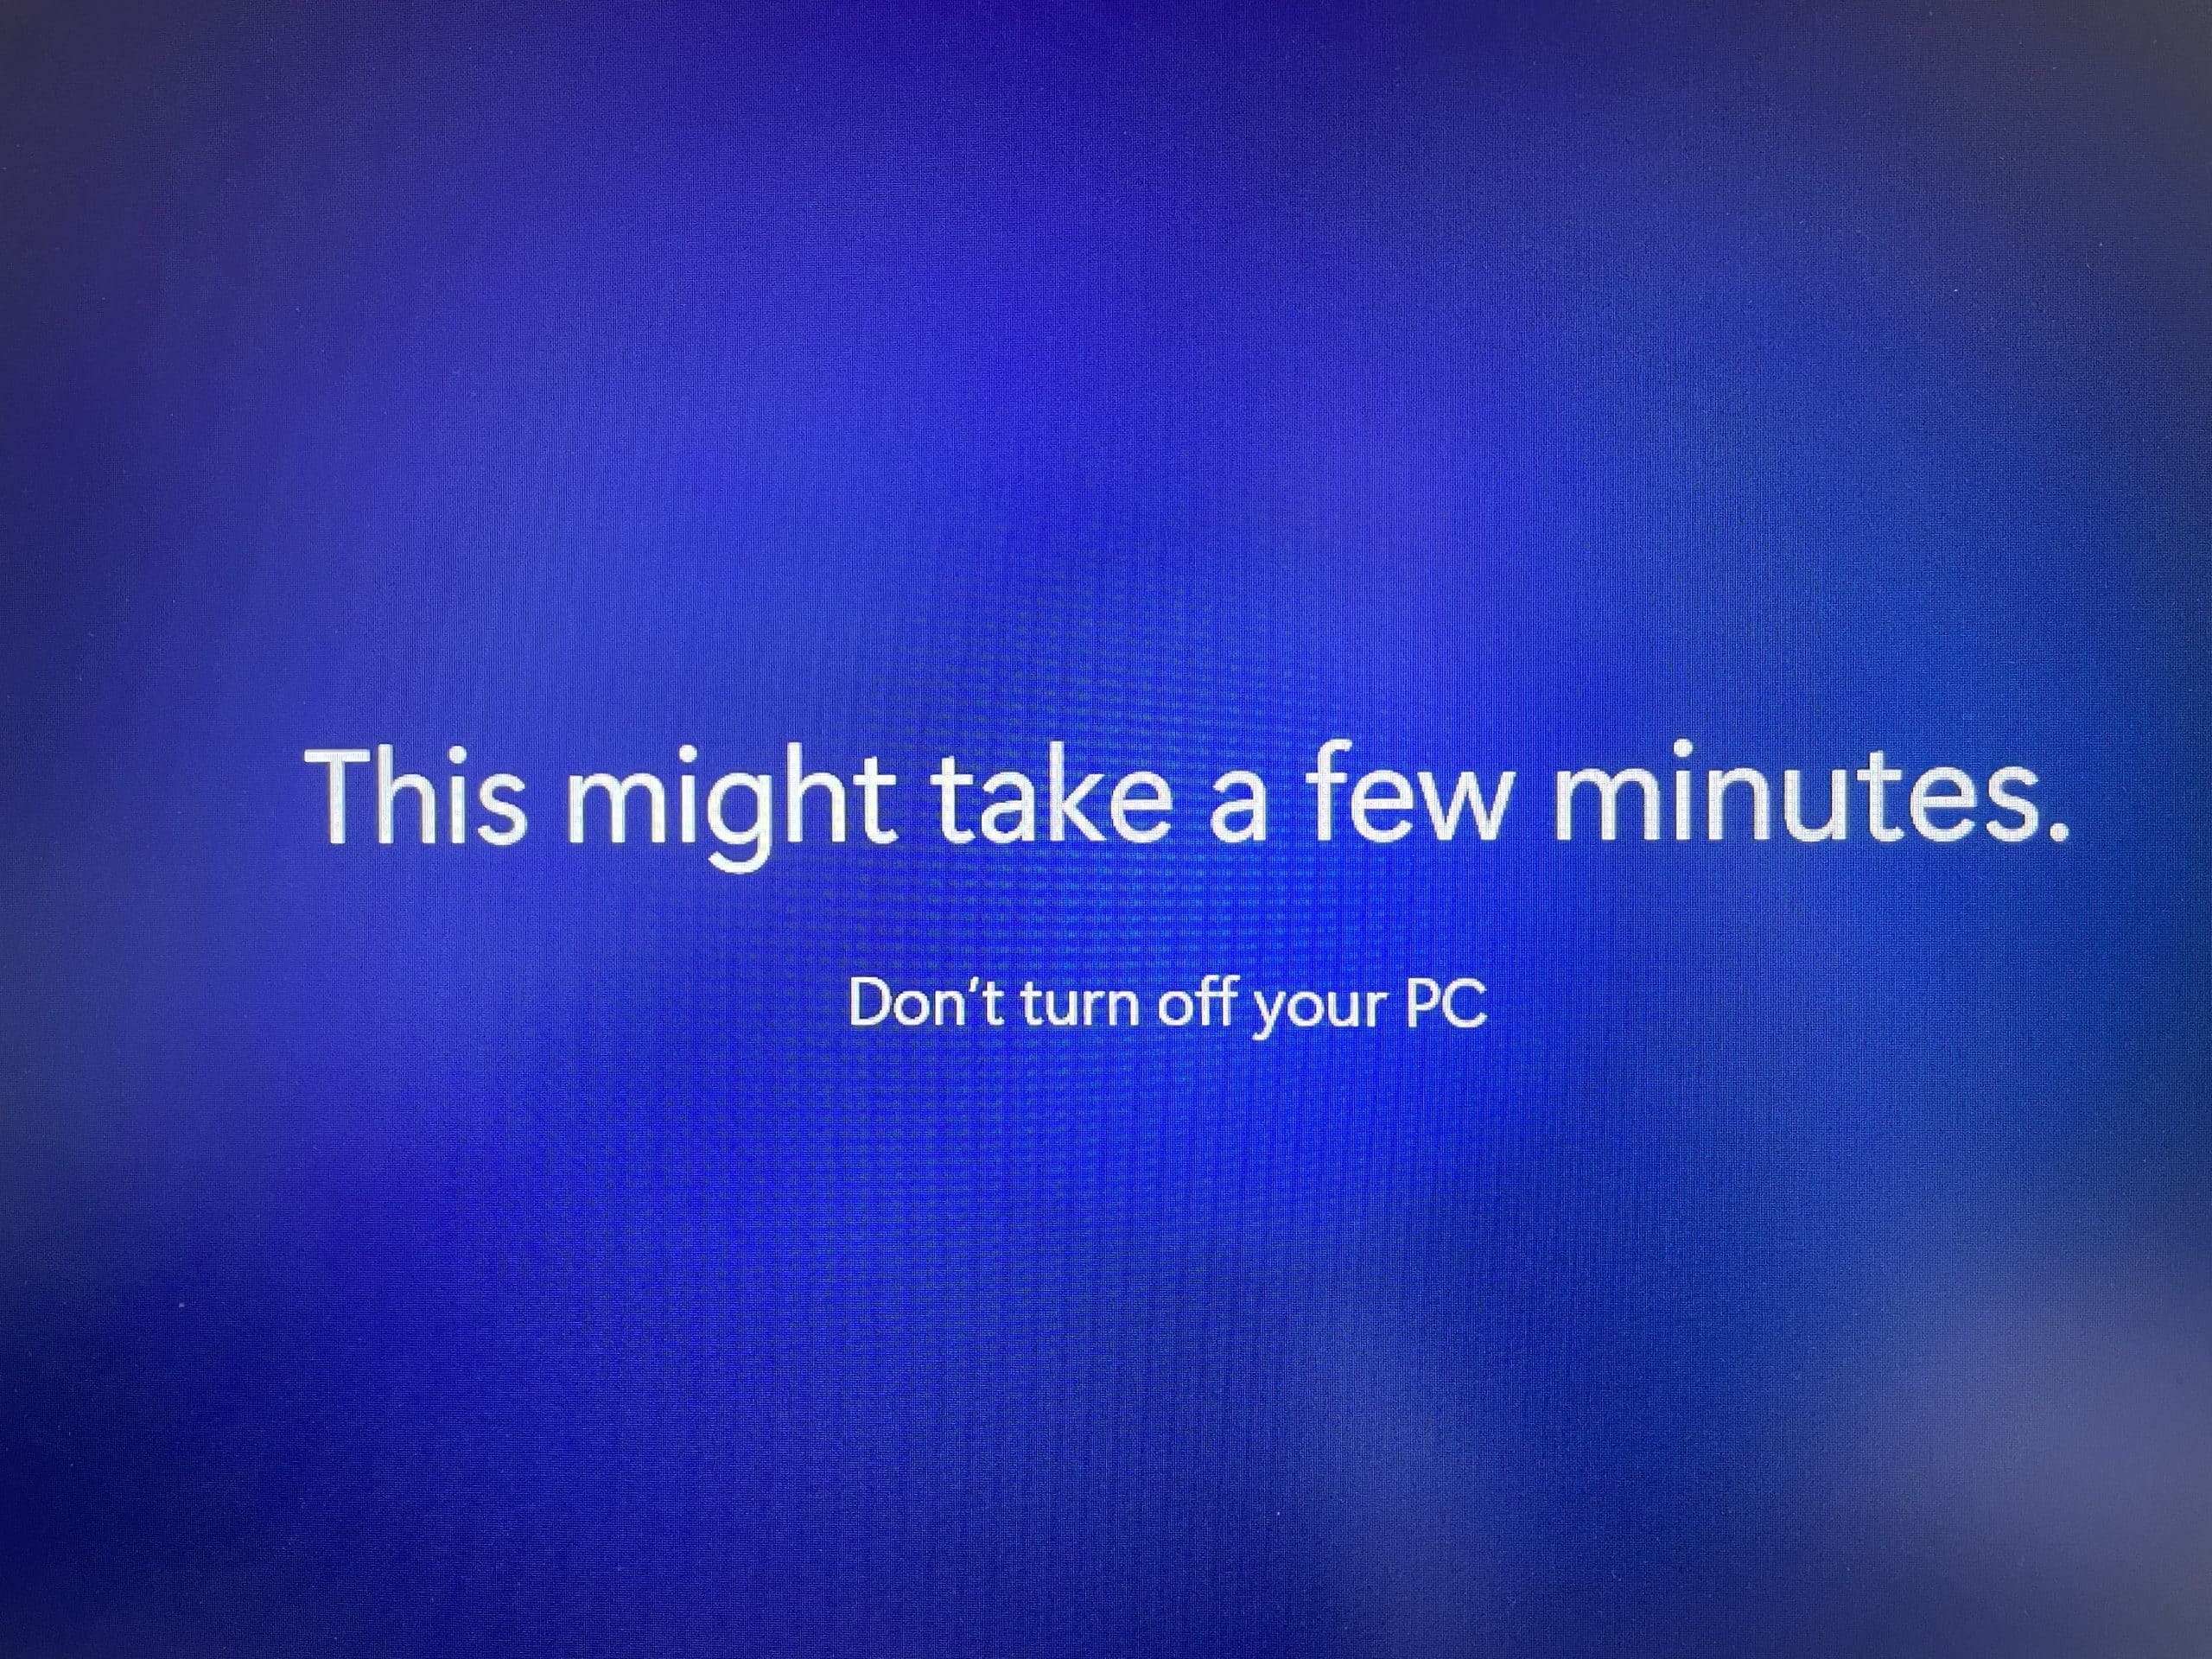
Your PC may restart a few times. Please don’t try to speed up the process by restarting manually or turning off your PC. Just let the process play out.
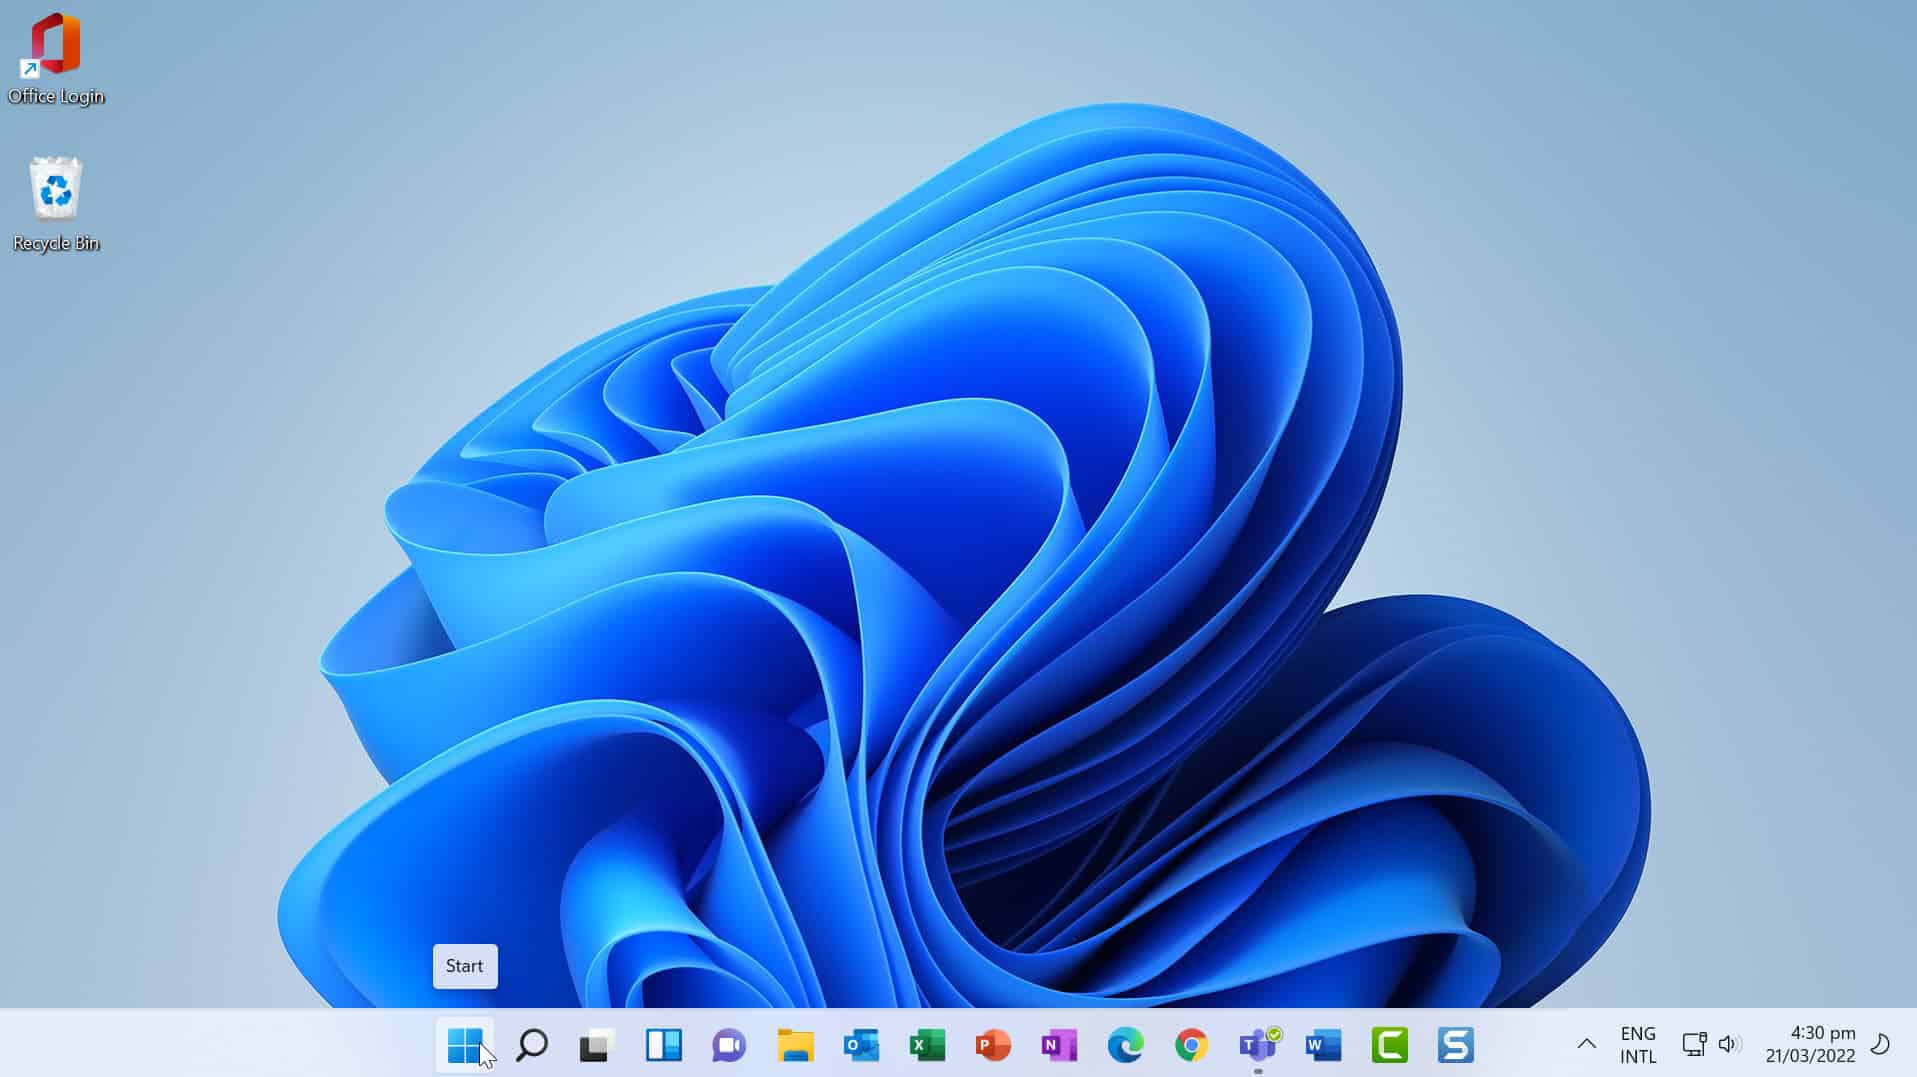
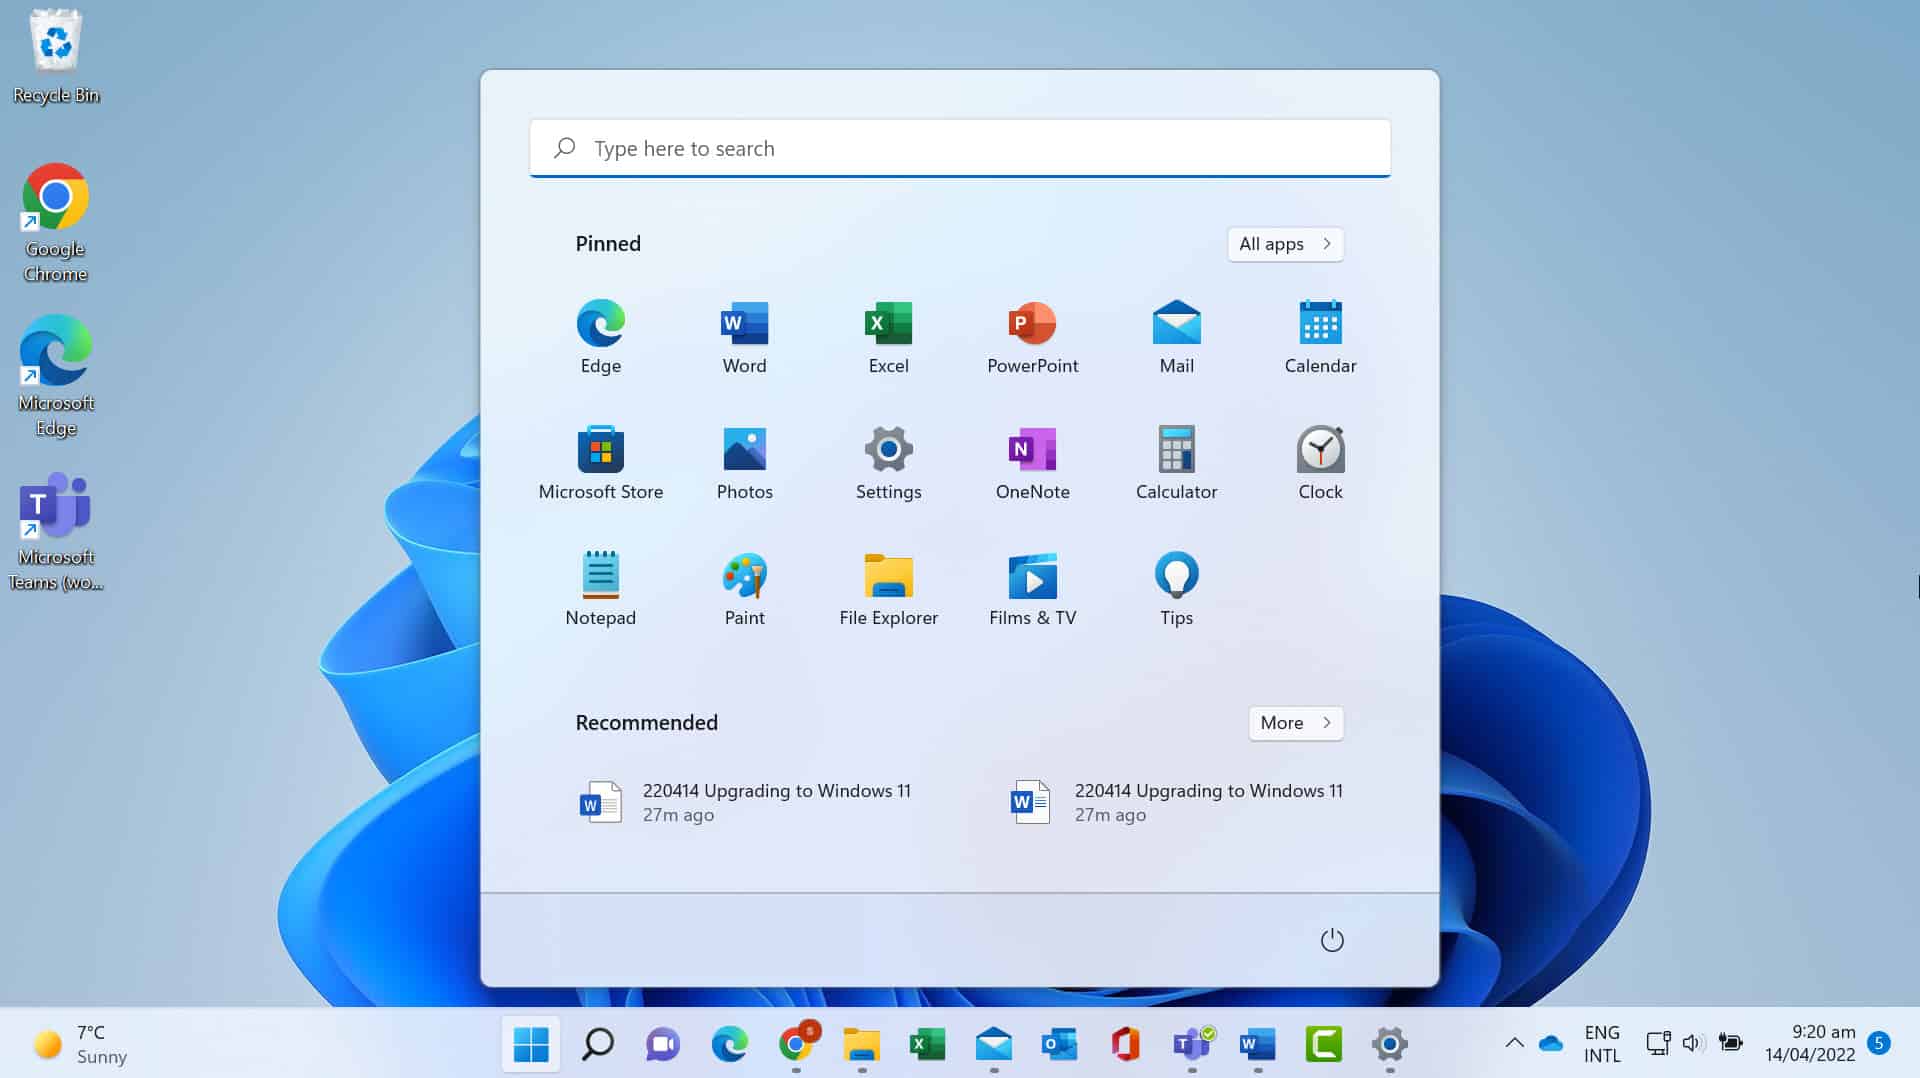
On the final restart you will see the new Windows 11 Desktop, as shown below.
Note: If you have upgraded to Windows 11 and your screen has gone black, check out the end of this post Personalising your desktop background if the screen goes black for steps on how to fix this.
Installing Windows 11 using the Windows Installation Assistant
If the steps above do not work for you and you have no updates yet but want Windows 11 now, you can use the Installation Assistant to upgrade.
Note: Microsoft recommends waiting until you have been notified through Windows Update that Windows 11 is ready for your PC.
You can Download the Windows 11 Installation Assistant on the Windows 11 software download page.
Note: Before downloading, read the Before you begin information which covers the requirements for downloading Windows 11 Installation Assistant and upgrading to Windows 11.
Step 1: Select Download Now.
Step 2: Select Run.
The tool will then confirm if your device is compatible. Once it has done this, license terms will pop up.
Step 3: Select Accept and Install.
Step 4: You will have to restart your computer to complete the installation of Windows 11. To do this click the Restart Now button.
Note: Windows 11 might take some time installing, do not turn off your PC. My download and update took approximately 2 hours on a relatively fast internet connection.
Windows 11 should now be installed.
How to fix a black screen after Windows 11 update (personalising your Desktop)
After installing Windows 11, you may end up with a black Desktop. If you want to personalise your display follow these steps.
Step 1:
Right-click anywhere on the screen and then select Personalize from the menu.
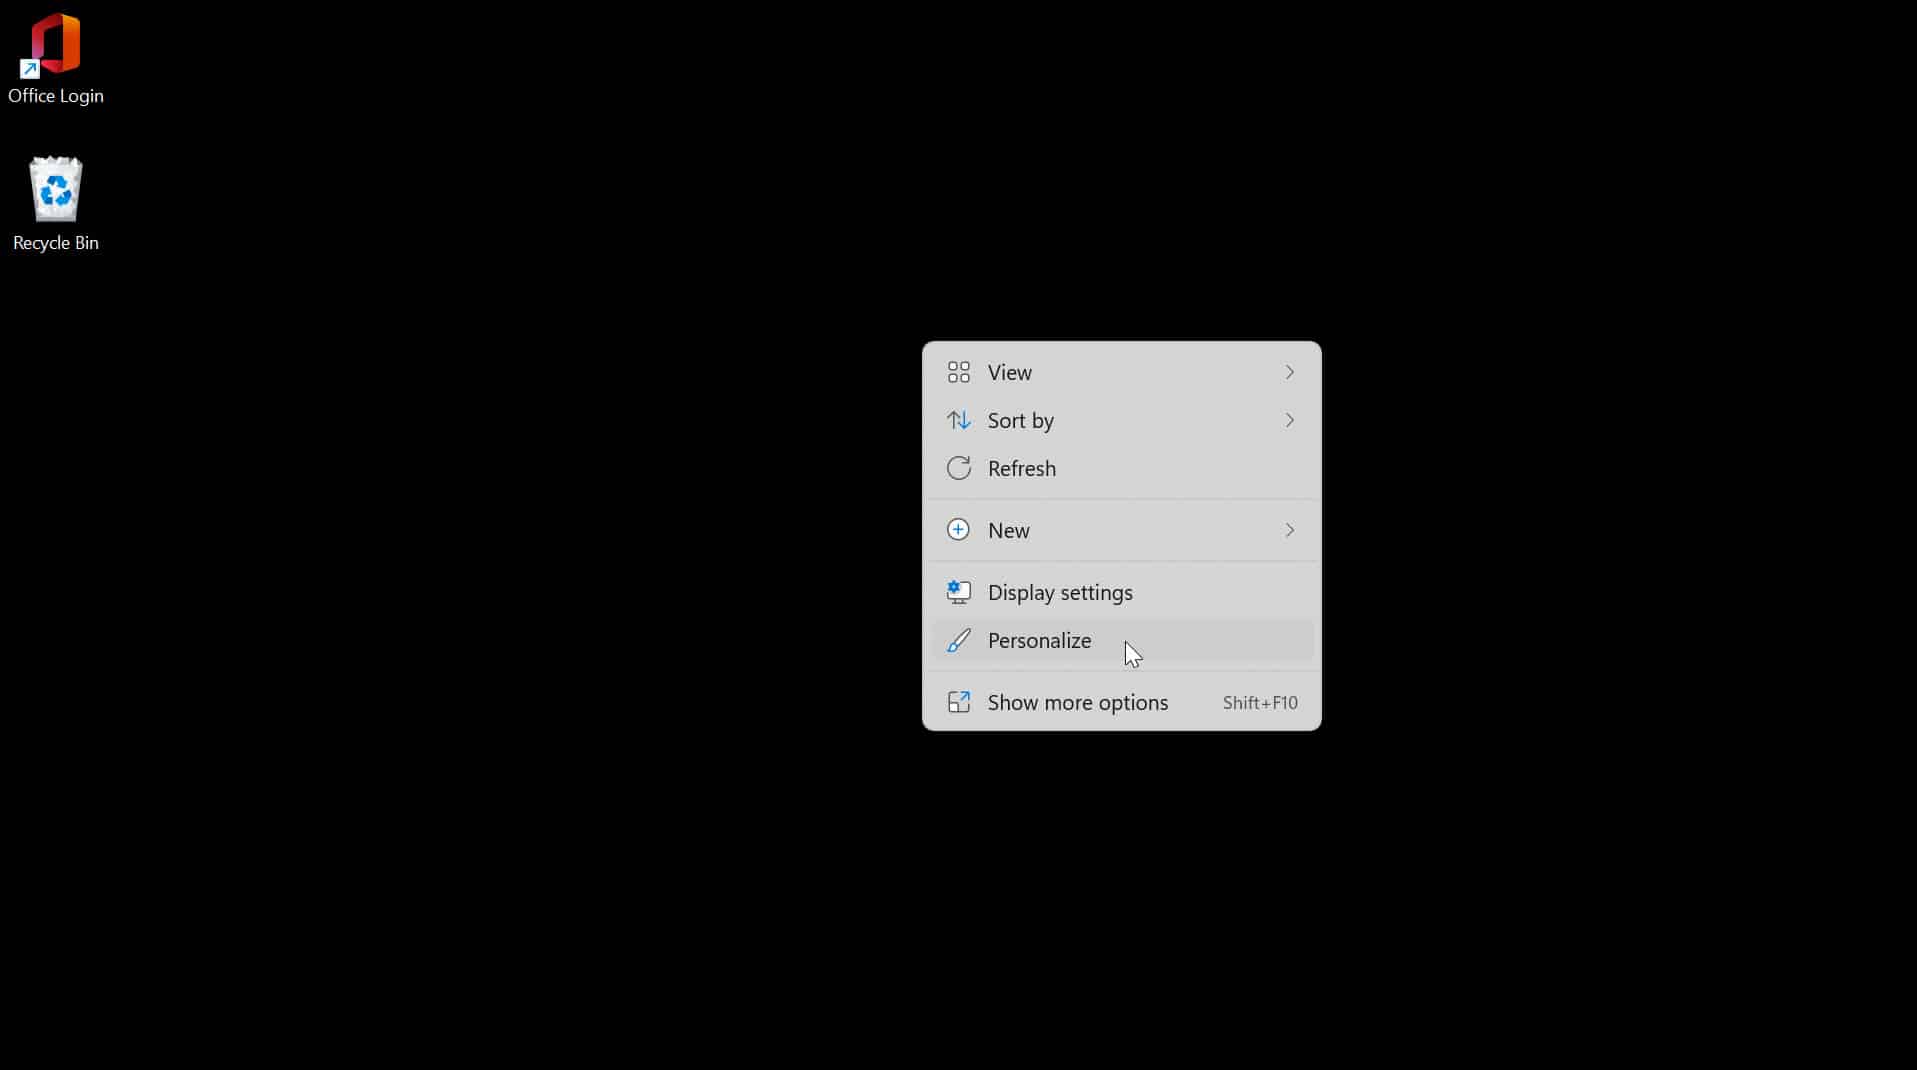
This will take you to the Personalization option in Settings.
Step 2: Select the theme you want to apply. In my example, I have selected Windows (light).
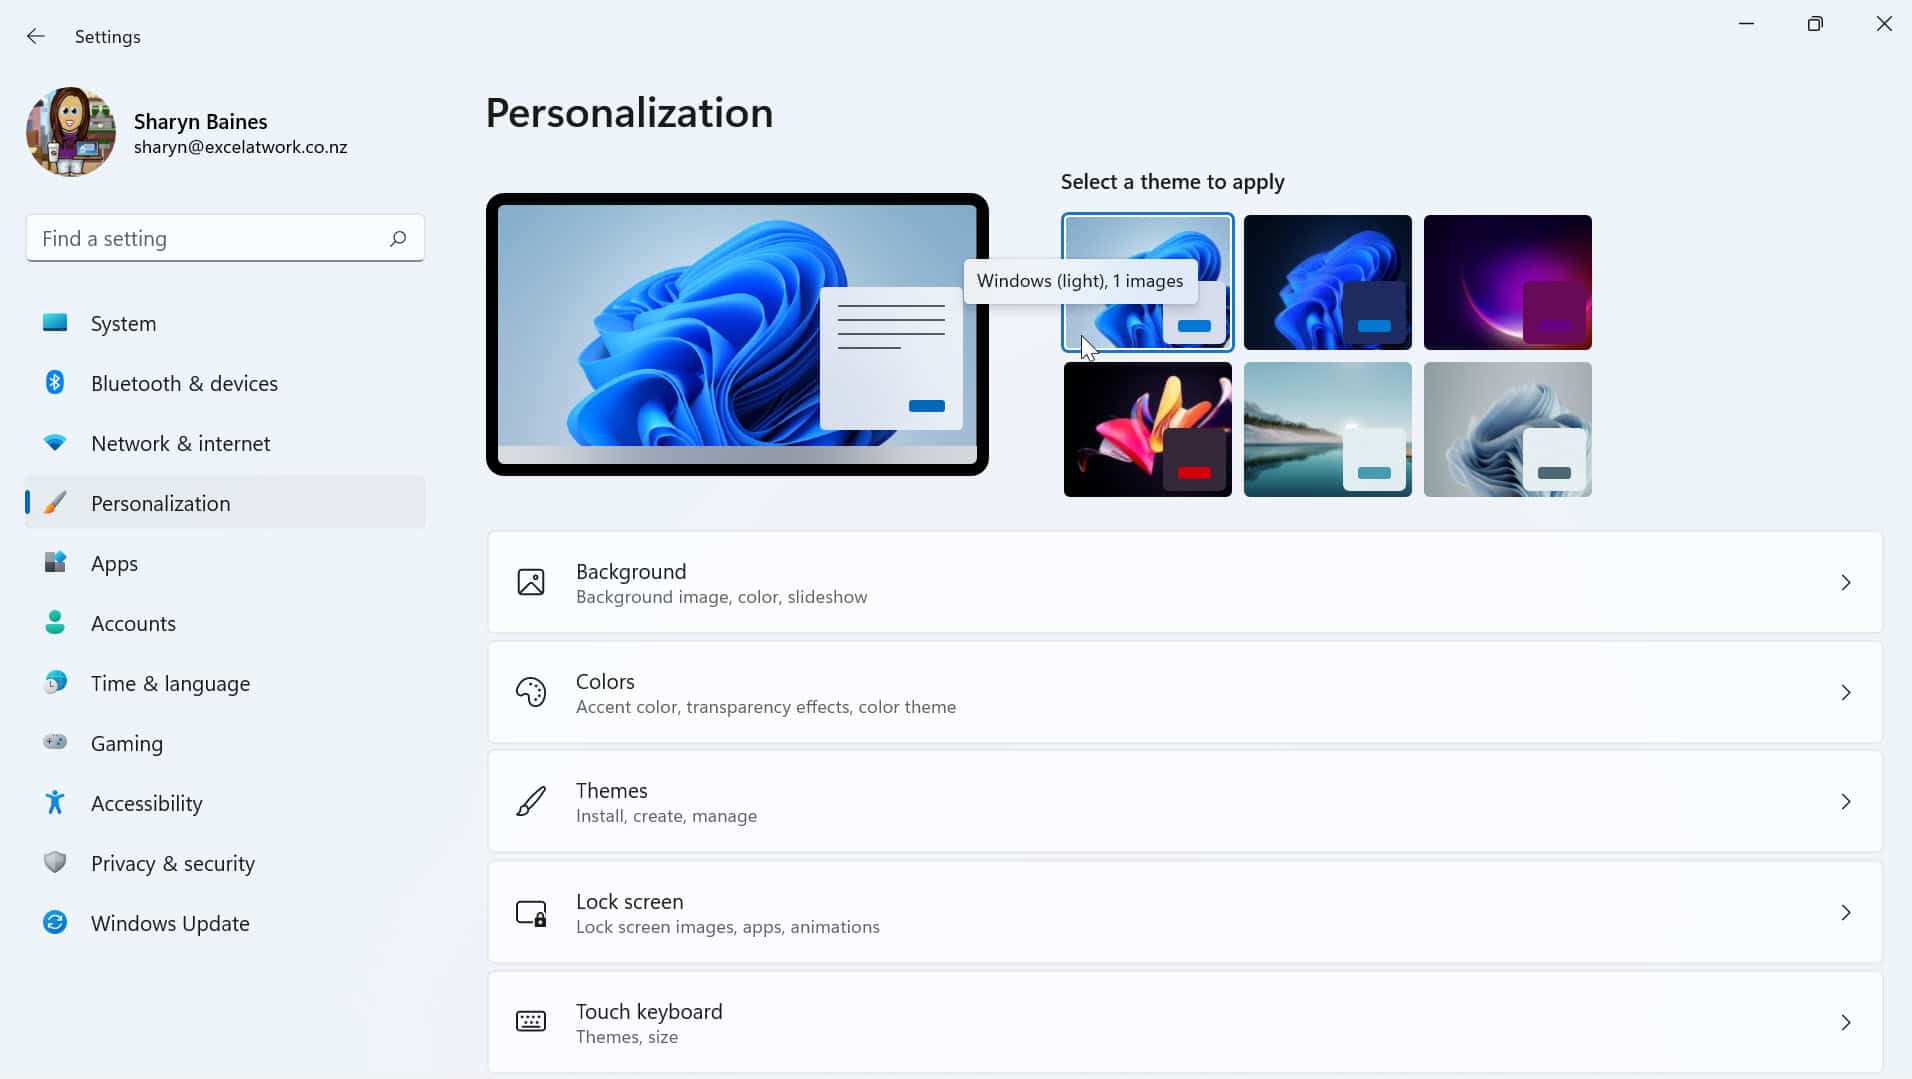
Once you have selected the theme you want to apply. It should automatically update.

Note: You can have a play around in this area to fully personalize your own PC to the look you want.
To Sum up
Our team has been using Windows 11 for a while now and we really enjoy the new look and ease of use. If you are considering upgrading I hope this post will assist you with a hassle free install.
Was this blog helpful? We'd love to know. If you're a beginner or if you use Excel every day please let us know if we helped in some way by leaving a Comment below .

