
![]() Yesterday I had the pleasure of running an Outlook course for a fabulous group of learners. During the session I was asked if we could cover importing contact details from an Excel worksheet into Outlook. Sadly we ran out of time and I didn’t get to cover this feature. However, I thought it would make an excellent blog entry as this is a common request.
Yesterday I had the pleasure of running an Outlook course for a fabulous group of learners. During the session I was asked if we could cover importing contact details from an Excel worksheet into Outlook. Sadly we ran out of time and I didn’t get to cover this feature. However, I thought it would make an excellent blog entry as this is a common request.
To import contact details from Excel into Outlook:
- Create or open the contact details file in Excel. In my example below you will see I have only four fields of information to be imported; First Name, Last Name, Email Address and Phone.

- I now need to save the file into a format ready for importing into Outlook. Using File, Save As I have saved my file as a CSV (Comma delimited)(*.csv) format. The file is now saved as ExcelContacts.csv. Note: when you close the file Excel will display a prompt telling you that a csv file type will save only the active worksheet. Click OK to continue and then Yes.
- Close the file in Excel and then open Outlook.
- For Outlook 2010 and 2013
Click File > Open > Import.
For Outlook 2007 and 2003
Click File > Import And Export.
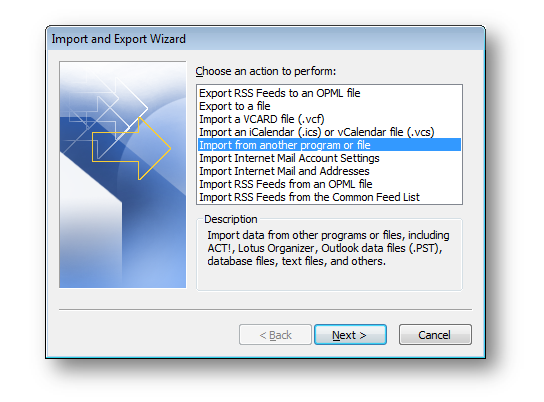
The Import and Export Wizard dialog box will be displayed. Select Import from another program or file and then click Next.
- Select Comma Separated Values (Windows) and then click Next.
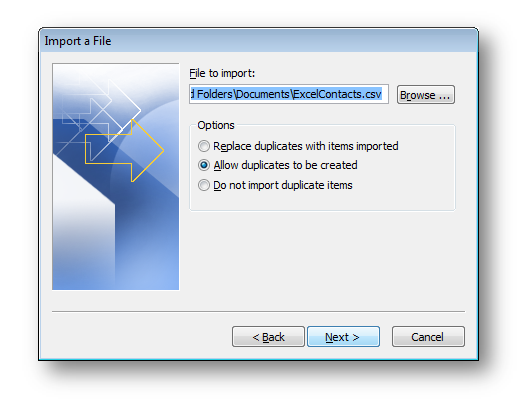
- Click the Browse button and then navigate to your csv file. Select the file and then click Open. The file name will be added to the File to import box. From the Options box select the option that best suits your needs. Click Next.

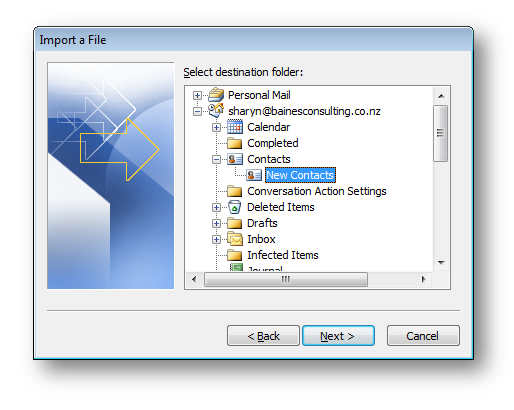
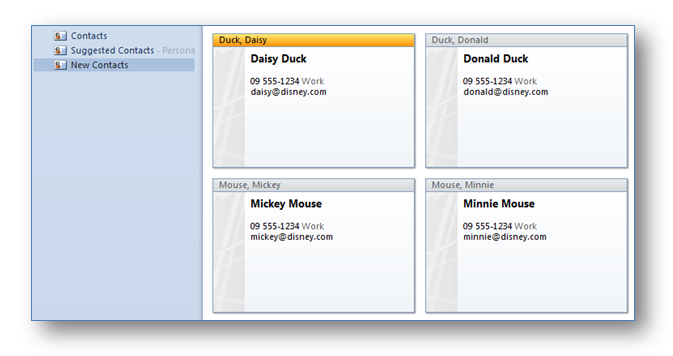
- Now select the folder that will hold the contact details. In the example below you will see I have created a new contacts folder called New Contacts. I’ve done this so that I can separate the new contacts from existing contacts allowing me to quickly check that the import was successful. Once I have established the import worked I will then click and drag the new contact details into my existing Contacts folder and then delete the New Contacts folder. Once you have the folder selected click Next.

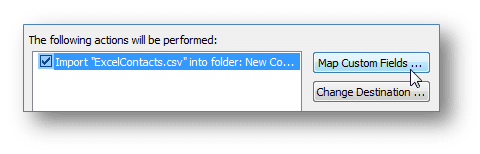
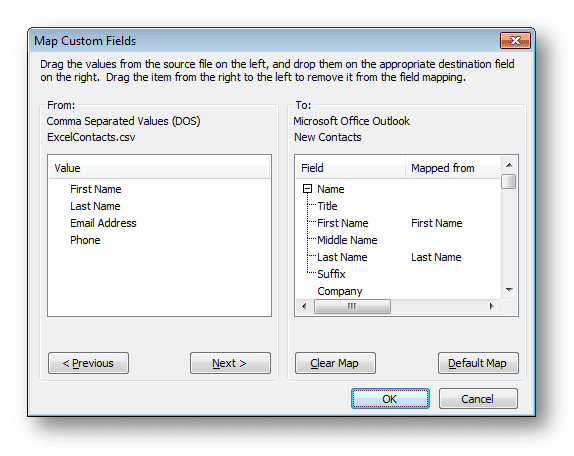
- Click Map Custom Fields
 .
. - The field names in your csv file may differ slightly from the field names in Outlook. This window allows you to match your field names to the Outlook field names. All you need to do is click and drag your field names (from the left box) and drop them on the matching field name in Outlook (in the right box). Note: you may need to click the + to expand field name options. For example the Outlook Name field can be expanded to display the First Name and Last Name fields.

- Once you have completed step 8 click OK and then click Finish and the contact details will be imported into the selected folder.


 .
.
Was this blog helpful? Let us know in the Comments below.
If you enjoyed this post check out the related posts below.